SmartPad LCD
Page:
53
© 2003 Xantech Corporation
Section 7: Appendix
INTERFACING SPLCD with MRC44 & MRC88 (IR Control)
The SmartPad LCD™ allows direct integration with Xantech MRC Products via the CONTROL and
EXPANSION RJ45 Terminals on the rear of the panel (See
Figure 3-13
&
Figure 3-14
). Connecting either of
these terminals to the Keypad Connection on the rear of the MRC44 or MRC88 will allow IR control of the MRC
unit and any components connected to the MRC Controller.
Note:
External 16VDC Power wiring is still required via the Power Terminals. See
Figure 3-19a & 19b
)
PROGRAMMING SPLCD FOR USE WITH MRC44 (ZONE CONTROL)
1. Open a new Project (CTRL+N)
2. Choose the Base Unit (3.9G, 6.4G/V)
3. Select the Style
4. Place 4 Source GTL’s onto the SmartPad LCD Systems Window
5. Open the RC68+ Command Palette (Hit
F5
on the Keyboard)
6. Select the OPTIONS TAB on the RC68+ Command Window
7. Under MODEL select MRC44 and verify the Code Group setting is the same as that of the MRC44
(Default Code Group = 48). Click on the Palette TAB to return to the RC68 Command window.
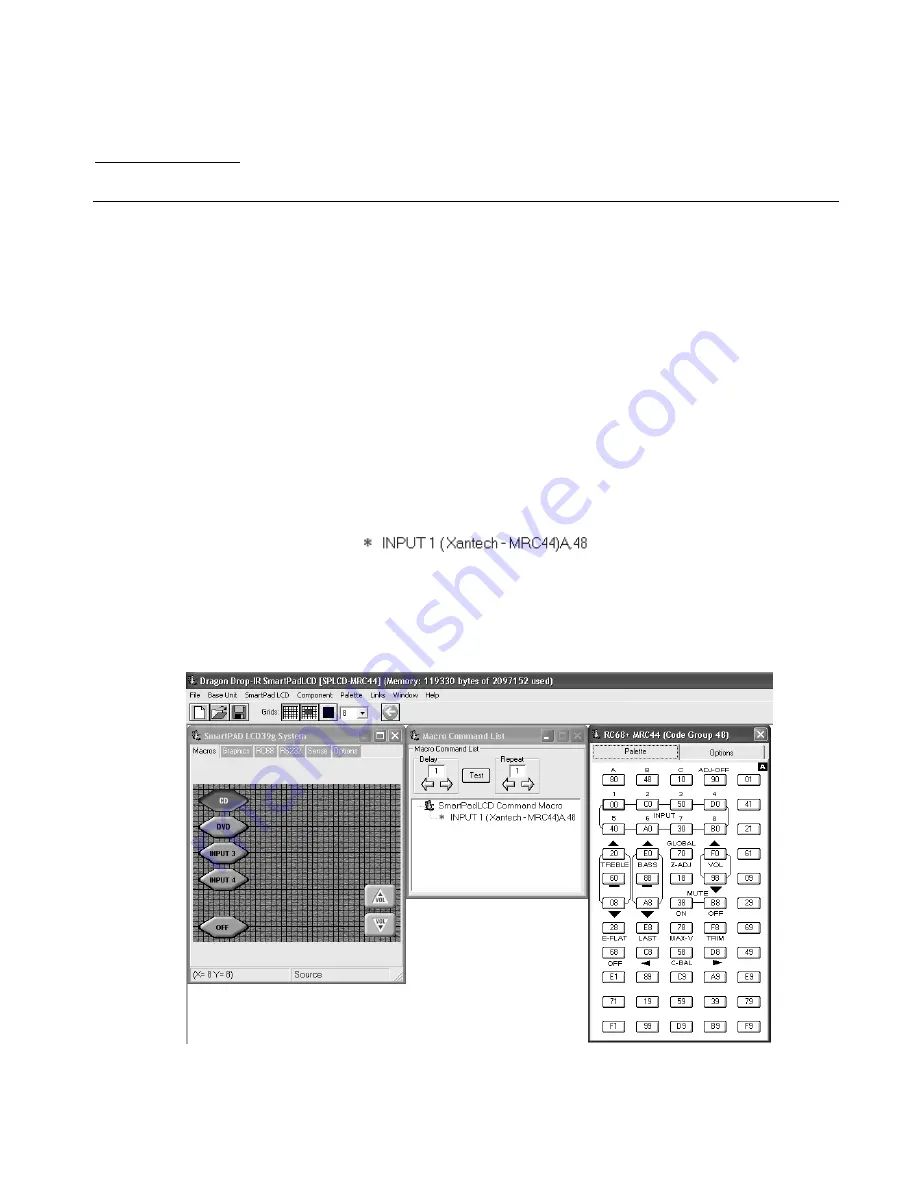
8. Click on a Source Button GTL in the SPLCD Systems Window that will select the component connected
to INPUT 1 on the MRC44 (i.e.
CD
as shown in
Figure 35
.
9. Select INPUT 1 on the RC68+ (00 Button) and verify the proper command description is shown in the
Macro Command List Window
10. Repeat for all Source Input GTL’s
11. Add a Source GTL and Label for OFF (if desired).
a. With the OFF GTL selected, press OFF (button 68) on the RC68+ Command Window and
verify the command as shown in the Macro Command List window.
12. Under each Source Page add Volume Buttons, MUTE or other commands as desired and place the
appropriate RC68+ command under the GTL button.
Figure 35 – Programming SPLCD for MRC44 IR Control


