67
WPS-365-DVR-9CH & 16CH Installation and Users Manual
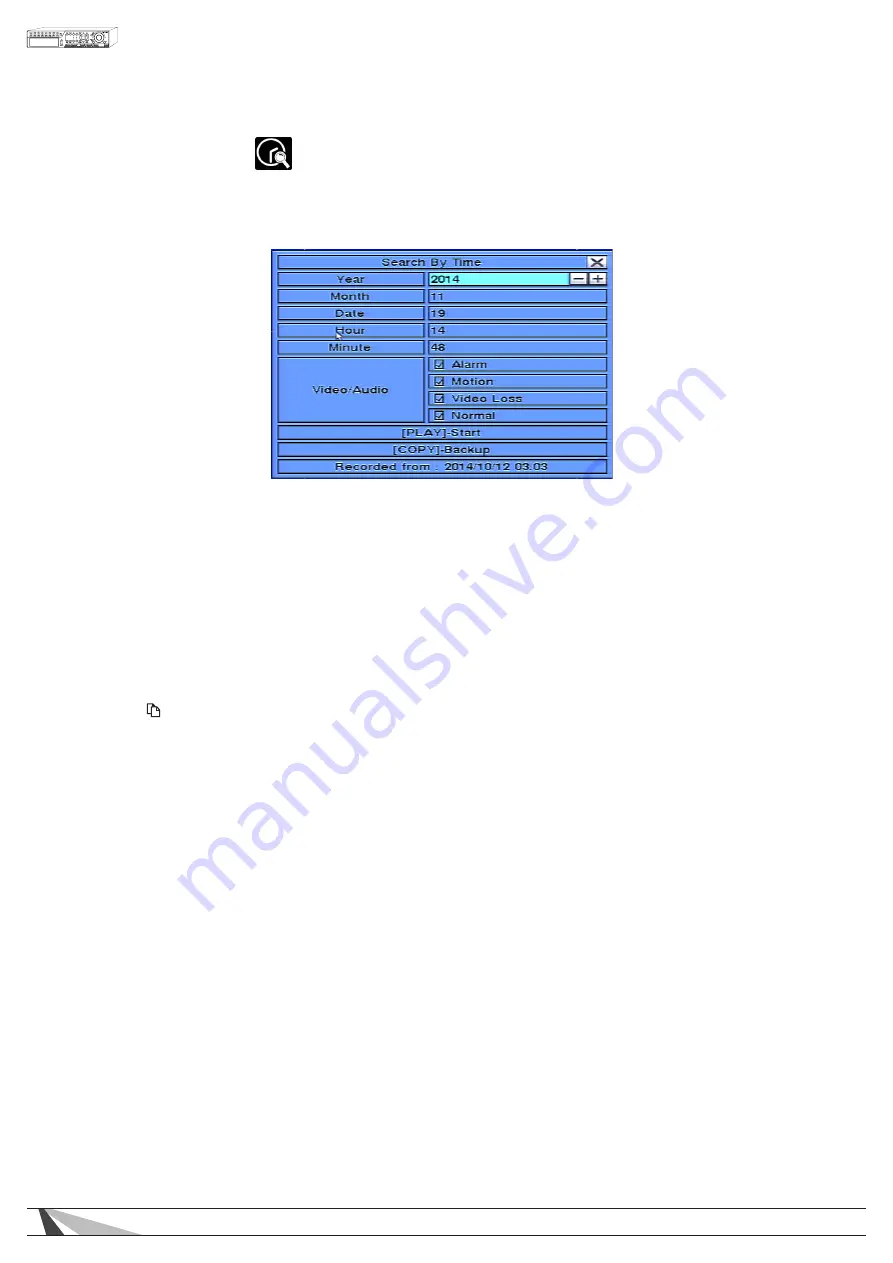
8.1. SEARCH BY TIME
The Search By Time feature allows the user to search for recorded video and audio based on time.
Tip: When the screen is opened the oldest record time is displayed at the bottom labeled as Recorded From
To navigate and operate this menu:
•
▲▼◄►
Press these buttons on the front panel of the DVR or remote control to select an item. Alternatively use the
mouse to select an item.
• Play (
►
/II)
Press the PLAY button on the front panel of the DVR or on the remote control to begin playback of the
recorded video and audio using the defined search time and video type. Alternatively use the mouse to
select the PLAY button. If there is not a camera currently in playback mode then all of the cameras in the
current split window will begin playback. See Section 8.5 for more details.
• Copy ( )
Select the COPY button from the front panel of the DVR or on the remote control to backup (copy) the
selected type of recorded video (beginning from the Search Time) to the connected backup device. The
Backup menu (described in the Archive portion of Section 8.6) will be displayed. Alternatively use the
mouse to select the COPY button.
The following is a brief description for each item in the sub menu and its specific operations:
• SEARCH TIME
Select the Year, Month, Date, Hour, Minute for the recorded video and audio. Playback (or backup) will
begin from the time entered in this menu. Use the +/- buttons on the front panel of the DVR or on the
remote control to modify each item. Alternatively use the mouse to enter the Search Time.
• VIDEO/AUDIO
Select the types of recorded video to search: Alarm, Motion, Video Loss, Normal. Press ENTER or +/- buttons
on the front panel of the DVR or on the remote control to check or uncheck the corresponding video type.
Alternatively use the mouse to check the appropriate video type(s).


