41
WPS-365-DVR-9CH & 16CH Installation and Users Manual
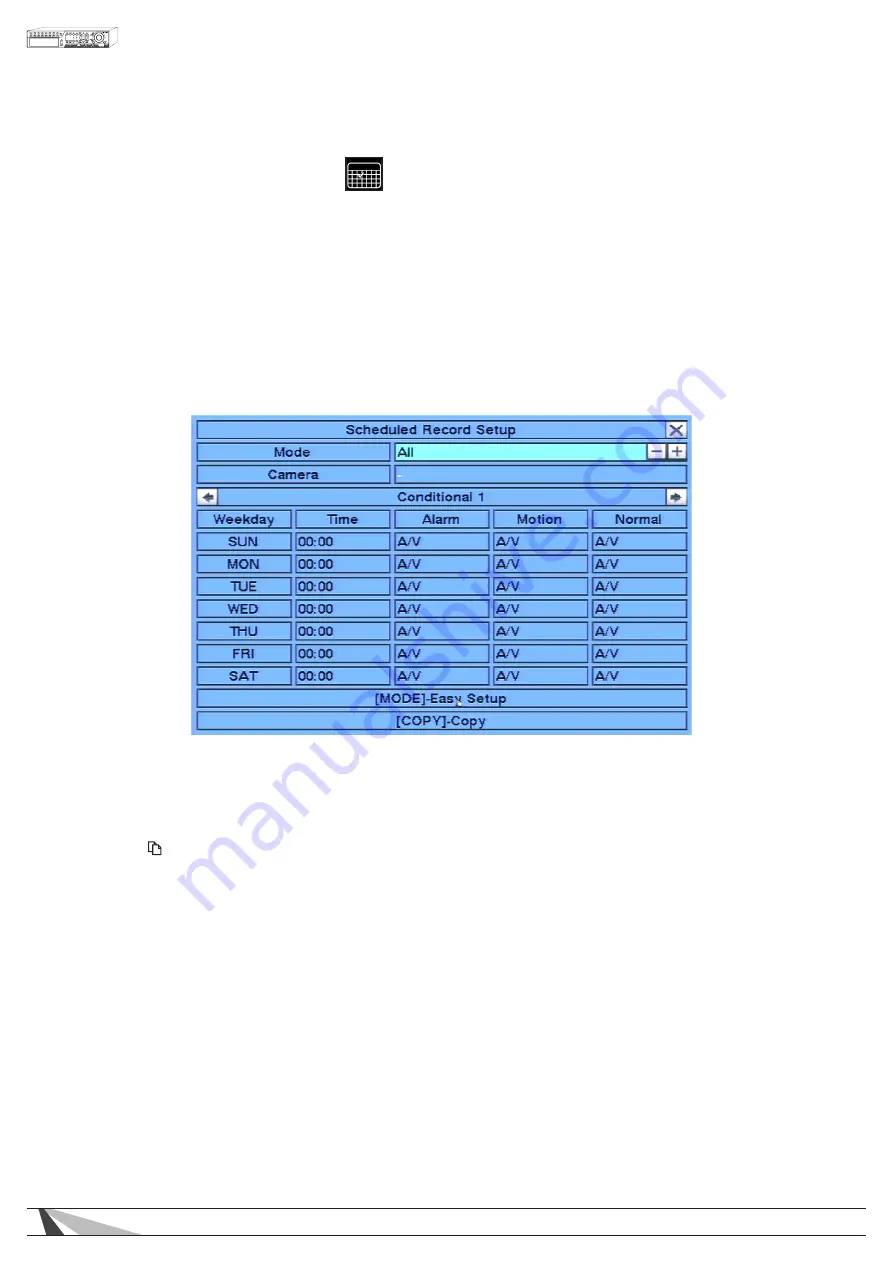
6.5. SCHEDULED RECORD SETUP
The schedule section affects the when and how the DVR records video and audio. However this does not
affect outgoing email notifications or alarm outputs. These will occur 24/7 regardless of schedule
The Scheduled Record Setup allows the administrator to define when and how video and audio will be
recorded. This feature may be useful to increase hard drive storage space by defining what types of events
are recorded on specific days of the week. For example, if Nor mal Recording (recall that the DVR is capable
of always recording “normal” video even without event triggers such as motion or alarm) is not necessary, this
feature can be disabled on a daily basis. To further define when and how the DVR records, up to 16 time
segments (Conditional 1 – Conditional 16) are available for each day of the week.
In the Setup Menu display, press
▲▼◄►
on the front panel of the DVR or on the remote to change the
highlighted option to Scheduled Record, and then press ENTER to display Scheduled Record Setup.
To navigate and operate this menu:
•
▲▼◄►
Press these buttons on the front panel of the DVR or remote control to select an item. Alternatively
use the mouse to select an item.
• COPY ( )
Press the COPY button on the front panel of the DVR or remote control to copy the settings of the focus
day to other days of the week.
• MODE
Press this button on the front panel of the DVR or the remote control to enter Easy Setup for Schedule
Record as described in the following paragraphs. Alternatively use the mouse to select Easy Setup.
• ESC
Press the ESC button on the front panel of the DVR or remote control to escape from this menu and
return to the main menu. Alternatively use the mouse to exit the sub menu by clicking on the “X.” If
the contents in this menu have been modified, a Save dialog box will be displayed requesting the user
to save the changes. Press ENTER on the front panel of the DVR or remote control to exit and save, ESC
to exit without saving. Another method to escape is to use the mouse to “right-click,” and exit the
sub menu.


