16
WPS-365-DVR-9CH & 16CH Installation and Users Manual
4.1. TEXT INPUT
There are certain system settings that the system requires text to be entered, such as system login, camera title
setup, etc. Follow the steps below using the front panel or remote control to enter text when prompted to do so
by a text box:
1. Press ENTER to edit the highlighted option. The flashing cursor will be displayed to indicate the editing point.
2. Press
◄►
to move the cursor to the left/right.
3. Press #/code (found on the remote control) in text editing mode to change text case. If the text entry
accepts numbers only, pressing code will have no effect. Toggle through the options to select:
• 123 = Number only
• abc = All lower case letters
• ABC = All capital letters
• CODE = Used for languages that requires characters
4. Use the front panel of the DVR or the remote control to press a number key (1-9, 0) repeatedly until the
character you want appears (1 for 1 or space, 2 for 2, a/A, b/B, or c/C, etc.).
5. Press
*
/mark (found on the remote control) to display a list of punctuation marks and special characters.
The highlighted character in the list indicates the selected character. Press
▲▼◄►
to change the
selection.
6. If you make a mistake, using the remote control press BS to remove the character to the left of the cursor, or
press DEL to delete the character at the current cursor position.
7. Press ENTER to exit the highlighted option and save changes, press ESC to exit without making changes.
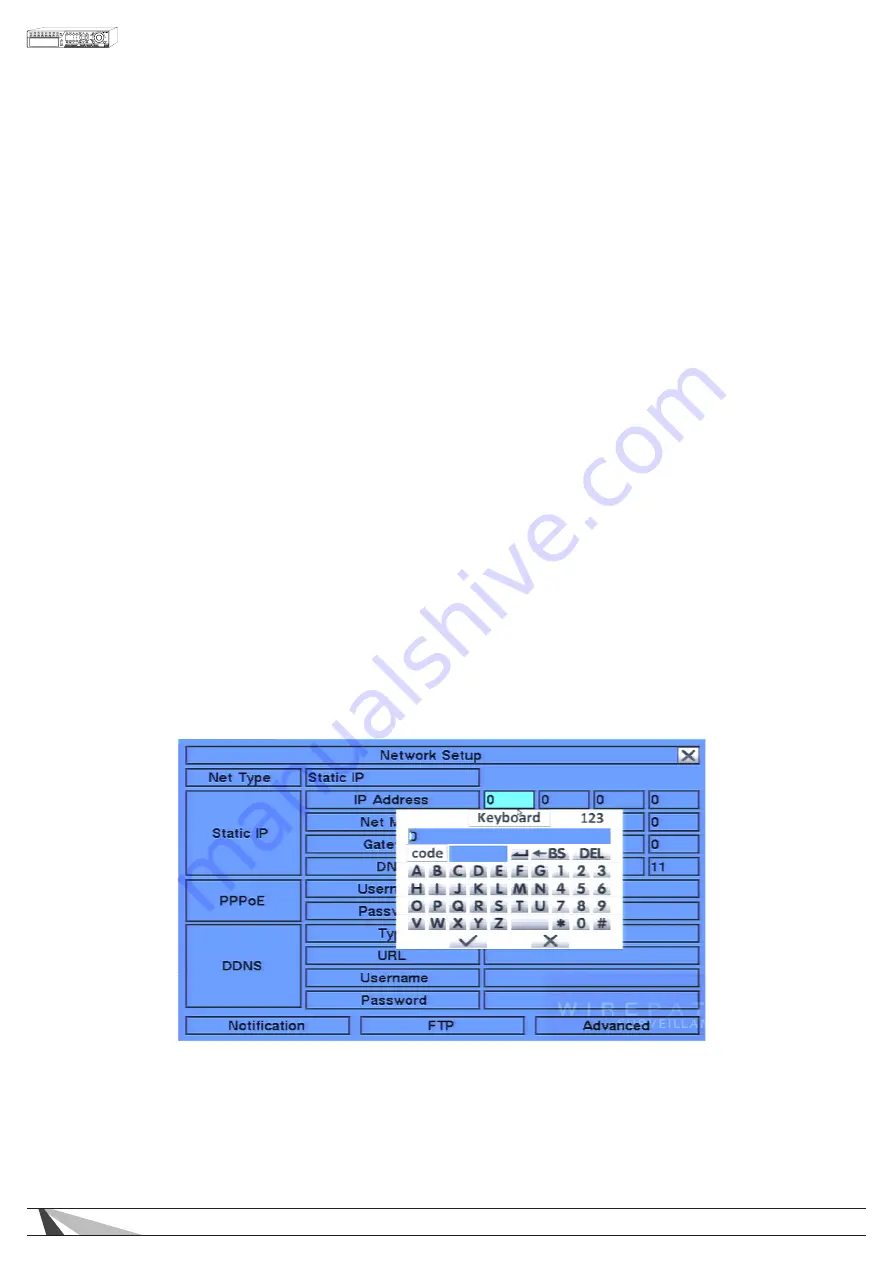
Alternatively the supplied mouse can be used to enter text. When using the mouse to enter text, click on a
highlighted option window with the left mouse button. A Keyboard Simulator will be shown.
Click on “#” (or “abc”) to change text case. Click on the alpha-numeric characters to enter letters and
numbers. Click on “
*
” for special characters. Click on the check mark to accept the changes or click on the
X to exit without changes.


