


User Guide
3. Management
3.2 Part Replacement
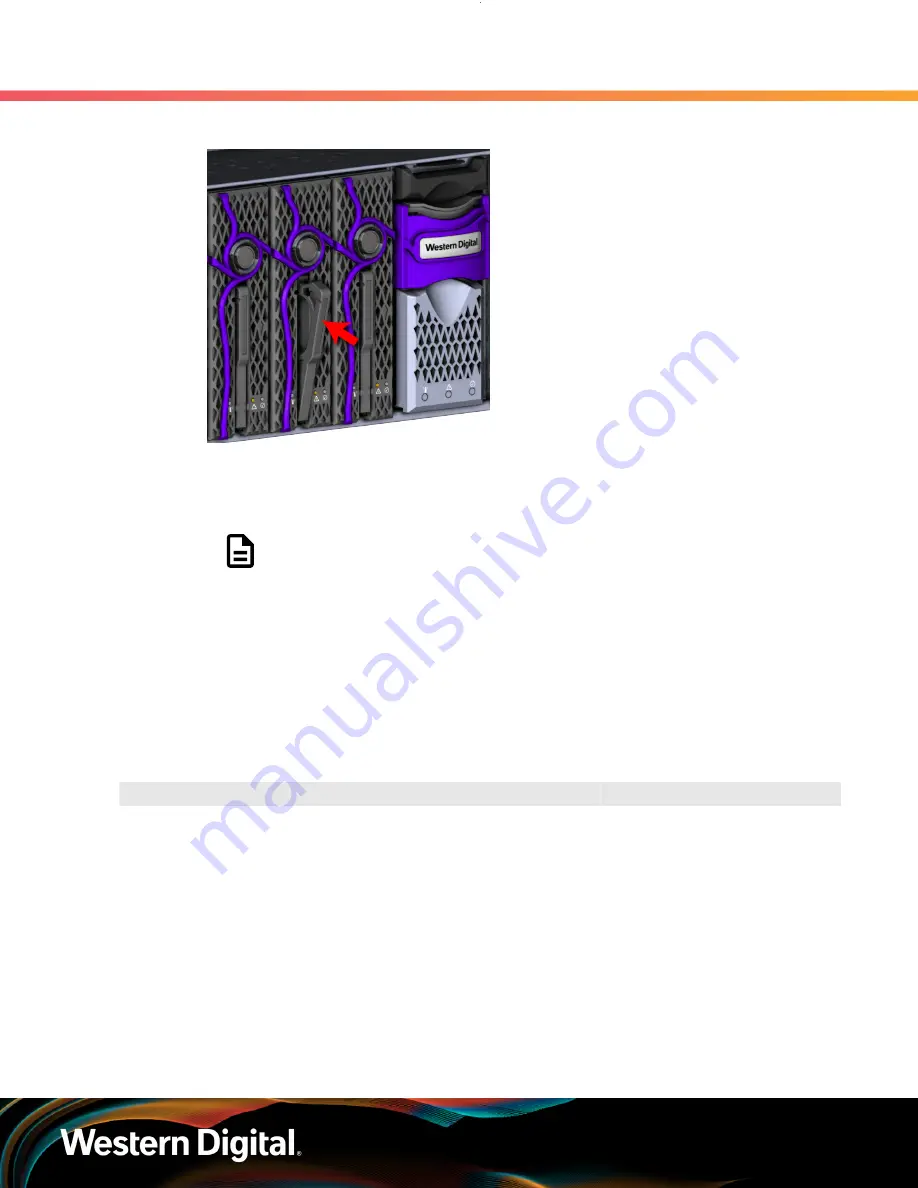
Figure 219:
Secure OpenFlex F3x00
d.
Verify that the F3x00 is securely latched into the chassis by pulling on the latch and
ensuring the device does not move when pulled. Reinstall the device if it is not securely
installed into the chassis.
Note:
The blue and amber LEDs will illuminate, followed shortly by the green
LED. All three LEDs will remain illuminated for just over a minute until the
device is initialized. Once the device is initialized, the amber and blue LEDs
will turn off, and the Device Status LED that encircles the device release
button will illuminate, indicating that the SPDK services are running. Wait time
is
not
required between the installation of multiple OpenFlex F3x00 devices.
3.2.5
Rails Replacement
Table 36:
Replacement Procedure Info
Required Tools
# of People Required
Time Required
T15 Torx screwdriver
#2 Phillips screwdriver
2
65 minutes
Step 1 :
Unpack and inspect the new Rack Mount Rails for damage.
a.
Inspect the packaging that the Rack Mount Rails replacement was shipped in and record
any damage to the box. Large cuts, open boxes, and crushed corners should be reported.
b.
Remove the Rack Mount Rails from the packaging and verify that there is no damage to the
Rack Mount Rails. Dents, scratches, and broken parts should be reported. If major damage
has occurred to the Rack Mount Rails, DO NOT use the replacement part.
c.
Store in a safe location until the Rack Mount Rails is needed for installation.
Step 2 :
Disconnect the power and data cables from the enclosure.
127


