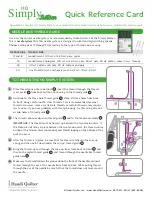
Sewing a test seam using straight stitch as an example
Sewing a test seam
10
Sewing a test seam
This section contains information on test seams:
•
Sewing a test seam using straight stitch as an example (Section 10.1)
•
Backtacking options (Section 10.2)
◦
Sewing in reverse (Section 10.2.1)
◦
Automatic tie-off, Automatic tie-off and cut (Section 10.2.2)
10.1 Sewing a test seam using straight stitch as an
example
Starting to sew
•
Straight stitch (centre) is selected when the machine is switched on.
81
Please note: Every time before threading
•
Set the presser foot lever to the upper position.
•
Press the Needle Up / Needle Down button (the thread take-up lever and
needle threader automatically move into the correct position).
•
Thread the upper thread taut in all positions.
•
Thread the lower thread taut and slowly into the silver metal slot in the
7 o’clock and 9 o’clock positions on the black hook race until it clicks into
place.
•
In the event of any lack of clarity: watch the Optimal Threading video that is
just 4 minutes long on the W6 website under Service / Help / W6 N 5000
Exklusive.
•
95% of all errors occur during threading. Failure to do this will always lead to
a sloppy seam, blockages or damage to the sewing machine, which are not
covered by the warranty.
Summary of Contents for N 5000 Exklusive
Page 1: ...W6 N 5000 Exklusive sewing machine Manual 1...
Page 28: ...Knee lifter Accessories Dust cover Cover the machine with the dust cover when not in use 28...
Page 32: ...32...
Page 33: ...33...
Page 34: ...34...
Page 35: ...35...
Page 36: ...36...
Page 37: ...37...
Page 38: ...38...
Page 39: ...39...
Page 42: ...42...
Page 48: ...48...
Page 55: ...55...
Page 56: ...56...
Page 57: ...57...
Page 58: ...58...
Page 62: ...62...
Page 63: ...63...


