66251750-EN - V1.0 - 05/06/17
41
4000 Series Vandal Resistant Digital GSM - Technical Manual
4000 Series Vandal Resistant Digital GSM Audio Intercom with Proximity
3.7 PROXIMITY READER ENABLE/DISABLE (PROX ENABLE)
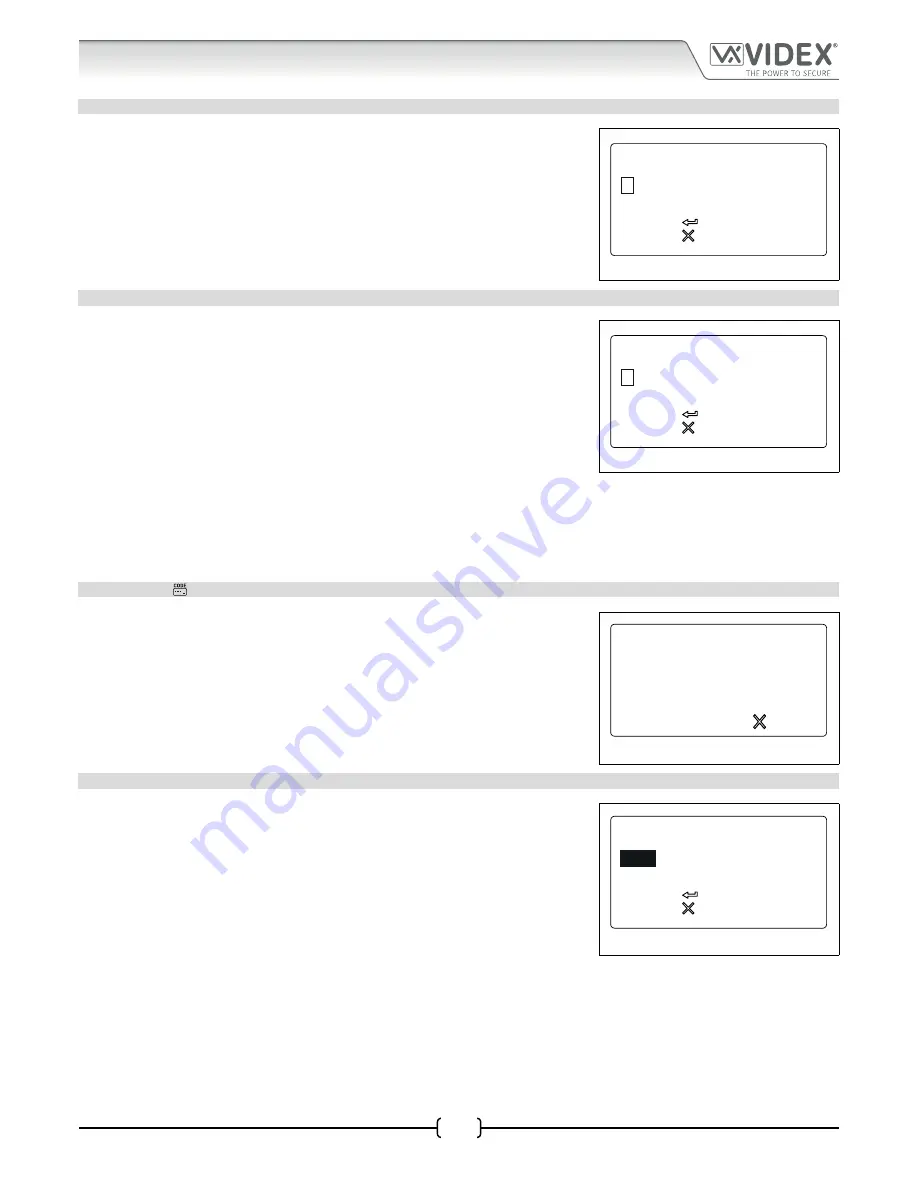
Selecting option 7 from the general settings menu will access the proximity reader
enable screen (refer to
Fig.85
). On this screen the proximity reader on the GSM panel
can be switched ON and OFF. The current setting will be indicated on the second line of
the screen with or without a tick in the check box (see
Fig.85
). By default the onboard
reader will be switched OFF. Enter a “0” (reader switched OFF) to disable the reader or
a “1” (reader switched ON) to enable the reader. To confirm and save the setting press
the ENTER button and the screen will revert back to the general settings menu (refer
to
Fig.78
).
Fig. 85
3.8 GATE MODE (GATE)
Selecting option 8 from the general settings menu will access the gate mode screen
(refer to
Fig.86
). On this screen the gate mode of the panel can be set. The current
setting will be indicated on the second line of the screen with or without a tick in the
check box (see
Fig.86
). By default the gate mode is set with the check box ticked. To
set the gate mode enter one of the following:
0 -
When set in this mode and the panel’s onboard relay is activated the display
will show that the door is open (refer to
Fig.107
on page 61). The speech
annunciation (if the speechboard is switched ON) will announce “the door is
open”.
1 -
;
When set in this mode and the panel’s onboard relay is activated the display
will show that the gate is open (refer to
Fig.108
on page 61). The speech
annunciation (if the speechboard is switched ON) will announce “the gate is
open”.
Fig. 86
To confirm and save the setting press the ENTER button and the screen will revert back to the general settings menu (refer to
Fig.78
).
4 CODE MENU
From the code menu (refer to
Fig.87
) it is possible to edit the following access codes:
1. Master code (by default is set to “1111”)
2. Admin code (by default is set to “0000”)
3. Trade code (by default is set to “2222”)
Press the relevant button (1, 2 or 3) to change the required access code.
Fig. 87
4.1 MASTER CODE
Selecting option 1 from the code menu will access the master code screen (refer to
Fig.88
). On this screen the master code of the GSM panel can be changed. The current
setting will be highlighted on the second line of the screen (see
Fig.88
). By default the
master code is set to “1111” and can be changed to any 4 digit number, but must be
kept as a 4 digit number. Enter the new code required then to confirm and save the
setting press the ENTER button and the screen will revert back to the general settings
menu (refer to
Fig.78
).
Fig. 88
to confirm
to cancel
PROX ENABLE:
(0-1)
GATE:
(0-1)
3
to confirm
to cancel
to exit
1. MASTER CODE
2. ADMIN CODE
3. TRADE CODE
to confirm
to cancel
MASTER CODE
(4 DIGITS)
1111
Programming Screens


