3
the VATH accessory, please talk to one of the GLAs for the instrument first.
For the
normal or large sample setup
there are three positions for the large standard
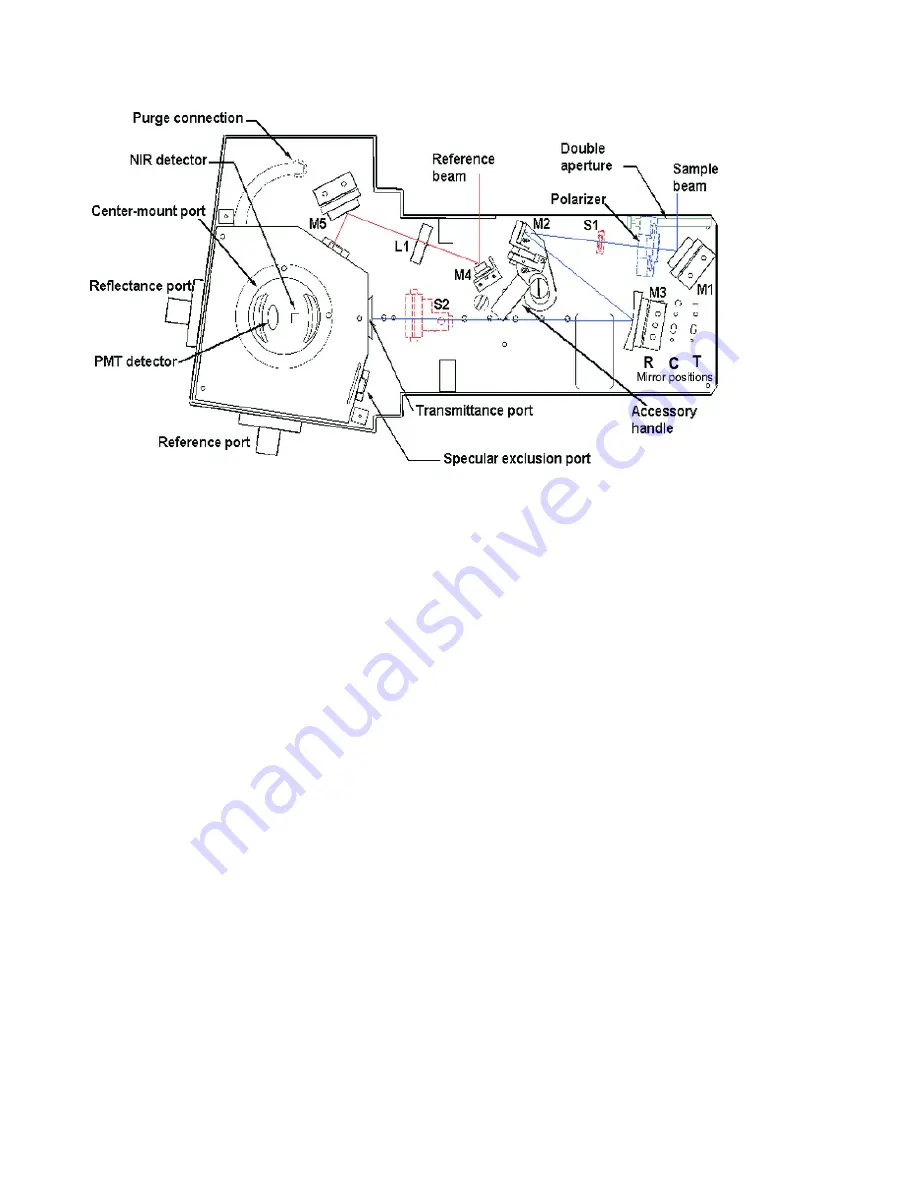
M3 mirror (see Figure 3 andFigure 4)that correspond to the three sample positions
(Transmission, Center, and Reflection). Each of the mirror positions will focus the light
onto the position of the sample. The three different mirror positions are marked T
(transmittance slot), C (center mount), and R (rear reflectance slot) in Figure 3. Thus,
the mirror needs to be moved to the right position depending on the placement of your
sample. The cable for the DRA can get in the way of moving this mirror.
Turn off the
Cary first, if you need to unplug the DRA to move the mirror.
For the small sample setup (see small sample discussion below) the M3 mirror is
replaced by the small sample kit mirror (M3 SSK) in the T position. Lens (L2) mounts in
front of the sample (see Figure 4). There are three lenses that can be used again for the
three positons marked as T, C or R.
Each time the sample configuration is changed, the optics need to be realigned, such
that the sample and reference beams are not clipped at the entrance to the integrating
sphere and that the sample beam is centered on the sample.
1.
With the top door to the DRA closed, under the
commands
menu click on
Go to
,
and then type in 550 nm. When you darken the room lights, you should see a
green beam, which you can use to align the beam onto the sample (Alternatively,
if you have trouble seeing the beam: Block the sample and reference beams from
entering the integrating sphere. Under the
commands
menu go to
align
to
switch the gratings to zero order to send white light into the DRA. The white
light should not enter the integrating sphere)
2.
Most of the mirrors have two knobs, which you can rotate to adjust the vertical
and horizontal positions of the beam. Start with mirror M2 and adjust so the
Figure 3 Diffuse Reflectance Accessory with beam path.


