background image

Valloy Incorporation.


Any-002 


User Manual 


any-002 


©  2015 Valloy Inc. All rights reserved. 


Rev 1.0 

– 2015.10 

15 of 68 


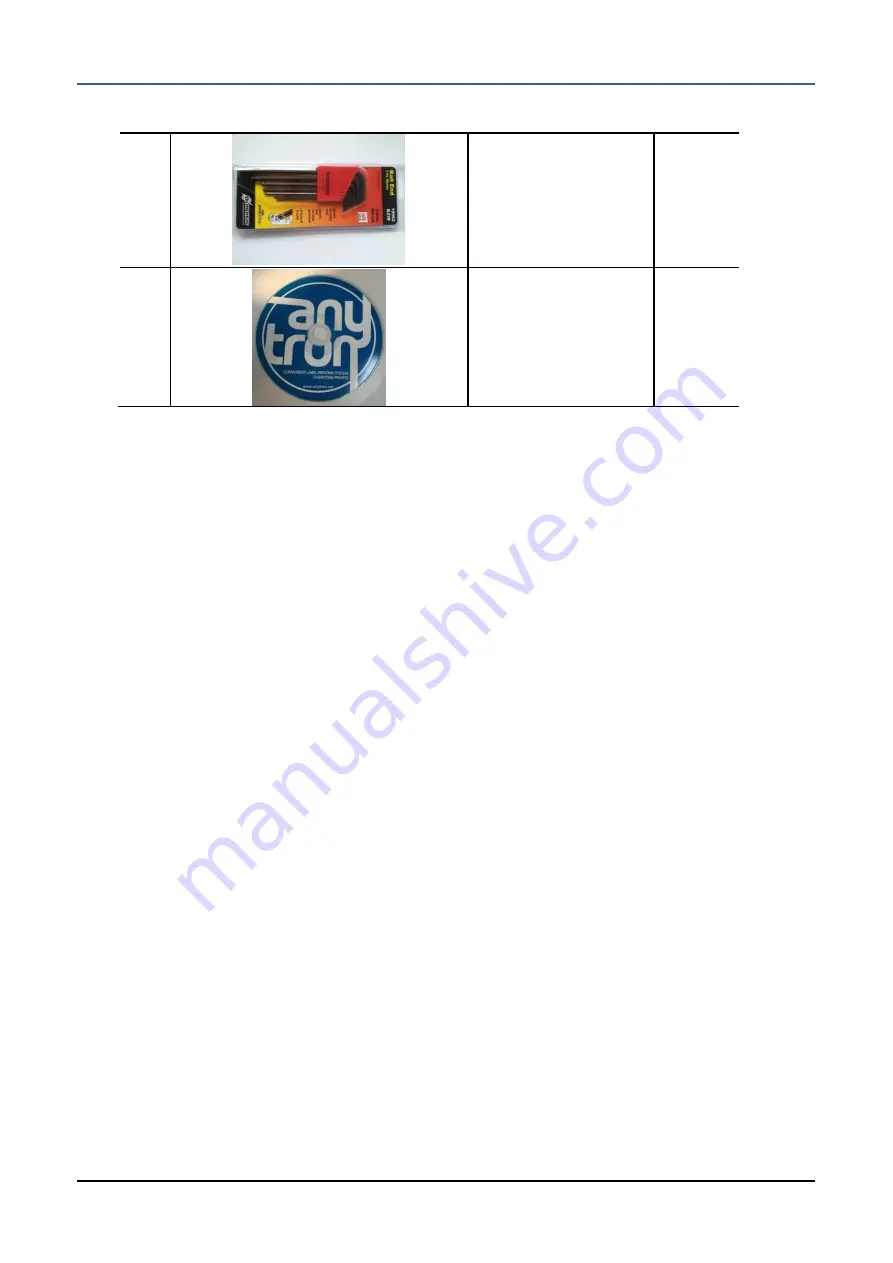
Wrench set   


Driver installation CD 


5. Requirement for installation 

        5-1 Environment for installation and caution 

            5-1.1 When installing 

- Install it in safe place where there is no risk of falling. 
- Do not install in the place of high temperature or humidity. There may be risk of not operating 

normally or electric shock. 

- Do not use loose socket or damaged power code. It may cause electric shock or fire. 
- Connect power code to socket or multi outlet having grounding terminal. 

5-1.2 When using 

- Check and repair should be carried out only by specialist. 
- Do not dismantle discretionally and give shock. 
- Do not use around things to which magnet is attached or keep together with them. 
- Use it in the places without electromagnetic interference. 
- Dot not place things on the product that is heavy or has risk of spilling over. 
- Do not use chemicals or cleanser to clean product. 
- Use program provided or acknowledged only by Valloy Anytron Support team. 
 

5-2 Power requirement 

- AC 100~ 120V/220~ 240V, 50/60Hz (Possible to select) 
 

5-3 PC requirement 

- Window7 (32& 64bit), Window8 (32& 64bit), Window8.1 (32& 64bit)   
- CPU: above i3, HDD: above 100GB, RAM: above 4GB 

Summary of Contents for Anytron Any-002

Page 1: ...ANYTRON Any 002 User manual Rev 1 0 2015 12 11 PUBLIC...

Page 2: ...7 1 3 Legal force of this document 7 2 Product Specifications 8 2 1 Press Station 8 2 1 1 Specifiations 8 2 2 Digital Press 8 2 2 1 Specifications 8 3 Composition of equipment 10 3 1 Name of equipmen...

Page 3: ...case of connecting by Ethernet 19 6 2 2 RIP program installaiton 22 6 3 Inquiry and Download 22 7 Installation check 23 7 1 Power check 23 7 2 Interface check 23 7 3 Printing test pattern 23 II How t...

Page 4: ...ment of layout size 28 3 2 How to use printer driver 32 3 2 1 Setting roll paper driver 32 3 3 Roll paper printing 33 3 3 1 Overview 33 3 3 2 Print setting by paper 33 3 3 3 Printing rule depending on...

Page 5: ...9 3 5 3 How to use 40 3 5 3 1 Paper saving function 41 3 5 3 1 1 Continuous paper 41 3 5 3 1 2 2 Pre cut paper 42 3 5 3 2 Counter function 42 III Any 002 System maintenance 43 1 Maintenance 43 1 1 Ove...

Page 6: ...AD 51 1 3 2 Cutter cleaning 51 1 4 Consumables purchase 52 1 5 Inquiry and download 52 2 Problem diagnosis and solution 53 2 1 Error type according to error message and explanation 53 2 1 1 Occurrence...

Page 7: ...the patient outside so as to breath in fresh air and consult doctor 3 If powder entered eyes wash eyes with running water for more than 15 minutes while opening eyes and consult doctor 4 If powder is...

Page 8: ...er 3M 0 2 mm Continuous paper Adjustable Beginning 3M 0 7 mm After 3M 0 4 mm Dimension HxWxD 1150x580x505mm Weight 85kg Power AC 100 240 50 60Hz 2 5A 2 2 Digital Press 2 2 1 Specifications Digital Pre...

Page 9: ...0 2 mm Continuous paper Adjustable Beginning 3M 0 7 mm After 3M 0 4 mm Standard memory configuration 256MB HDD 160GB Aftermarket supplies RFID lock out for toner Yes Image drum with unique lockouts Y...

Page 10: ...tion 3 1 1 Press Station Image Name Explanation Unwinder Part to mount roll paper Unwinder releases paper to feed the printer and allows the paper to keep constant tension Media guide Guide for paper...

Page 11: ...printing Sensor The sensor for sensing the Gap Black mark and Backside black mark Feed roller Fixed Lever It is locking system to fix feed roller If installing paper and moving relevant lever to LOCK...

Page 12: ...nu based control and LCD panel Multi purpose tray Tray for using continuous media Front cover release lever The front cover is opened by pulling the lever On Off switch Printer power switch AC power s...

Page 13: ...Incorporation Any 002 User Manual any 002 2015 Valloy Inc All rights reserved Rev 1 0 2015 10 13 of 68 3 2 Consumable Parts No Photograph Item Q ty EA 1 Toner 4 2 Image Drum 4 3 Fuser unit 1 4 Belt u...

Page 14: ...nc All rights reserved Rev 1 0 2015 10 14 of 68 4 Component List No Photograph Item Q ty 1 Any 002 Printer Station Digital printer start consumable set 1 2 Power cable 1 3 Serial to USB cable 1 4 USB...

Page 15: ...nnect power code to socket or multi outlet having grounding terminal 5 1 2 When using Check and repair should be carried out only by specialist Do not dismantle discretionally and give shock Do not us...

Page 16: ...the picture Print using USB cable In case that condition of network is unstable or capacity of file to be printed is very big printer can process file at a faster speed than Ethernet Print using Ether...

Page 17: ...erved Rev 1 0 2015 10 17 of 68 6 2 Software installation 6 2 1 Printer driver installation 6 2 1 1 In case of connection by USB 1 Connect USB cable to printer and PC respectively 2 After executing Dev...

Page 18: ...8 of 68 4 Click Brows my computer for driver software 5 Seek for anytron_driver by clicking Browse If checks Include subfolders and presses Next all installations would be completed If there is any pr...

Page 19: ...f 68 6 2 1 2 In case of connecting by Ethernet 1 Connect LAN cable to printer as shown in the picture Direct cable is for connecting printer with sharer or hub and Cross cable is for connecting printe...

Page 20: ...al any 002 2015 Valloy Inc All rights reserved Rev 1 0 2015 10 20 of 68 4 Click the Add a local printer 5 After selecting Standard TCP IP Port of Create a new port click Next 6 Input IP address of pri...

Page 21: ...ts reserved Rev 1 0 2015 10 21 of 68 8 Insert Anytron CD into computer and click Browse You can download at website 9 Click Computer among location to be sought and select anytron_driver at Anytron me...

Page 22: ...not share this printer and click Next 14 Select Set to default printer and click Confirming test page to check connection A4 paper should be fed in Tray 1 15 After checking test page printing press Cl...

Page 23: ...ed below website If you have any inquiry please send E mail to below address Valloy Inc ANYTRON Support team Country Republic of Korea E mail support valloy net Tel 82 2 6082 5022 Web site www anytron...

Page 24: ...ter displays Ready to print Click Top or Bottom button on operating panel of printer Select Printer information on LCD window of printer and click Enter key Select Demo page on LCD window of printer a...

Page 25: ...which cannot be supported PE media of which surface contains metal series Golden paper silver paper etc This information is limited only to the papers that are verified by Valloy Inc 2 Operation of h...

Page 26: ...y moving media guide fixing unit to LOCK 5 Fix feed roller by moving feeder fixing unit to LOCK 6 Install media through the route as shown in picture 7 Media installation is completed 2 1 2 How to use...

Page 27: ...gap of pre cut or black mark SET switch It supports 3 movements Pressing for one second It changes sensing mode It also saves teaching value while using automatic sensing mode Pressing for 3 seconds...

Page 28: ...s the SET button 1 second to select the sensing mode among GAP Front Black mark and Back Black mark that user wants to Select the GAP sensing mode which is first one of left LED If there was existing...

Page 29: ...to Move the sensor and place the sensor guide line on the black mark 2 Press the SET button 1 second to select the sensing mode among GAP Front Black mark and Back Black mark that user wants to Set th...

Page 30: ...e the media to up and down if the sensor is on the black mark the right LED will be on Also you have to check if the sensor is on the label the LED is off or not 2 1 3 How to use cutter There is a but...

Page 31: ...ollowing the media guide properly After installing the media place the guide lever on Lock Do not press the cutting button over double clicks after installing the media because it is not easy to remov...

Page 32: ...Inc All rights reserved Rev 1 0 2015 10 32 of 68 3 Software operation 3 1 How to use basic Illustrator for ANY 002 3 1 1 Measurement of layout size artboard icon Check the layout size Shortcut key Ct...

Page 33: ...at WEB61 driver of Device and Printer and then click Printing preferences 2 You have to set size as Super long paper at Print basic setting Change method of paper feeding by clicking OK at message bo...

Page 34: ...cutting point after working is completed There is no difference whether you select Enable Cut mode or not 5 Select No Adjustment mode when using common continuous paper Driver setting for common roll...

Page 35: ...e that length of image is 100mm it is printed in multiple of 5 according to above mentioned printing rule Therefore even though you input 9 as number of printing 5 5x1 images are printed which is mult...

Page 36: ...rom software Therefore error of pre cut which may occur in equipment is designated as approx 1mm in total 3 4 2 2 Caution There exist several risk factors as below when using pre cut label During prin...

Page 37: ...ithout fail when using pre cut roll media 3 4 5 Error correction In ANY 002 two methods are used to correct error that may occur from software i e Full Bleed method and 1M Measurement method Error tha...

Page 38: ...hould be decreased by 1mm each i e width and length of each gap becomes 4mm Also vertical gap of label footer margin shall be 4mm which is size decreased by 1mm because length of image is also increas...

Page 39: ...btained in this method as footer margin of driver 3 5 How to use Anycomm 3 5 1 Overview When printing with WEB61 equipment about 800mm of blank space remains after completion of printing Therefore the...

Page 40: ...or website download www anytron net In general driver is installed automatically in the system However if it is not installed you have to do it manually To check whether it is recognized normally ent...

Page 41: ...xecuted window appears as shown below Select COM port confirmed at Device Manager and click Open To check whether it is executed normally input ver in Command column and click enter then you can confi...

Page 42: ...g in Print Count column Input image length layout length in Label length column Input gap between labels gap between images in Label gap column When input of information about label to be printed is c...

Page 43: ...screen Input amount of printing in Print Count column and click Set button below When clicking Set button message saying SET complete is displayed at bottom of screen 3 5 3 2 Counter function You can...

Page 44: ...done at replacement time because its lifespan is limited 1 2 Checking consumables replacement cycle and replacement 1 2 1 Checking consumables replacement cycle 1 If printer is connected through netw...

Page 45: ...ning off power of printer 1 2 2 1 Replacement of toner cartridge If message saying Short of toner is displayed on LCD window or color fades while printing open upper cover first and tap cartridge slig...

Page 46: ...open top cover of printer completely 2 Check the position of 4 toner cartridges a and image drum b respectively When installing it you have to install it again in same order 3 Holding it by its top ce...

Page 47: ...e image drum unit 6 Lift the right hand end of the toner cartridge 1 and then draw the cartridge to the right to release the left hand end as shown 2 and withdraw the toner cartridge out of the image...

Page 48: ...age drum unit and release toner into it 10 Holding the complete assembly by its top centre lower it into place in the printer locating the peg sat each end into their slots in the sides of the printer...

Page 49: ...image drum units out of the printer and place them in a safe place away from direct sources of heat and light CAUTION The green image drum surface at the base of each cartridge is very delicate and li...

Page 50: ...the drive gear towards the rear of the printer Locate the drive gear into the gear inside the printer by the rear left corner of the unit and lower the belt unit flat inside the printer 8 Turn the tw...

Page 51: ...h you should keep it after installing lock unit orange color If you don t install lock unit and keep it more than a month the fuser roller can be modified 1 Press the cover release and open the printe...

Page 52: ...tal partition which separates the fuser area from the image drums 8 Push the two retaining levers b towards the rear of the printer to lock the fuser in place 9 Finally close the top cover and press d...

Page 53: ...both sides so that the cover latches closed 1 3 2 Cutter cleaning A glue can stick to the cutter when you cut many labels and the label cannot be cut because of glue You can open the cover and using a...

Page 54: ...if separating feeder structure Under this condition eliminate adhesive substance attached to blade using remover of adhesive and assemble it again Cutter is very sharp so wear glove certainly during w...

Page 55: ...ion 2 1 1 Occurrence of paper jam Phenomenon Paper jam message displayed on LCD window Cause Paper is hanged within printer Paper touches paper inlet of printer too closely or end of paper touches pap...

Page 56: ...rn the power OFF ON Replace the CU board Replace the EEPROM POWER OFF ON 002 Error 011 Error Abnormal condition of the CPU Is it displayed only on particular file Is the error display reproduced Yes N...

Page 57: ...lace the CU board POWER OFF ON 048 Error xx PS PCL ROM is installed on a Non PS model Is the ROM installed a prescribed one Yes No Replace the program ROM Replace the ROM with one specified SERVICE CA...

Page 58: ...error during image data preparation Is the CU correctly installed No Yes Correctly reinstall the CU Replace the CU board SERVICE CALL 081 Error Parameter Consistency Examination Error Reading from an...

Page 59: ...a day Yes Reapply the power after leaving the unit alone Replace the control panel SERVICE CALL 127 Error Fuser Exhaust Fan Error Is the connection of the Fan Connector normal Does the error occur ag...

Page 60: ...61 M 162 C 163 K It does not occur under factory default condition Is the Toner Cartridge installed Is the fixing lever of the Toner fixed Does the error occur again No No Yes Turn the Fixing Lever of...

Page 61: ...Table Download Failure Download of the user media table type failed Retry download after turning on the power again This error does not occur if the procedure is not completed in general POWER OFF ON...

Page 62: ...ted while deleting the disk Does the error occur again Yes Turn on the power again Replace the HDD SERVICE CALL 256 Error 257 Error SD Card Error SDRAM ERROR CU Board SP2 DCON Access Error Does the er...

Page 63: ...e unit Check Paper Paper thickness error TRAY Please see HELP for details The detected value of the media is out of the specification 325 Error Aren t media of different types mixed Aren t two sheets...

Page 64: ...plex printing device Check Duplex Please see HELP for details Paper is caught while being fed to the duplex printing device 372 Error Check the paper caught in the paper feeding part of the duplex pri...

Page 65: ...r Insert paper MP Tray MEDIA SIZE Please see HELP for details There is no paper in the MP Tray the unit is out of the range or the printer is out of paper 490 Error Check that there is not enough pape...

Page 66: ...e error occur again Yes Yes Check whether the Fuser is correctly installed Replace the Fuser Replace the Fuser Motor POWER OFF ON 919 Error The 24 V power of the Duplex Printing Device is abnormal 24...

Page 67: ...ychip is missing or Keychip error Turn the power OFF ON Replace the Keychip Software no authorized 002 Uncertified HDD Reproduction The ASP PCB HDD is not a genuine product Turn the power OFF ON Repla...

Page 68: ...he product is failed while using However if the product is failed by customer s mistake or natural disasters we inform that it will be serviced at a cost even within the free service period 3 2 A S an...

Reviews: