29
PRINTHEAD REPLACEMENT
Remove Printhead
CAUTION
Static can damage the printhead. Before
working on the printhead, be sure to
ground yourself first by touching a metal
door jamb, or any grounded equipment.
Avoid rubbing your feet on the carpet.
1.
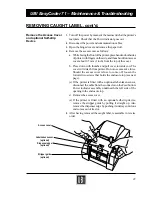
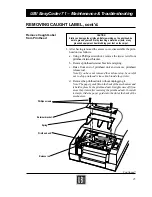
After having removed the access cover as described in the
chapter “Removing Caught Label”, disassemble the printhead
unit as follows:
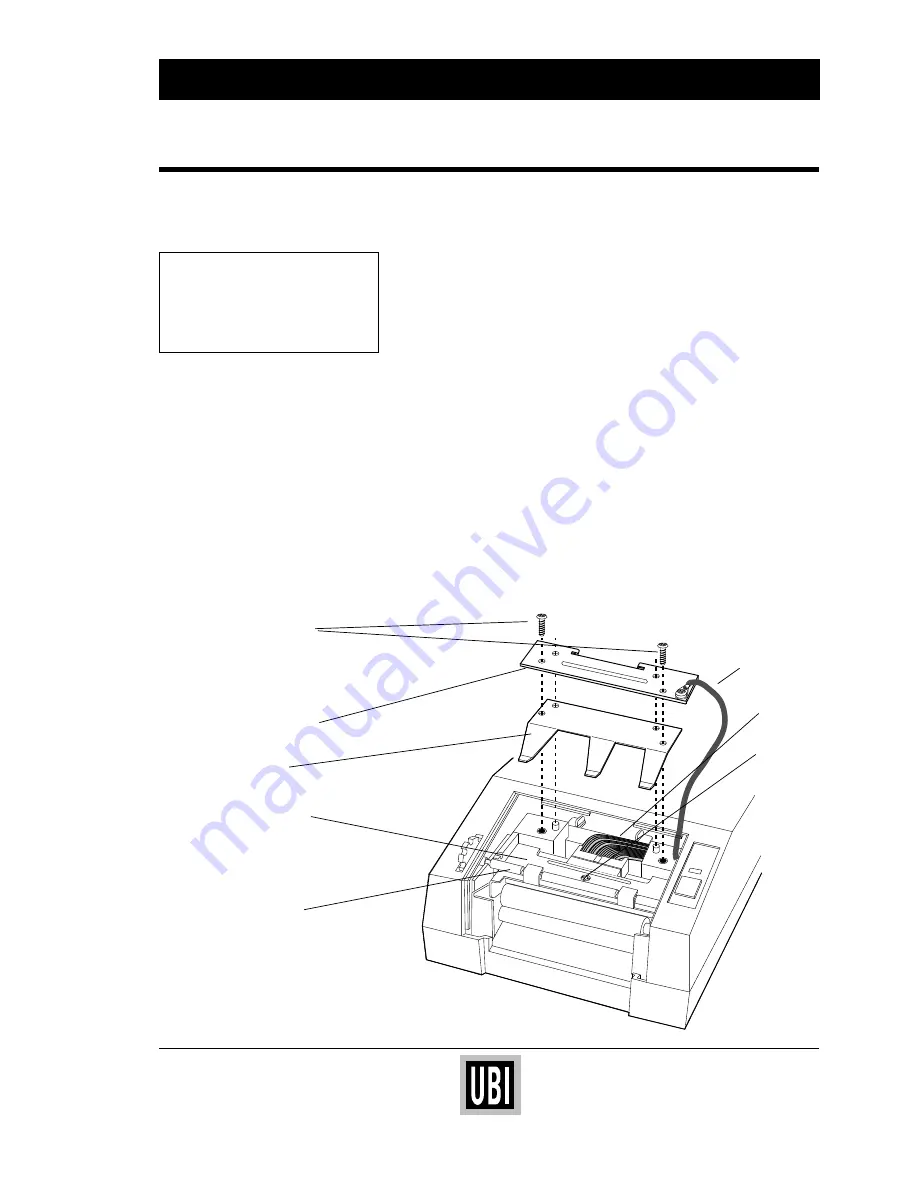
a. Using a Phillips screwdriver, remove the two screws from
printhead retainer bracket.
b. Remove printhead retainer bracket and spring.
c. Raise front end of printhead unit and remove printhead
release rod.
Note: If you have not removed the top enclosure, be careful
not to drop printhead release knob inside the printer.
d. Remove the printhead unit without disconnecting the ground
cable.
Note: The paper guide fits on the back of the mechanism and
is held in place by the printhead unit. It might come off if you
move the printer after removing the printhead unit. To install
it, simply slide the paper guide into the slot at the back of the
mechanism.
2.
Disconnect the printhead cable.
3.
Using a Phillips screwdriver, remove the screw that holds the
printhead unit together (see next page).
Phillips screws
Retainer bracket
Spring
Printhead unit
Release rod
Screw
Printhead
cable
Ground
cable
UBI EasyCoder 71 – Maintenance & Troubleshooting

