XIIMUS 4K CL User Manual. Model: 4096CT. Version 1.4
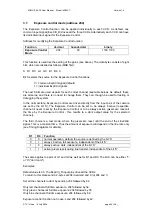
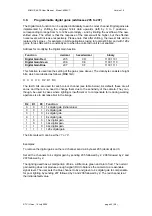
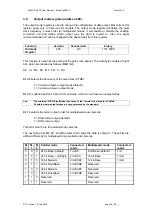
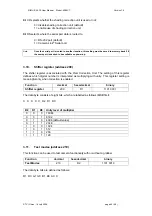
Replacement of the fan
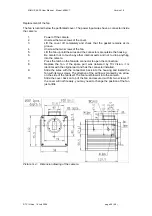
The fan is located below the perforated cover. The power input wires have a connector inside
the camera.
1.
Power off the camera.
2.
Unscrew the two screws of the cover.
3.
Lift the cover off completely and check that the gasket remains at its
groove.
4.
Unscrew the two screws of the fan.
5.
Lift the fan up until the wires and the connectors are outside the housing.
6.
Be careful not to touch any other internal parts and not to drop anything
into the camera.
7.
Press the latch on the fan side connector to open the connection.
8.
Replace the fan. If the spare part was delivered by TVI Vision, it is
identical with the original part and has the connector installed.
9.
Slide the wires with the connectors back into the housing and install the
fan with its two screws. The direction of the air flow is marked by an arrow
on the side of the fan itself. The fan must blow air into the camera.
10.
Slide the cover back on top of the fan and secure it with its two screws. If
the cover will not fit easily, you may need to change the position of the fan
just a little.
Picture G.2.: Dimension drawing of the camera.
© TVI Vision, 14 July 2006 page 56 ( 56 )

