3
4
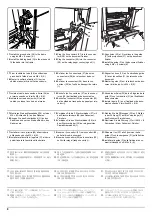
B
A
C
B
A
C
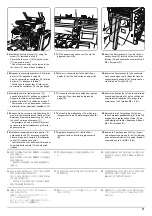
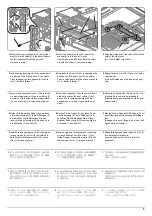
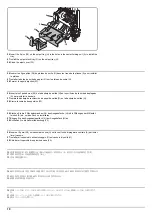
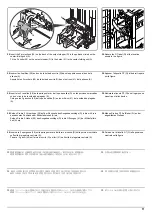
3.
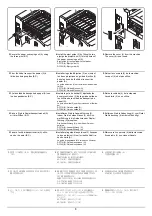
Secure the paper conveying unit (A) using
the three pins (B,C).
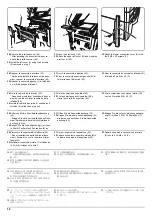
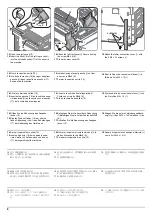
4.
Install the eject guide (2) by fitting the two
eject guide projections (3) into the holes of
the paper conveying unit (A).
Eject guide (2) is supplied with the finisher.
DF-770(B): Eject guide (G)
DF-790(B): Eject guide (H)
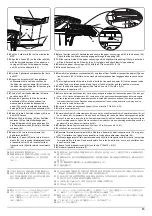
5.
Remove the cover (4) from the machine.
The cover (4) is not used.
3.
Fixer l'unité de transport du papier (A) à
l'aide des trois goupilles (B,C).
4.
Installer le guide d'éjection (2) en montant
les deux projections du guide d'éjection (3)
dans les trous de l'unité de transport du
papier (A).
Le guide d'éjection (2) est fourni avec le module de
finition.
DF-770(B): Guide d'éjection (G)
DF-790(B): Guide d'éjection (H)
5.
Retirer le couvercle (4) de la machine.
Le capot (4) n'est pas utilisé.
3.
Fije la unidad de transporte de papel (A) con
los tres pasadores (B,C).
4.
Instale la guía de salida (2) ajustando las
dos proyecciones (3) de la guía de salida en
los orificios de la unidad de transporte de
papel (A).
La guía de salida (2) se proporciona con el finaliza-
dor.
DF-770(B): Guía de salida (G)
DF-790(B): Guía de salida (H)
5.
Retire la cubierta (4) de la máquina.
La cubierta (4) no se utiliza.
3.
Sichern Sie die Papiertransporteinheit (A)
mit drei Stiften (B,C).
4.
Installieren Sie die Auswerfführung (2),
indem Sie die beiden Nasen (3) der Aus-
werfführung in die Aufnahmen der Papier-
führung (A) einsetzen.
Die Auswerfführung (2) wird mit dem Finisher
geliefert.
DF-770(B): Auswerfführung (G)
DF-790(B): Auswerfführung (H)
5.
Entfernen Sie die Abdeckung (4) vom Gerät.
Die Abdeckung (4) wird nicht benötigt.
3.
Fissare l'unità di trasporto carta (A) utiliz-
zando i tre perni (B,C).
4.
Installare la guida di espulsione (2) fissando
le due protezioni (3) nei fori dell'unità di tra-
sporto carta (A).
La guida di espulsione (2) è fornita con il finisher.
DF-770(B): Guida di espulsione (G)
DF-790(B): Guida di espulsione (H)
5.
Rimuovere il coperchio (4) dalla macchina.
Il coperchio (4) non viene utilizzato.
3.
ピン (B,C) 3 本で搬送ユニット (A) を固定
する。
4.
排出ガイド (2) のピン (3) 2 本を搬送ユ
ニット (A) の穴に差し込み取り付ける。
排出ガイド (2) はフィニッシャーに同梱され
ています。
DF-770(B): 排出ガイド (G)
DF-790(B): 排出ガイド (H)
5.
機械本体からカバー (4) を取り外す。
カバー (4) は不要。
3.
使用三个销钉 (B,C) 固定纸张传输单元
(A)。
4.
把排纸导向板 (2) 的 2 个突出部 (3) 插入纸
张传输单元 (A) 的孔中。
排纸导向板 (2) 附带在装订器中。
DF-770(B): 排纸导向板 (G)
DF-790(B): 排纸导向板 (H)
5.
从机器上拆下盖板 (4)。
不需要盖板 (4)。
3.
핀 (B,C) 세 개를 사용하여 반송 유니트 (A)
를 고정합니다 .
4.
배출 가이드 돌출부 (3) 2 개를 반송 유니트
(A) 의 구멍에 맞추어 끼워서 배출 가이드
(2) 를 설치합니다 .
배출 가이드 (2) 는 피니셔와 함께 제공됩니다 .
DF-770(B): 배출 가이드 (G)
DF-790(B): 배출 가이드 (H)
5.
본체에서 커버 (4) 를 분리합니다 .
커버 (4) 는 사용되지 않습니다 .
A
2
3
3
Summary of Contents for UTAX AK 730
Page 5: ...This page is intentionally left blank ...
Page 11: ...This page is intentionally left blank ...
Page 15: ...3NB 3ND 3N0 3NK This page is intentionally left blank ...
Page 25: ...3NB 3ND 3N0 3NK 1 1 10 This page is intentionally left blank ...
Page 43: ...3NB 3ND 3N0 3NK 1 2 18 3 Remove tape and pad Figure 1 2 23 Tape Pad ...
Page 45: ...3NB 3ND 3N0 3NK 1 2 20 This page is intentionally left blank ...
Page 81: ...3NB 3ND 3N0 3NK 1 3 36 This page is intentionally left blank ...
Page 157: ...3NB 3ND 3N0 3NK 1 4 76 This page is intentionally left blank ...
Page 169: ...3NB 3ND 3N0 3NK 1 5 12 This page is intentionally left blank ...
Page 206: ...3NB 3ND 3N0 3NK 2 2 11 This page is intentionally left blank ...
Page 246: ...1 1 INSTALLATION GUIDE INSTALLATION GUIDE FOR 4000 SHEETS FINISHER ...
Page 269: ...INSTALLATION GUIDE FOR FINISHER ATTACHMENT KIT MFP A ...
Page 283: ...INSTALLATION GUIDE FOR FINISHER ATTACHMENT KIT MFP B ...
Page 284: ...E F A H G I J B D C ...
Page 291: ...INSTALLATION GUIDE FOR FINISHER ATTACHMENT KIT PRINTER ...
Page 295: ...INSTALLATION GUIDE FOR CENTER FOLDING UNIT ...
Page 312: ...INSTALLATION GUIDE FOR MULTI TRAY ...
Page 326: ...INSTALLATION GUIDE FOR MULTI TRAY ATTACHMENT KIT PRINTER ...
Page 330: ...INSTALLATION GUIDE FOR PUNCH UNIT ...

