16
22
12
23
26
27
26
26
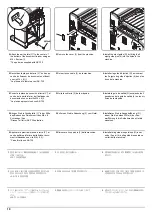
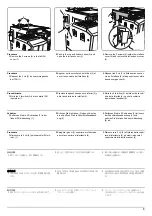
2.
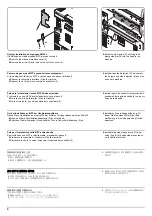
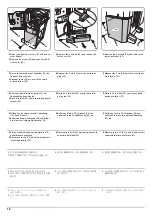
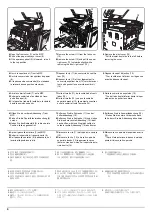
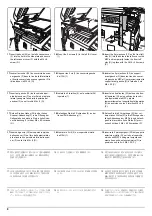
Open the upper front cover (12) of the docu-
ment finisher.
3.
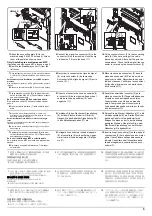
Remove the screw (22) and open the lower
front cover (23).
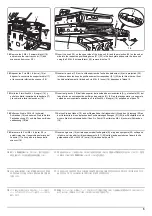
4.
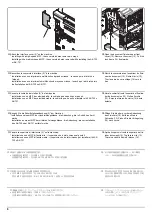
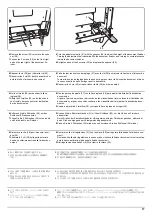
Remove the 2 screws (24) and remove the
foot cover (25).
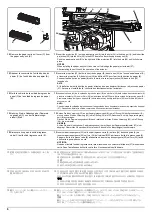
5.
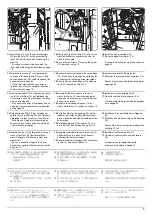
Remove the 3 screws (26) and remove the
lower rear cover (27).
2.
Ouvrir le couvercle avant supérieur (12) du
finisseur de document.
3.
Déposer la vis (22) et ouvrir le couvercle
avant inférieur (23).
4.
Déposer les 2 vis (24) puis le couvercle du
pied (25).
5.
Déposer les 3 vis (26) puis le couvercle arri-
ère inférieur (27).
2.
Abra la cubierta frontal superior (12) del
finalizador de documentos.
3.
Quite el tornillo (22) y abra la cubierta frontal
inferior (23).
4.
Quite los 2 tornillos (24) y quite la cubierta
de la pata (25).
5.
Quite los 3 tornillos (26) y quite la cubierta
posterior inferior (27).
2.
Öffnen Sie die obere vordere Abdeckung
(12) des Finishers.
3.
Entfernen Sie die Schraube (22) und öffnen
Sie die untere vordere Abdeckung (23).
4.
Entfernen Sie die 2 Schrauben (24) und
nehmen Sie die Fußabdeckung (25) ab.
5.
Entfernen Sie die 3 Schrauben (26) und
nehmen Sie die untere hintere Abdeckung
(27) ab.
2.
Aprire il coperchio superiore anteriore (12)
della finisher documenti.
3.
Rimuovere la vite (22) ed aprire il coperchio
inferiore anteriore (23).
4.
Rimuovere le 2 viti (24) e quindi rimuovere la
copertura del piede (25).
5.
Rimuovere le 3 viti (26) e quindi rimuovere il
coperchio inferiore posteriore (27).
2.
ドキュメントフィニッシャーの前上カバー
(12) を開く。
3.
ビス (22)1 本を外し、前下カバー(23) を開
く。
4.
ビス (24)2 本を外し、フットカバー(25) を
取り外す。
5.
ビス (26)3 本を外し、後下カバー(27) を取
り外す。
2.
打开装订器的前部上盖板 (12)。
3.
拆除 1 颗螺丝 (22),打开前部下盖板 (23)。
4.
拆除 2 颗螺丝 (24),拆下脚座盖板 (25)。
5.
拆除 3 颗螺丝 (26),拆下后部下盖板 (27)。
2.
문서 피니셔 앞 상커버 (12) 를 엽니다 .
3.
나사 (22) 1 개를 제거하고 앞 하커버 (23) 를
엽니다 .
4.
나사 (24) 2 개를 제거하고 , 풋커버 (25) 를
제거합니다 .
5.
나사 (26) 3 개를 제거하고 , 뒤 하커버 (27)
를 제거합니다 .
24
24
24
25
25
Summary of Contents for UTAX AK 730
Page 5: ...This page is intentionally left blank ...
Page 11: ...This page is intentionally left blank ...
Page 15: ...3NB 3ND 3N0 3NK This page is intentionally left blank ...
Page 25: ...3NB 3ND 3N0 3NK 1 1 10 This page is intentionally left blank ...
Page 43: ...3NB 3ND 3N0 3NK 1 2 18 3 Remove tape and pad Figure 1 2 23 Tape Pad ...
Page 45: ...3NB 3ND 3N0 3NK 1 2 20 This page is intentionally left blank ...
Page 81: ...3NB 3ND 3N0 3NK 1 3 36 This page is intentionally left blank ...
Page 157: ...3NB 3ND 3N0 3NK 1 4 76 This page is intentionally left blank ...
Page 169: ...3NB 3ND 3N0 3NK 1 5 12 This page is intentionally left blank ...
Page 206: ...3NB 3ND 3N0 3NK 2 2 11 This page is intentionally left blank ...
Page 246: ...1 1 INSTALLATION GUIDE INSTALLATION GUIDE FOR 4000 SHEETS FINISHER ...
Page 269: ...INSTALLATION GUIDE FOR FINISHER ATTACHMENT KIT MFP A ...
Page 283: ...INSTALLATION GUIDE FOR FINISHER ATTACHMENT KIT MFP B ...
Page 284: ...E F A H G I J B D C ...
Page 291: ...INSTALLATION GUIDE FOR FINISHER ATTACHMENT KIT PRINTER ...
Page 295: ...INSTALLATION GUIDE FOR CENTER FOLDING UNIT ...
Page 312: ...INSTALLATION GUIDE FOR MULTI TRAY ...
Page 326: ...INSTALLATION GUIDE FOR MULTI TRAY ATTACHMENT KIT PRINTER ...
Page 330: ...INSTALLATION GUIDE FOR PUNCH UNIT ...


