3NB/3ND/3N0/3NK-2
1-4-31
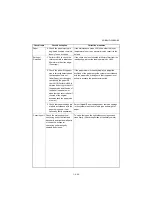
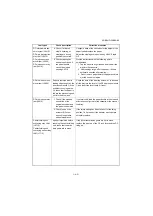
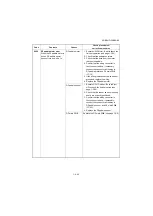
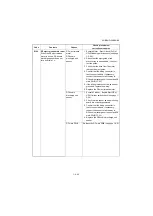
DF intermediate sen-
sor stay jam (J631X)
DF main tray ejection
stay JAM (J641X)
DF eject sensor non
arrival jam (J6500)
DF eject sensor stay
jam (J651X)
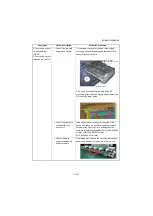
8. Check if a floated
staple, buckling, or
stapling at a wrong
position is occurred.
Configure each of the cassettes for the weight of the
paper loaded.replace the paper.
Adjust the stapling home position by U246 - Staple
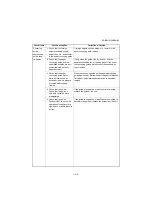
HP.
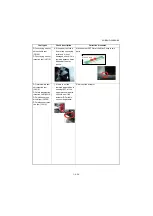
9. Check stapling has
been properly done if
the paper bundle
cannot be ejected
causing J-6510.
Provide instructions with the following points
emphasized.
1. Tap the paper to align its ends and load all the
way into the cassette.
2. After settings, let go off of the paper. (Allows
automatic ehection after stapling.)
3. Do not remove paper before the paper bundle is
ejected once it is stapled.
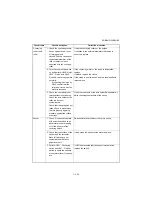
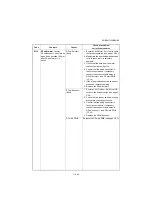
DF drum sensor non
arrival jam (J6600)
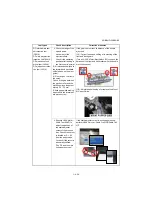
Paper is jammed with its
leading edge caught by the
diversion solenoid 1 in the
middle of coveying paths.
Or, check that the paper is
fed into the processing unit,
not into the drum unit.
Check the axle of the diverting solenoid 1 is inserted
all the way into the lever of the DF diverting solenoid
1, and insert the lever firmly if it is not.
DF drum sensor stay
jam (J6610)
1. Check if the size and
orientation of the
original document and
the paper used match.
If not matched, load the paper bundle in the size and
orientation configured for the cassette or the manual
feed tray.
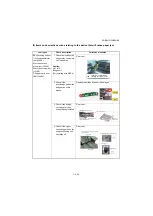
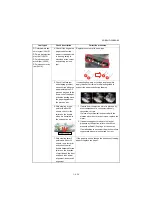
2. Check to see if the
actuator (DF drum
sensor) is operative
without hinderance.
If the return spring has been fallen off of the fixing
position, fix it properly.If the actuator won't operate
smoothly, replace.
Center-folding unit
conveying stay JAM
(J6710)
Center-folding unit
conveying sensor stay
JAM (J7710)
If paper is jammed before
reaching the center-folding
unit, check that the drive
train gears are in mesh.
If the drive transmission gears are not in mesh,
replace the pivot pin of the CF lock lever and the DF
fixing pin.
Jam types
Check description
Corrective measures
Summary of Contents for UTAX AK 730
Page 5: ...This page is intentionally left blank ...
Page 11: ...This page is intentionally left blank ...
Page 15: ...3NB 3ND 3N0 3NK This page is intentionally left blank ...
Page 25: ...3NB 3ND 3N0 3NK 1 1 10 This page is intentionally left blank ...
Page 43: ...3NB 3ND 3N0 3NK 1 2 18 3 Remove tape and pad Figure 1 2 23 Tape Pad ...
Page 45: ...3NB 3ND 3N0 3NK 1 2 20 This page is intentionally left blank ...
Page 81: ...3NB 3ND 3N0 3NK 1 3 36 This page is intentionally left blank ...
Page 157: ...3NB 3ND 3N0 3NK 1 4 76 This page is intentionally left blank ...
Page 169: ...3NB 3ND 3N0 3NK 1 5 12 This page is intentionally left blank ...
Page 206: ...3NB 3ND 3N0 3NK 2 2 11 This page is intentionally left blank ...
Page 246: ...1 1 INSTALLATION GUIDE INSTALLATION GUIDE FOR 4000 SHEETS FINISHER ...
Page 269: ...INSTALLATION GUIDE FOR FINISHER ATTACHMENT KIT MFP A ...
Page 283: ...INSTALLATION GUIDE FOR FINISHER ATTACHMENT KIT MFP B ...
Page 284: ...E F A H G I J B D C ...
Page 291: ...INSTALLATION GUIDE FOR FINISHER ATTACHMENT KIT PRINTER ...
Page 295: ...INSTALLATION GUIDE FOR CENTER FOLDING UNIT ...
Page 312: ...INSTALLATION GUIDE FOR MULTI TRAY ...
Page 326: ...INSTALLATION GUIDE FOR MULTI TRAY ATTACHMENT KIT PRINTER ...
Page 330: ...INSTALLATION GUIDE FOR PUNCH UNIT ...


