background image

THE WIRE HARNESS FOR “WIEGAND DATA OUTPUT” & “Transmitter Solutions DATA I/O

O”


NOTE:

 The information in this section is 

NOT

 for the system in 

Stand Alone

 operation. It is not necessary to plug in the 

wire harness to the socket, just leave it open.

The information below is for setting the keypad unit with the Wiegand data interface to a control panel, or the 
Transmitter Solutions Data I/O interface to an Transmitter Solutions Controller to make up a high security split-
decoded system.

Split-decoded Keypad System

Most of the general purpose keypads on the market are self-contained systems for stand alone operation. It controls 
the appliance(s) directly with its output relay contact(s); such as the electric lock in an access control system. The 
electric lock is connected to the keypad that is installed outside the house. The thief can open the door without a code 
or card but just open the keypad box and make contact to the output relay terminal. It is a safety drawback in security.

The high security systems are usually operating in the Split-decoded mode that combines an outside unit for card 
reading and code entry; and a control panel or a decoder unit installing in a secure closet inside the house. The 
outside unit and the inside unit communicate in digital data with each other. All the commands are in digital 
codes, the thief can do nothing to the inside unit even the outside unit is opened in sabotage. This design
philosophy confirms high security to the area protected, but not just relying on the protection of the keypad with the
outer box and two screws.

The Wire Harness

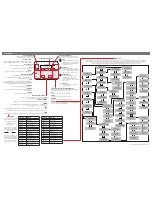
The keypad unit comes with two sets of interface wires from the wire harness. The Wires 1-4 are the Wiegand 
interface wires. The Wire 6 is the Data Input/Output wire for the connection with the optional Transmitter Solutions’s 
Digital Keypad Access Controller,  for high security Split-decoded operation. The Wire 5 is the Common 
Grounding point of these signal wires. Please see the location of the wire Harness on Page 7.

The Wires for "Wiegand & Data" :

1) Yellow ---------  D1, Wiegand DATA 1
2) Blue -----------  D0, Wiegand DATA 0
3) Brown ---------  BUZ, Buzzer control line, 0V active, for Wiegand audible status indication
4) Red ------------ LED, Red LED control line, 0V active, for Wiegand visible status indication
5) Black ----------  GND, (-) Common Ground
6) White ---------- DATA, Transmitter Solutions’s data In/Out line, for Transmitter Solutions’s decoder connection

29

Summary of Contents for Dolphin DOLXP1KB

Page 1: ...T BACK LIT WEATHERPROOF ACCESS CONTROL KEY AND CARD READER PAD WITH WIEGAND OUTPUT APO DATA I O Dolphin Keypad DOLXP1KB Programming Installation Manual FOR ELECTRIC LOCK INTER LOCK AND SECURITY SYSTEM...

Page 2: ...nd Functions of The Super User PIN Record Delete PINs for Output 1 2 3 Examples Programming And Operation Visitor Codes For Output 1 Only Duress Codes For Outputs 1 2 3 The Operation And Function of T...

Page 3: ...WIEGAND DATA OUTPUT READING FROM THE USER PINS Example Wiegand Output from PIN Code Entry THE Transmitter Solutions DATA I O PORT FOR SETTING UP A SPLIT DECODED KEYPAD The Optional Controller Introduc...

Page 4: ...the timing of 1 second to over 24 hours for Automatic Operator systems The DOLXP1KB is designed for surface mounting on wall or on a mounting post A member of the keypads compatible with the optional...

Page 5: ...2 3 Egress Button Programmable for Instant Delay with Warning and or Alarm Momentary or Holding Contact for the Exit Delay Input Sensing Terminals a Door position b Egress c O P 1 inhibit Output Cont...

Page 6: ...er to the system for testing PACKAGE CONTENTS One unit Keypad One pack of Mounting Screws Two EM cards or keyfobs One Centre Pin Torx Screw Wrench One Wire Harness Six wires One Programming Installati...

Page 7: ...int of the two contacts The relay is programmable for Start Stop toggle mode or Momentary timing mode See programming Location 52 for the details 9 EG IN Egress Input A Normally Open N O input termina...
Page 8: ...ion 80 for the details c Door Propped up Warning The keypad generates propped up warning beeps does not activates alarm output while the door is left open longer than the allowable time programmed The...

Page 9: ...m 1 Long Beep NOTE All Pacifier Tones can be ON or OFF through the programming option at Location 71 The Output Relay Activation beep can be selected through the programming option at Location 72 The...

Page 10: ...8 0 1 Switch OFF all the power for 1 minute to ensure that the system is fully discharged 2 Swich ON power again The system is in Power up Mode for 1 minute and the buzzer gives beeps during the whole...

Page 11: ...Common User PIN 2 Nil User Program Required 05 Common User PIN 3 Nil User Program Required 4 0 Visitor Codes Nil User Program Required 4 1 Duress Code for O P 1 Nil User Program Required 4 2 Duress C...

Page 12: ...ster Code for Security Reason 01 3289 2 beeps 3 2 8 9 is a Master Code for example here only 3289 is the new Master Code and the 0000 is erased 12 3 Record an EM Card to Operate The Output 1 for Door...

Page 13: ...or 6 above with other User IDs such as 005 006 007 999 etc Total 1 000 users are allowed See Programming Location 10 for the details 7 Close The Programming Mode 2 beeps The programming mode is closed...

Page 14: ...e Card always has the priority to be read when working in EM Card Secondary PIN or EM Card Common User PIN d Secondary User PINs The Secondary User PINs are prepared to enhance security It is put afte...

Page 15: ...t decoded operation Example Set a Master Code with the number of 2 2 3 3 RECORD A SUPER USER PIN Location 02 The Super User PIN has TWO functions It is prepared for the owner to simply use only one Us...

Page 16: ...r Enabled in Toggle SUPER USER PIN SUPER USER PIN SUPER USER PIN SUPER USER PIN 1 2 3 9 NOTE The inhibit function setting with the Super User PIN applies to the whole group of User PINs and Cards for...

Page 17: ...Locations 10 20 30 Number 1 2 3 or 4 represents the Media to be used to operate the keypad Number 5 is the authorization code for deleting of an PIN and or Card from its User ID EM Card only Private U...

Page 18: ...IDs in 001 100 d Put Private User PIN 1 2 3 4 into the storage location ii Operation while the system is back to operation mode 1234 a b a Key in the Private User PIN 1 2 3 4 3 Example 3 EM Card Secon...

Page 19: ...up 1 20 for the Group 2 and 30 for the Group 3 b Key in 5 that is the Command Code for making a deletion here c Key in the User ID that stored the User PIN the lost EM card or the EM Card User PIN d P...

Page 20: ...de One Time Code has no time limit but it can only be used for ONCE It is cleared by the system automatically after use 01 99 Time Limit in Hour s The Visitor Code can be set with the valid time limit...

Page 21: ...e Duress Output is connected with a security system NOTE The Duress Codes are always valid They are not governed by any inhibit or lock out function in the system OUTPUT LOCATIONS 41 Duress Codes for...

Page 22: ...elay Output 1 2 or 3 just like a normal User PIN The Duress Code always activates its Relay Output in its group but does not de activate stop the Duress Output ONLY a normal User PIN or Card in any on...

Page 23: ...utput 2 resets Reset Output 3 3 Output 3 resets PERSONAL SAFETY AND SYSTEM LOCK OUT Location 60 SAFETY LOCK OUT OPTIONS The Options are represented by their Mode Numbers in programming They are descri...

Page 24: ...entry 1 beep the Output Operation Announcer 2 beeps or 1 long beep and the Unsuccessful User Code Card entry 5 beeps NOTE The beeps for the Warning and the Power up Delay do not belong to pacifier ton...

Page 25: ...ypad generates the door forced open warning beeps and activates the alarm output Terminal 13 instantly if the door is forced to open without a valid User PIN or pressing of the Egress Button The beeps...

Page 26: ...pressed Further setting of the egress button with holding contact for the delay even gives higher level of security to a controlled door Kindergarten Young children are always active Some of them may...

Page 27: ...d hold the Button The system gives Warning Beeps during Egress Delay Good for the place required attention The keypad beeps while the button is kept pressed during the people are waiting for the door...

Page 28: ...which starts to count after the door is opened and it resets automatically when the time reaches The alarm can be stopped with the User Codes Cards or the Super User PIN for Output 1 at any time befor...

Page 29: ...or card reading and code entry and a control panel or a decoder unit installing in a secure closet inside the house The outside unit and the inside unit communicate in digital data with each other All...

Page 30: ...er PINs and Codes exactly like in the Stand Alone Mode The Master keypad will transfer all the programmed feature data except the user PINs Codes and Card data to the Access Controller decoder right a...

Page 31: ...transmission wires called DATA 0 Wire 2 Blue and DATA 1 Wire 1 Yellow When no data is being sent both DATA 0 and DATA 1 are at high voltage When a 0 is sent the DATA 0 is at low voltage while the DATA...

Page 32: ...e EM Cards The ID Code to be read for Wiegand Output The Code does not belong to this system The Code in Decimal Number 6 6 1 3 7 7 9 The Code 6 6 1 3 7 7 9 Equivalent to Hex Number 6 4 E B 1 3 b Each...

Page 33: ...Even Parity Bit of 0 0 B C 1 An Odd Parity Bit of 6 1 4 E 0 The 34 bits Wiegand data sending out in Binary from entry of the PIN 1 0 0 0 0 0 0 0 0 1 0 1 1 1 1 0 0 0 1 1 0 0 0 0 1 0 1 0 0 1 1 1 0 0 B T...

Page 34: ...connection with the Transmitter Solutions s Access Controller for Split decoded operation to up grade its security level Once the keypad unit is connected with the controller all the commands from it...

Page 35: ...DE 4 8 Digits 40 CODE1 CODE2 CODE3 NIL 4 1 Duress Code for O P 1 CODE ID O P 1 01 50 CODE ID O P 2 01 10 CODE ID O P 3 01 10 DURESS CODE 4 8 Digits 41 CODE ID DURESS CODE NIL 4 2 Duress Code for O P 2...

Page 36: ...ENT S YS T E M C O D E I T I S CHANGED IF A NEW MASTER CODE IS PROGRAMMED 0000 OR NEW MASTER CODE System in Programming Mode 9 9 9 9 REFRESH CODE Refresh the system and set all its function back to de...

Page 37: ...power terminals of the lock to absorb the back EMF to prevent it from damaging the keypad The 1N4004 is not required if the electric lock is AC operated To avoid Electro Static Discharge from interfer...

Page 38: ...ike the wiring diagram shown User code 1 is invalid while the O P 1 INHIB terminal is shunted to ground with user code 3 NOTE 1 The Inhibit Authorization Control in this example is made up with hardwa...

Page 39: ...achieve the inter lock logical functions Use keypad to open the door from outside Press egress button to open the door from inside Connect the door magnetic sensors on the doors to monitor their posit...

Page 40: ...door is left open longer than the pre set delay time Enable the function at Location 81 Inter lock Control When the door is open the interlock output of the keypad will give a command to stop the othe...

Page 41: ...make arm disarm control of an alarm system Consult your alarm control panel manual for the appropriate output contact to be used in arm disarm control Usually set output 2 to Momentary mode Programmi...

Page 42: ...t is equivalent to a Normally Open N O contact referring to ground similar to a relay contact referring to ground The transistor is normally OFF and its output switches to ground when active The open...

Reviews: