


Operating Instructions
12-43
Editing
Others
Introduction
Function
setup
Recording
Playback
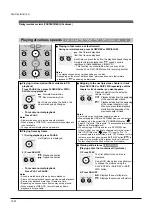
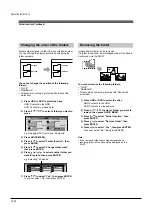
Selecting the sound
If a disc contains several languages, you can select a
preferred language from them to hear.
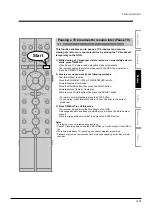
1) During playback, press AUDIO in the lid.
Each time you press the button, output sound
changes.
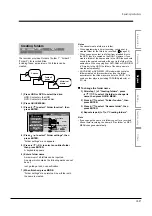
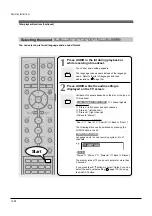
Selecting Subtitles
You can display subtitles on the TV screen and select
a subtitle language from those included on the disc.
1) Press SUBTITLE in the lid during playback.
The current subtitle setting appears.
e.g.
2) Press to select “Status,” then press
SUBTITLE to select “On.”
Skip to step 3 if “On” is already displayed.
3) Press to select “Subtitle,” then press
SUBTITLE to select a language.
The subtitles of recorded languages appear.
The display turns off after about 3 seconds if you
do not make a selection.
• To turn the subtitles on or off
At step 2, select “Off” by pressing the SUBTITLE
button.
Notes
• Some DVD video discs are set to display subtitles
automatically.
• Depending on the scene, subtitles may not appear
immediately after you set the subtitle function to on.
• Some DVD video discs will allow you to change subtitle
languages and turn subtitles on or off only via the disc
menu.
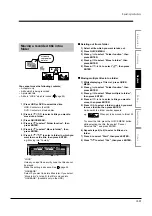
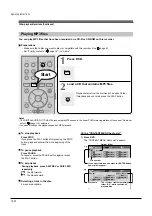
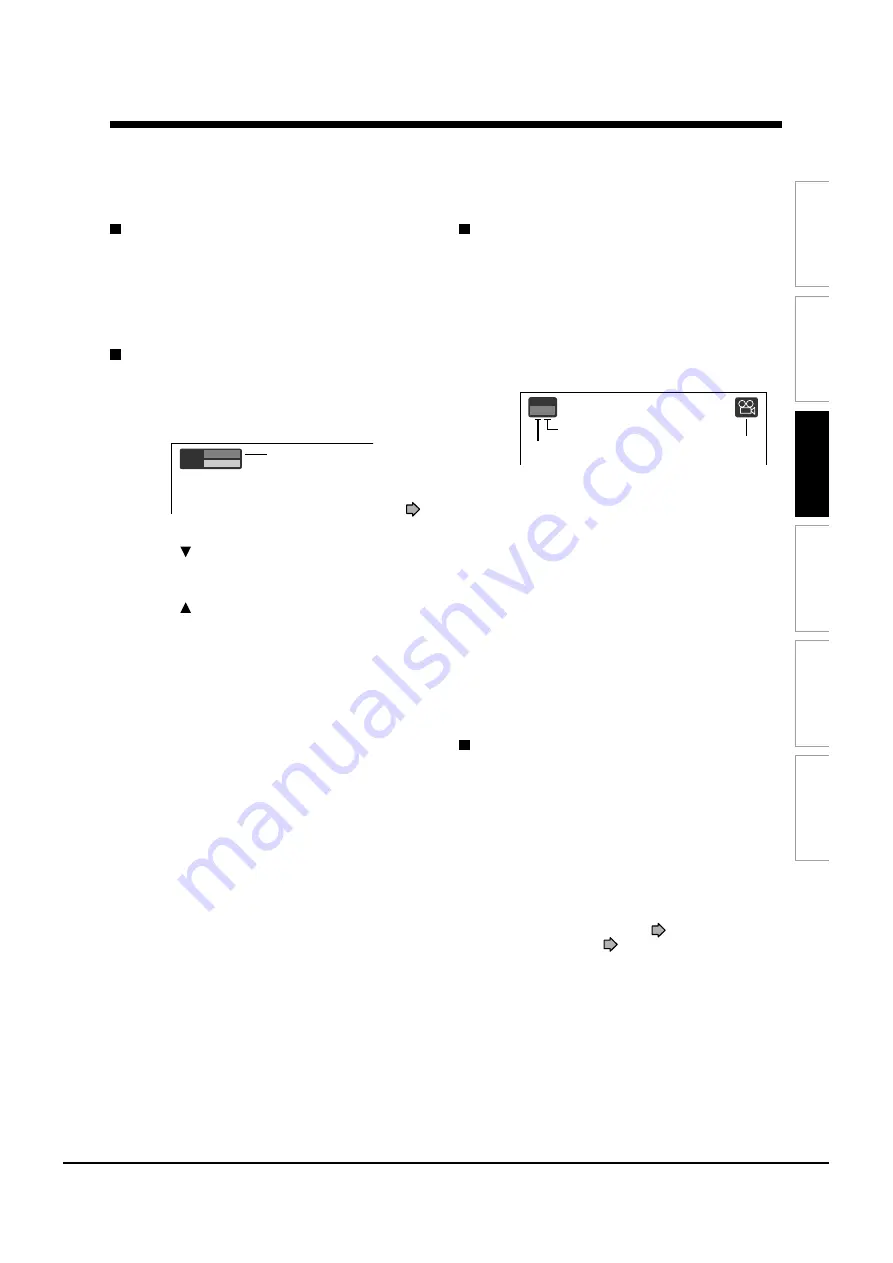
Selecting the camera angle
If the scene was recorded with multiple angles, you
can easily change the camera angle of the scene you
are watching.
1) Press ANGLE in the lid while playing a scene
recorded with multiple angles.
While playing a scene recorded with multiple
angles, the angle icon appears on the TV screen.
Press the ANGLE button while the angle icon is
displayed.
e.g.
2) Press ANGLE while the angle number is
displayed on the TV screen.
You can also select the camera angle by pressing
the ANGLE button several times.
• The angle icon disappears after about 3 seconds
if no further selections are made.
Notes
• You can also change the camera angle during still
playback. The camera angle changes to the new setting
when you resume normal playback.
• If you pause a picture immediately after changing a camera
angle, the resumed playback picture may not display the
new camera angle.
• Depending on a disc, the camera angle may not change
even though the angle number changes.
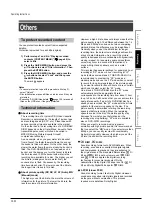
Resuming playback from the location last
stopped (Resume Play)
You can resume playback from the location where you
stopped.
If you press the PLAY button after stopping playback,
playback resumes from the location you have stopped.
If you stop playback by pressing the STOP button
twice, the resume playback feature will be cancelled.
Notes
• Resume feature cannot function when:
– you select a disc menu language (
page 115) or change
the parental lock setting (
page 116).
– you play a PBC-featured VIDEO CD.
– you open the disc tray.
– you cancel the DVD-Video finalizing process of a DVD-RW
disc.
• There may be a difference in the location where playback
resumes depending on the disc.
• While the recorder retains a location in memory, initial
setting changes with GUI may function only after the
memory is cleared.
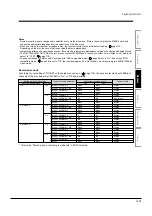
Subtitle
Status
1 – –
Off
Setting number and language
The language code appears
instead of the language name.
Refer to the list of languages
and their abbreviations. (
page 135)
Angle
1 / 6
Angle icon
Total number of angles
Current selection
Summary of Contents for RD-XS24SB
Page 10: ...Product Specification 2 4 MEMO ...
Page 12: ...3 2 Software Update MEMO ...
Page 20: ...4 8 Disassembly and Reaasembly MEMO ...
Page 34: ...Troubleshooting 5 14 MEMO ...
Page 35: ...6 1 6 Exploded View and Parts List 6 1 Cabinet Assembly Page 6 2 ...
Page 38: ...Exploded Views and Parts List 6 4 MEMO ...
Page 50: ...Electrical Parts List 7 12 MEMO ...
Page 160: ...Operating Instructions 12 110 MEMO ...
Page 173: ...1 1 SHIBAURA 1 CHOME MINATO KU TOKYO 105 8001 JAPAN ...
Page 177: ...Block Diagrams 8 3 8 2 Digital Block Diagram ...
Page 180: ...Block Diagrams 8 6 8 5 AIC01 MSP3417 Block Diagram ...
Page 181: ...Block Diagrams 8 7 8 6 AIC02 AIC07 MC14052 Block Diagram ...
Page 182: ...Block Diagrams 8 8 8 7 AIC03 AK5357 Block Diagram ...
Page 183: ...Block Diagrams 8 9 8 8 AIC04 PCM1753 Block Diagram ...
Page 184: ...Block Diagrams 8 10 8 9 KIC01 PT6961 Block Diagram ...
Page 185: ...Block Diagrams 8 11 8 10 MIC01 78F4225 Block Diagram ...
Page 187: ...Block Diagrams 8 13 8 12 SIC01 MM1647 Block Diagram ...
Page 188: ...Block Diagrams 8 14 8 13 VIC01 74HC4051 Block Diagram ...
Page 189: ...Block Diagrams 8 15 8 14 VIC05 MM1568 Block Diagram ...
Page 190: ...Block Diagrams 8 16 MEMO ...
Page 191: ...9 Wiring Diagram 9 1 ...
Page 192: ...Wiring Diagram 9 2 MEMO ...
Page 194: ...PCB Diagrams 10 2 10 1 S M P S PCB COMPONENT SIDE ...
Page 195: ...PCB Diagrams 10 3 CONDUCTOR SIDE ...
Page 196: ...PCB Diagrams 10 4 10 2 Main PCB COMPONENT SIDE ...
Page 198: ...PCB Diagrams 10 6 10 3 Jack PCB COMPONENT SIDE ...
Page 199: ...PCB Diagrams 10 7 CONDUCTOR SIDE ...
Page 200: ...PCB Diagrams 10 8 10 4 Key PCB COMPONENT SIDE CONDUCTOR SIDE ...
Page 202: ...Schematic Diagrams 11 2 11 1 S M P S SMPS PCB ...
Page 203: ...Schematic Diagrams 11 3 11 2 Main Main PCB ...
Page 204: ...Schematic Diagrams 11 4 11 3 Audio Jack PCB ...
Page 205: ...Schematic Diagrams 11 5 11 4 Video Jack PCB ...
Page 206: ...Schematic Diagrams 11 6 11 5 AV switch Scart Jack PCB ...
Page 207: ...Schematic Diagrams 11 7 11 6 Tuner Front in Connection Jack PCB ...
Page 208: ...Schematic Diagrams 11 8 11 7 Micom Jack PCB ...
Page 209: ...Schematic Diagrams 11 9 11 8 Key Key PCB ...
Page 210: ...Schematic Diagrams 11 10 MEMO ...


