


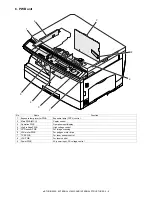
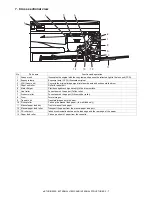


e-STUDIO202S UNPACKING AND INSTALLATION 5 - 6
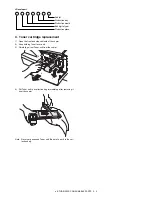
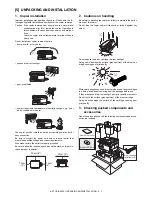
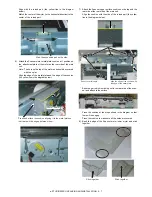
2) Remove the rear cabinet.
Remove the four screws and then remove the rear cabinet.
3) Remove the rear cover for the document glass.
<1> Remove the two screws and then remove the right glass
holder.
<2> Slide the rear cover for the document glass to remove it.
<3> Remove the table glass.
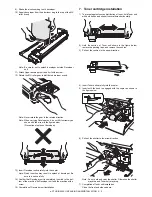
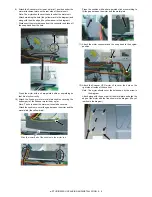
4) Attach the Scanner condensation prevention mylar at the 3
positions on the rear side of the main unit as described below.
Note: The hole should be covered with the mylar.
Align the edge of the mylar to the R part (the yellow line in the
diagram below) so that the hole of the metal plate is covered
as much as possible.
Align the edge of the mylar to the R part (the yellow line in the
diagram below) so that the hole of the metal plate is covered
as much as possible.
Attach along the edge of the projection (the yellow line in the
diagram below).
5) Attach the Optical right hole mylar B at the 2 positions shown
in the diagrams below which are at the top of the rear side of
the main unit.
Note: The holes should be covered with the mylar.
Attach along the edge of the cushion (the yellow line in the dia-
gram below).
Align with the inside line of the bent part (the yellow line in the
diagram below).
1
2
1
2
3
Stick the excessive part on the side.


