Note:
It is recommended to start the 15 second
catch test at 2.75 bar (40 psi), then adjust from
there.
All boom sections must be on when performing
the catch test.
8.
Start at 2.75 bar (40 psi) and use the
application-rate switch to adjust the spray
pressure so a catch test yields the volume
displayed for the selected nozzle color.
9.
Press button 2 to move to the next step.
10.
Turn on all boom sections, turn on the master
boom, and press button 2 to begin calibration.
Note:
Calibration takes several minutes.
Note:
As the machine sprays, the InfoCenter
displays the volume of fluid that it is counting.
Important:
Do not turn off the pump or any
booms during calibration.
11.
If the calibration is successful, a Calibration
Successful screen appears; press button 5 to
exit.
12.
If the calibration is not successful, a Calibration
Failed screen appears with the reasoning behind
why the calibration failed; press button 5 to exit
and restart the calibration.
Speed Calibration
1.
Ensure that the tires are properly inflated; refer
to
Checking the Tire Pressure (page 36)
.
2.
To access the Speed screen, press button 2 on
the Calibrate screen until you reach Speed, then
press button 4 (
) to select Speed.
3.
Fill the sprayer tank with a minimum of 700 L
(150 US gallons) of water and apply the parking
brake.
4.
Press button 2 to move to the next step and to
view the Speed Calibration screen.
5.
Mark off the desired distance before proceeding
to the next screen.
6.
Press button 2 to move to the next step.
7.
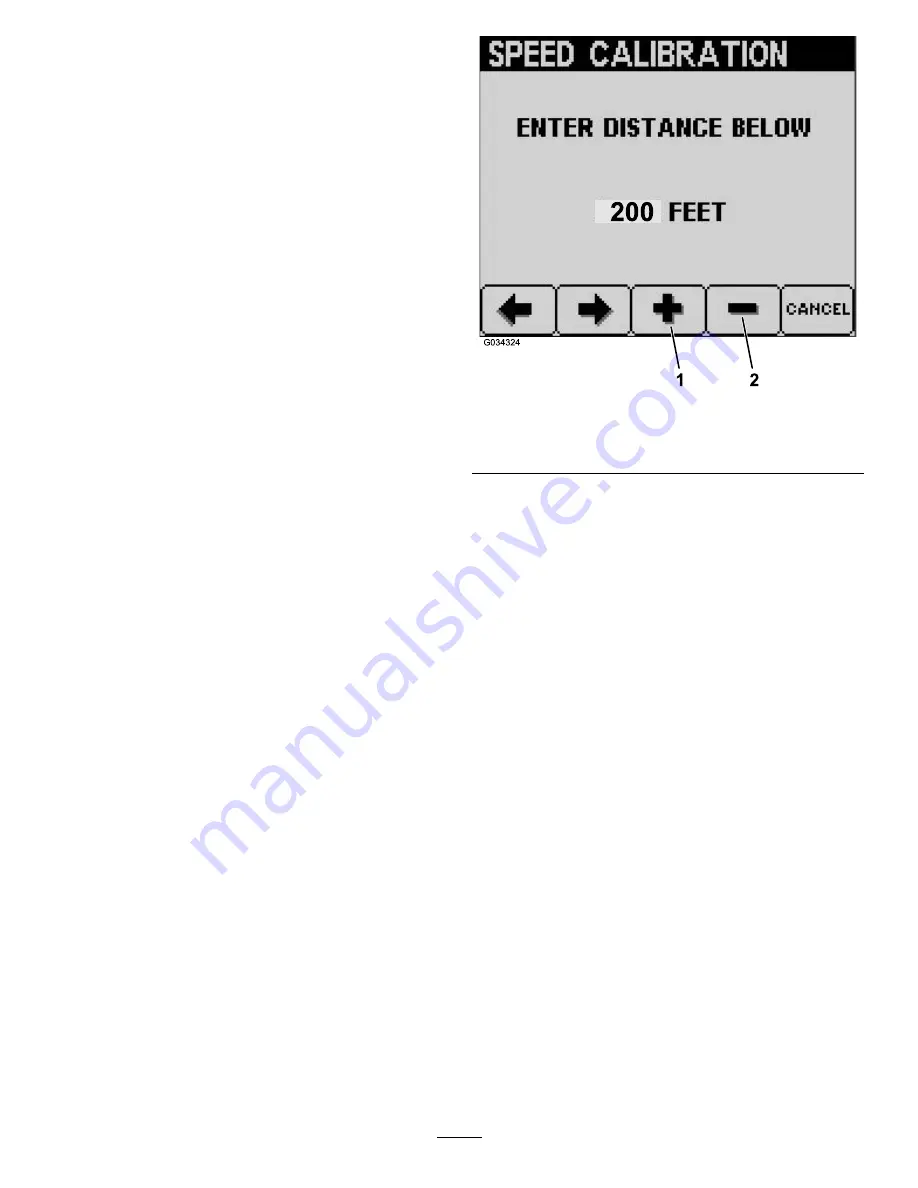
Press button 3 to increase the desired distance
or press button 4 to decrease the desired
distance (
).
Note:
If you choose to cancel the calibration
by pressing button 5, the system automatically
defaults to the previously-stored distance.
g034324
Figure 32
1.
Increase the desired
distance
2.
Decrease the desired
distance
8.
Ensure that the boom sections are off and press
button 2 to begin calibration.
Note:
As you drive the machine, and the speed
calibration progresses, the InfoCenter displays
distance until it reaches the set amount.
Important:
Do not shut off the machine after
the speed calibration completes.
9.
Beginning with the center of the front tire at the
“0” mark, drive the vehicle at approximately 5 to
8 kph (3 to 5 mph) to the other mark, and stop
with the center of the front tire on the mark.
10.
Press button 2 to confirm the distance traveled.
11.
If the calibration is successful, a Calibration
Successful screen appears; press button 5 to
exit.
12.
If the calibration is not successful, a Calibration
Failed screen appears with the reasoning behind
why the calibration failed; press button 5 to exit
and restart the calibration.
Manual Calibration Entry
This screen allows you to view and edit the flow
calibration number and the speed calibration number.
30
Summary of Contents for Multi Pro ExcelaRate 5800-G
Page 73: ...Spray System Schematic g034336 Figure 92 73...
Page 86: ...Notes...
Page 87: ...Notes...


