Servicing the Gear Box (continued)
Note:
Refer to
during this procedure.
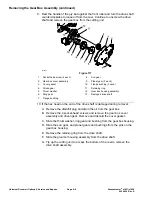
1. Remove the drain/fill plug and drain the oil from the gear box.
2. Remove the 4 socket-head screws and separate the gear box cover and
housing. Remove and discard the cover gasket.
3. Slide the sun gear, ring gear, and planet gears from the pins on the gear
box housing.
4. Continue to disassemble the gear box as necessary.
CAUTION
Use the 1−3/8 inch flats on the input shaft to prevent the input shaft
from rotating during drive adapter removal and installation. DO NOT
use the 1/2 inch hex on the input shaft for drive adapter removal or
installation as input shaft damage may occur.
5. If the drive adapter requires replacement, apply high strength thread locker
(Loctite 243 or equivalent) to the 5/8 inch threads of the drive adapter and
tighten the adapter from
150 to 163 N∙m (110 to 120 ft-lb)
.
6. Carefully clean all the gasket material from the gear box housing and cover.
7. Inspect the V-ring, seals, bearings, gears, and bushings in the gear box
assembly. Replace the damaged or worn components as necessary.
8. If the sun gear, ring gear, or the gear box housing bearings are replaced,
press the bearings all the way to shoulder into the part.
9. If the flange bushings are replaced, ensure that the flange bushing is fully
seated against the part.
10. Assembly the gearbox.
• Ensure that all the retaining rings and O-rings are fully seated in the ring
groove during assembly.
• Lubricate the seal lips and O-rings before installing the shafts.
• Lubricate the planet gear and sun gear pins in the gear box housing with
the gear oil prior to installing the gears.
11. Clean the gasket surface on the gear box housing and cover with the solvent
and install new gasket.
12. Fit the gear box cover over dowel pins and install the 4 socket-head screws.
Tighten the screws from
1.7 to 4.5 N∙m (15 to 40 in-lb)
. In an alternating
cross pattern, tighten the screws from
8.4 to 9.6 N∙m (75 to 85 in-lb)
.
13. Fill the gear box with 80W−90 gear oil and tighten the drain/fill plug from
4 to 5 N∙m (32 to 42 in-lb)
.
The gear box oil capacity is
50 ml (1.7 fluid ounces)
.
14. Operate the groomer gear box by hand to check for proper operation prior to
installation.
Greensmaster
®
e1021/e1026
Page 8–9
Universal Groomer (Optional): Service and Repairs
20246SL Rev A
Summary of Contents for 04831
Page 4: ...NOTES NOTES Page 4 Greensmaster e1021 e1026 20246SL Rev A ...
Page 6: ...g340650 Figure 1 Model 04831 shown Preface Page 6 Greensmaster e1021 e1026 20246SL Rev A ...
Page 14: ...Safety Safety and Instructional Decals Page 1 6 Greensmaster e1021 e1026 20246SL Rev A ...
Page 136: ...Electrical System Service and Repairs Page 5 56 Greensmaster e1021 e1026 20246SL Rev A ...
Page 216: ......


