


Removing the Lithium-Ion Battery (continued)
g339409
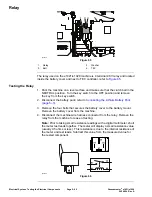
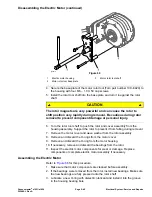
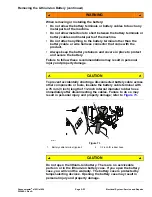
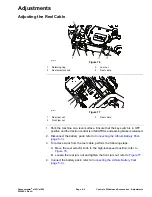
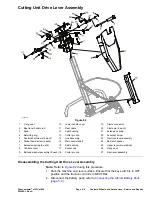
Figure 74
1.
Negative (-) terminal
4.
Washer
2.
Lithium-ion battery
5.
Lock washer
3.
Positive (+) terminal
6.
Nut
1. Park the machine on a level surface and make sure that the clutch bail in the
NEUTRAL position. Turn the key switch to the OFF position and remove
the key from the key switch.
2. Disconnect the battery pack; refer to
Connecting the Lithium Battery Pack
(page 5–3)
.
3. Remove the four bolts that secures the battery cover to the battery mount.
Remove the battery cover from the machine.
4. Label and disconnect the negative (-) battery cable, positive (+) battery cable,
and battery interface harness from the lithium-ion battery; refer to
g361750
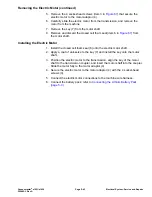
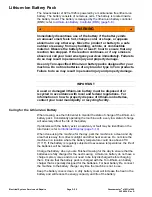
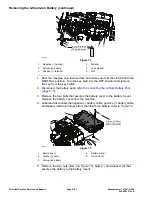
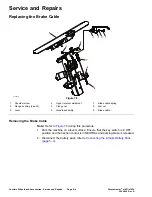
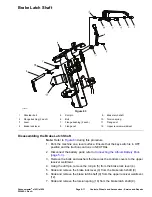
Figure 75
1.
Bolt (4 each)
4.
Battery mount
2.
Washer (4 each)
5.
Nut (4 each)
3.
Lithium-ion battery
5. Remove the four nuts (item 5 in
), bolts (1) and washers (2) that
secures the battery to the battery mount.
Electrical System: Service and Repairs
Page 5–54
Greensmaster
®
e1021/e1026
20246SL Rev A
Summary of Contents for 04831
Page 4: ...NOTES NOTES Page 4 Greensmaster e1021 e1026 20246SL Rev A ...
Page 6: ...g340650 Figure 1 Model 04831 shown Preface Page 6 Greensmaster e1021 e1026 20246SL Rev A ...
Page 14: ...Safety Safety and Instructional Decals Page 1 6 Greensmaster e1021 e1026 20246SL Rev A ...
Page 136: ...Electrical System Service and Repairs Page 5 56 Greensmaster e1021 e1026 20246SL Rev A ...
Page 216: ......


