background image

BC207 Series

Chapter 5: The Graphics User Interface (GUI)

Rev: 8.1,  10-Jan-2022

Page  34

© 2022 Thorlabs

·

the exposure time is set below 1 ms and brightness change between two successive ex-
posure times is too large.

·

pulsed laser sources are used.

5.5.3.4  Hot Pixel Correction

Hot pixels appear as an unwanted property of CMOS sensors and are due to different charge
leakage rates between individual pixels. They appear as points of high intensity particularly at
long exposure time and their intensity depends on the temperature. 

Hot pixels may cause measurement errors, particularly in 4

s

 measurements, which is important

for M² beam quality measurements, and may impact the baseline definition during ambient light
correction.

Thorlabs Beam offers a hot pixel correction feature. 

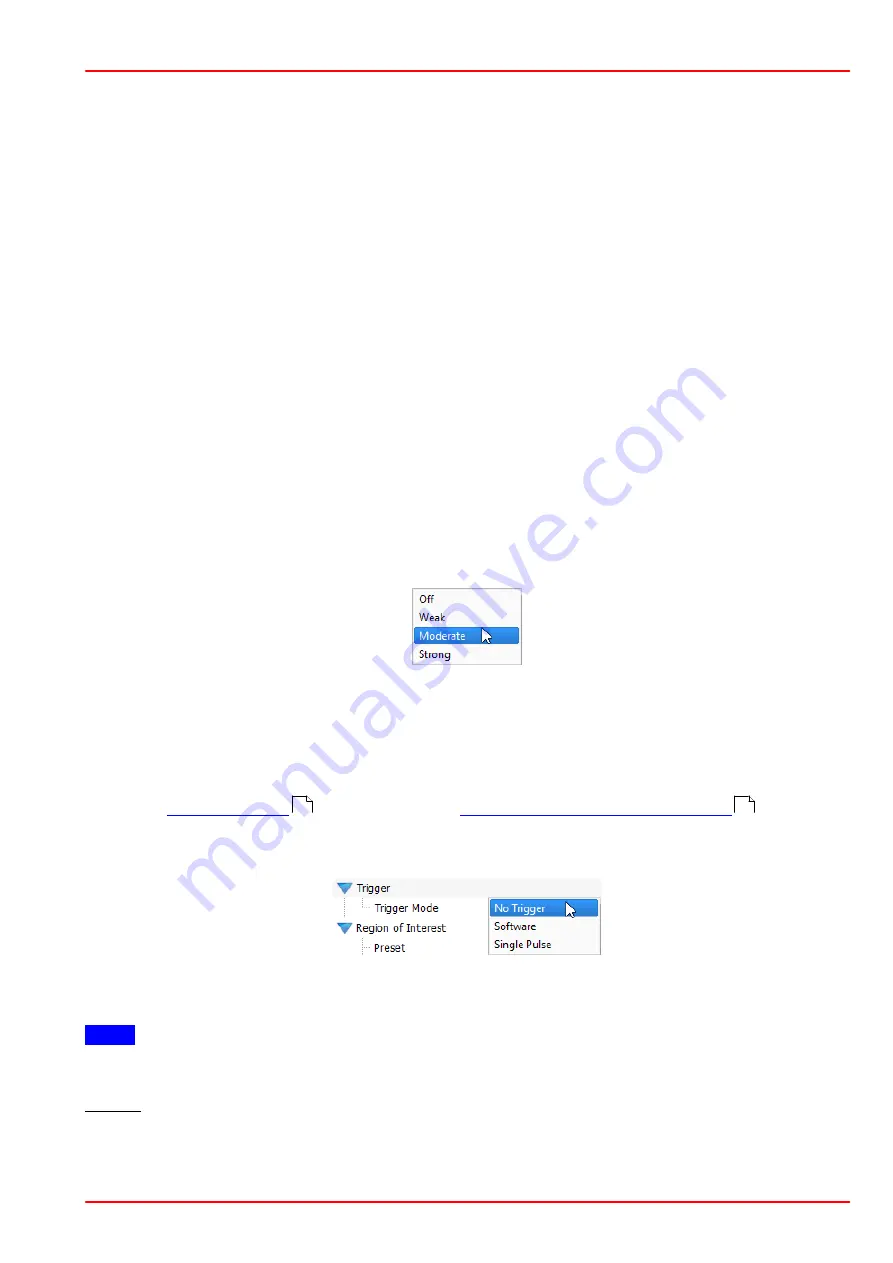
To reduce or eliminate hot pixels from influencing the measurement, set the hot pixel correction
to Weak, Moderate or Strong (maximum suppression of hot pixels). This function can be used
to get the current threshold value for hot-pixel correction. The value is a quantitative measure of
how aggressively the camera will remove hot pixels.

Please be aware that selection of the Moderate and, even more so, Strong hot pixel correction
affects the displayed beam profile, especially whenever the beam diameter is very small or has
steep edges. Selecting strong is results in cleaner displayed profiles for beams with larger dia-
meter.

5.5.3.5  Trigger

The  BC207  Series  Camera  Beam  Profilers  are  able  to  capture  beam  profiles  of  irregularly
occurring optical pulses or pulsed light sources in different modes to trigger exposure with re-
spect to the laser pulse occurrence.

Open the 

‘Beam Settings

’ panel and topic "

Camera Beam Profiler Parameter

" - "Trigger"

to choose between the

 trigger modes: No Trigger, Software Trigger, or Single Pulse Trigger.


By default 'No Trigger' is chosen for continuous caption of CW light sources.

 Note 

The BC207 Series Beam Profilers accommodate for the following frequency ranges:

37 kHz: The BC207 Series Camera Beam Profiler can detect single pulses provided their fre-
quency is lower than 37 kHz. Frequencies above 37 kHz are recognized as continuous wave
signal and result in a multi pulse detection.

26

31

Summary of Contents for BC207UV

Page 1: ...Thorlabs Camera Beam Profiler Beam Analyzing Software BC207UV M BC207VIS M with M2MS AL Operating Manual 2022 ...

Page 2: ...Copyright 2022 Thorlabs Version Date 8 1 10 Jan 2022 ...

Page 3: ...n Set 9 3 2 1 Operating Elements M2MS 9 3 2 2 Mounting BC207 Series on M2MS AL 12 3 2 2 1 M2MS with BC207UV M and BC207VIS M 4 Installation 13 13 4 1 Software Installation 13 4 2 Connection to the PC 14 4 3 Start the Application 5 The Graphics User Interface GUI 16 16 5 1 Menu Bar 16 5 1 1 File Menu 17 5 1 2 Control Menu 18 5 1 3 Options Menu 22 5 1 4 Windows Menu 22 5 1 5 View Menu 23 5 1 6 Help ...

Page 4: ... 5 4 8 Reference Position 44 5 5 4 9 Unit 44 5 5 5 Plot Over Time Parameter 45 5 5 6 Translation Stage Control 47 5 6 Child Windows 48 5 6 1 2D Projection 51 5 6 2 3D Profile 52 5 6 3 X and Y Profiles 53 5 6 4 Zooming and Panning Diagrams 54 5 6 5 Calculation Results 58 5 6 6 Manual Vergence Measurement 60 5 6 7 Tuning View 62 5 6 8 Beam Overlapping 64 5 6 9 Plots 65 5 6 9 1 Plot Positions 66 5 6 ...

Page 5: ...M Measurement Results 113 6 3 7 5 Running the M Measurement 114 6 3 7 6 M Measurement Results 119 6 3 7 7 M Troubleshooting 122 6 3 7 8 Live Adjustment 123 6 3 8 Divergence Measurement 123 6 3 8 1 Beam Alignment 132 6 3 8 2 Divergence Measurement Panel 135 6 3 8 3 Divergence Measurement Settings 136 6 3 8 4 Saving the Divergence Measurement Results 136 6 3 8 5 Running the Divergence Measurement 13...

Page 6: ...d BC207VIS M 162 10 3 Filter Wheel 163 10 4 Technical Data M2MS Extension Sets 163 10 5 Wavelength Response 164 10 6 Power Ranges 165 10 7 Initial Settings 165 10 8 Compatibility with Older Hardware 166 10 9 List of Acronyms 167 10 10 Safety 168 10 11 Certifications and Compliances 169 10 12 Return of Devices 169 10 13 Manufacturer Address 169 10 14 Warranty 169 10 15 Exclusion of Liability and Co...

Page 7: ...oking forward to hearing from you Thorlabs GmbH Warning Sections marked by this symbol explain dangers that might result in personal injury or death Always read the associated information carefully before performing the indicated procedure Please read this advice carefully This manual also contains NOTES and HINTS written in this form Attention Paragraphs preceded by this symbol explain hazards th...

Page 8: ...e for ambient light a measured mean value of the ambient light intensity is subtracted from the beam profile measurement The automatic exposure and gain control feature adapts the camera settings to the actual beam intensity The USB 3 0 interface allows for a high frame rate Measurements at very high frame rates can be transferred with reduced frame sizes To convert Thorlabs camera beam profilers ...

Page 9: ...n OpenGL specification GLX 1 3 up compatible graphics adapter Radeon X100 series X850 X1000 series X1600 HD series 2400 Geforce 7 series 7600 8 series 8500 9 series 9600 Quadro FX series FX770M Hard Drive Min 2 GB of available disk space Interface Free high speed USB 3 0 port Monitor resolution minimum 1024 x 758 pixel 16 bit color depth 1 Intel Core i3 processors and mobile versions of Intel proc...

Page 10: ...d the contents for completeness and tested the BC207 Series device mechanically and electrically Verify that you have received the following items within the package 2 1 Parts List BC207UV M and BC207VIS M BC207UV M or BC207VIS M Beam Profiler 1 1 BC207UV M or BC207 VIS M Beam Profiler Instrument with Mounted Filter Wheel 2 6 Mounted Attenuation Filters see Section Filter Wheel for further informa...

Page 11: ...perating Elements BC207 Series The components of the BC207UV are labeled in the image below Aside from the mounting thread BC207UV and BC207UV M are identical BC207VIS and BC207VIS M outer dimensions and components look identical to BC207UV and BC207UV M BC207VIS M differs in the mounted filters and the protection glass BC207UV ...

Page 12: ...avelength of the BC207 Series model Please find informa tion on the pre configured filters and links to the respective website in the tables below Model BC207UV M accommodates for a wavelength range between 245 400 nm Please use the reflective filters NDUVxxB for applications between 245 nm and 350 nm with the BC207UV M For applications above 350 nm absorption filters can be used alternatively BC2...

Page 13: ...rlabs ATT30x laser beam attenuators are particularly suitable as they preserve the polarization size and shape of the beam In case the Beam Profiler Software does not show a Power too high error it can be operated with this setting and the measurement results are reliable However in order to minimize beam distortions introduced by the ND filters it is recommended to select the lowest possible atte...

Page 14: ...o between both remains unchanged 3 1 1 2 CMOS Sensor Protective Glass Window The CMOS sensor is protected by a glass window The type of window depends on the BC207 Series model Camera Beam Profiler Coating Thickness BC207UV M UV Fused Silica UV AR coating 1 mm BC207VIS M ND Filter NG3 1 0 OD 1 mm 3 1 1 3 Trigger Input A TTL trigger input is provided for synchronizing the BC207 Series Camera Beam P...

Page 15: ...M and BC207VIS M The sensor is centered with respect to the mounting thread holes on the bottom of the device Its depth measured from the front surface of the filter wheel is 20 7 mm 0 82 This is also indicated by a fine white line engraved in the housing This line is labeled Optical Measurement Plane in the drawings Please see the dimensions of BC207UV M and BC207VIS M for the precise position of...

Page 16: ...ounting BC207 Series on M2MS AL Please use the mounting adapter for BC207 Series to M2MS in order to mount the BC207UV M or BC207VIS M beam profiler to the M2MS Measurement Extension For a mounting adapter for BC207 onto a preexisting M2MS Extension Set please contact Thorlabs 1 Place the BC207 Series device onto the mounting adapter for the BC207 Series such that the dowel pins on the adapter fit...

Page 17: ...he 8mm long M4 x 0 7 cap screw into the mounting how on the bottom of the moun ting adapter and secure the BC207 Series device on the adapter 3 Place the adapter with the BC207 Series onto the M2MS Measurement Extension such that the three Ø4 mm dowel pins protruding from the M2MS Measurement Extension will fit into the respective holes in the mounting adapter With that the input aperture of the B...

Page 18: ...erating Elements Page 11 MTN026962 D02 4 Secure the adapter with the two enclosed M4 cylinder head screws onto the M2MS Mea surement Extension The BC207UV M or BCVIS M is now securely mounted to the M2MS Measurement Exten sion ...

Page 19: ...Rev 8 1 10 Jan 2022 Page 12 2022 Thorlabs 3 2 2 1 M2MS with BC207UV M and BC207VIS M The operating elements of the combined setup with BC207 Series Camera Beam Profiler mounted to the M2MS Extension Setup for full M2 measurements are as follows ...

Page 20: ...to do that please click the Install button You will then be asked to confirm the installation of further Thorlabs software components Please in stall the instrument driver packages as well as the Firmware Loader Driver Package When all drivers are installed the Read Me comes up Click Next then Finish to complete the software installation 4 2 Connection to the PC Connect the BC207 Series Beam Profi...

Page 21: ...n the application is started the following start screen appears The connected instrument is recognized automatically connected and shown in the Beam Set tings panel Usually the Beam Software connects automatically to the instrument that has been connected first If you have connected more than one Beam Profiler and want to use another than the con nected device select to the icon Device Connection ...

Page 22: ...re all available settings and adjustments to the Beam Profiler can be made It is advisable to read the steps described in the chapter Measurement with the Beam Pro filer carefully in order to setup your Beam Profiler device and application properly When the Beam Profiler Software is started for the first time three preselected windows are opened and arranged automatically Calculation Results 2D Pr...

Page 23: ...S Windows 10 The main window consists of a menu bar 1 a tool bar 2 a status bar 3 and common frame for displaying several child windows When starting the application an additional window is dis played within the main window the Beam Settings 4 panel This panel can be unpinned from the main window and moved to a different display location e g to a second monitor 5 1 Menu Bar All user activities can...

Page 24: ...rue size and also the optical power BMP format Only the bitmap will be shown The dimensions in X and Y direction are not the original ones pixel pitch will be considered as 1 Print With the Print Application Window a screenshot of the Beam Profiler application is printed The Print Active Window entry prints the current active child window of the Beam Profiler ap plication This function gives you t...

Page 25: ...ver the parameters listed below to an external pro gram environment such as LabVIEW Saturation in Total Power Base Line X and Y Peak Value X and Y Distance of Peak to Reference Position X and Y Distance of Centroid to Reference Position X and Y Sigma X and Y Beam Width Clip X and Y Ellipse Diameter Min and Max Gauss Diameter X and Y Ellipticity Camera Temperature Pixel Pitch User Power Offset Seri...

Page 26: ...ossible to create a custom color scale which can be loaded automatically by starting the application To do so a few things need to be considered When starting the software the application loads valid lut files from the folder My Documents Thorlabs Thorlabs Beam LUT A valid lut file must fulfill the following criteria Ordinary text file with 9 columns and 256 rows Values must be tab separated The f...

Page 27: ...age 20 2022 Thorlabs Linear Scale Logarithmic Scale Quad Scale R G B R G B R G B 0 255 0 0 255 0 0 255 0 1 255 0 1 255 0 3 255 0 2 255 0 2 255 0 10 255 0 127 255 0 240 255 0 254 255 0 128 255 0 255 255 0 255 255 0 129 255 0 254 255 0 255 255 0 stands for the intermediary values ...

Page 28: ...l Pixels All pixels are used for calculation no slit emulation Hold Maximum Disabled Approximate Ellipse Enabled The ellipse is approximated to get a smooth surround ing Autoscale to Peak Enabled The diagrams that show intensities are scaled to the peak intensity Profile Cut Position Peak Posi tion The X and Y profiles are taken from the row and column where the peak is located Reference Position ...

Page 29: ...window arrange ments workspaces can be quickly selected Default Settings panel Numeric results 2D projection 3D profile Profile 2D projection 3D profile numeric results X and Y profiles M Beam Quality Measurement X and Y profiles Empty workspace Further the active child windows can be arranged tiled and cascaded Maximize Diagrams turns off the side and top toolbars in all child win dows simultaneo...

Page 30: ...s manual With a click on the link Visit the Thorlabs Website this website is opened in the browser window View Thorlabs LPGL License Agreement will open the license files of the installer package Check for Update searches for available software updates About Thorlabs displays device information and software versions details If you have trouble with the software please submit the version of the app...

Page 31: ... each window Open the Device Connection dialog Restore Beam Settings panel if unpinned or closed Open the Display Settings panel Reset application settings to defaults Open child window 2D Projection Open child window 3D Profile Open child window Calculation Results Open child window X Profile Open child window Y Profile Open child window Plot Position Open child window Plot Power Open child windo...

Page 32: ...f stored Device Data are loaded the location of the file is displayed 5 4 Save Settings The actual settings of the GUI including configurations of the graphical displays and the instru ment setup are automatically saved when exiting the program When starting the Beam Soft ware again the most recent settings are automatically loaded Exception Actual zoom settings of 3D graphs the rotation and trans...

Page 33: ... the Beam Settings panel is the only child window that can be detached When starting the application this panel arranged by default within the main window Drag an drop it to any convenient location within or outside the GUI main window e g to a second PC monitor When detached the Pin icon in the upper right corner changes from to Click to this icon to bring the panel back into the GUI frame The pa...

Page 34: ...lt values are set Parameter Default Value Wavelength 635nm Attenuation dB No Filter 0 dB Power Correction OFF factory calibration active Ambient Light Correction OFF Intensity Threshold 1 00 5 5 1 1 Wavelength Enter the operating wavelength in nm as a precondition for proper measurement of the Total Power It enables consideration of the known response curve stored within the Beam Profiler instrume...

Page 35: ...If you are using external attenuation filters or beam splitters select User Filter and enter its attenuation value into the control on the right Only values between 0 and 100dB are accepted by the software Note The correct selection of this attenuation value is a precondition for a proper power measure ment and for the Ambient Light Correction 5 5 1 3 Power Correction The Power Correction allows t...

Page 36: ...ctive the attempt to activate it lets the software check the cam era for a saved offset If no saved offset is found the Power Correction dialog opens and asks for a power meter value If an offset is recognized it will be applied immediately For this reason it is recommended to perform a power correction if the environment of the instrument was changed 5 5 1 4 Ambient Light Correction It is highly ...

Page 37: ...a camera Beam Profiler or change of the ND filter settings in the software 5 5 1 5 Intensity Threshold The Intensity Threshold applies to the raw data retrieved from the camera and allows to clip the intensities below a user defined threshold Warning Using the intensity threshold may exceed the Calculation Area Clip Level In such case the calculation area will change and this way falsify the beam ...

Page 38: ...l and thus the Intensity Threshold label cannot be displayed 5 5 2 Beam Profiler Information Beam Profiler model serial number driver version and firmware version are read out from the BC207 Series instrument and cannot be changed Beside general information important sensor information is stated 5 5 3 Camera Beam Profiler Parameter This chapter contains a number of important camera settings that a...

Page 39: ...alue Binning Binning 2 x 2 Auto Exposure Control ON Exposure Time NA due to Auto Exposure Gain NA due to Auto Exposure Hot Pixel Correction WEAK Trigger Trigger Mode No Trigger Region of Interest Full Size 5 5 3 1 Binning Binning allows to reduce the data volume by binning 2 x 2 pixels or even more by 4 x 4 This results in shorter processing times for data computation Please be aware that the spat...

Page 40: ...o keep the brightest pixel of the selected ROI at a high saturation level but prevent saturation 100 due to the limited range of the AD converter that is digitizing the image However in case of unstable or pulsed laser power it might be advantageous or even re quired to disable the automatic exposure control and set the optimal values manually For this remove the Auto Exposure Control check mark a...

Page 41: ... hot pixel correction The value is a quantitative measure of how aggressively the camera will remove hot pixels Please be aware that selection of the Moderate and even more so Strong hot pixel correction affects the displayed beam profile especially whenever the beam diameter is very small or has steep edges Selecting strong is results in cleaner displayed profiles for beams with larger dia meter ...

Page 42: ...oftware Trigger can be used for pulsed light sources which do not provide an electrical trig ger signal for synchronization to the beam profiler Also irregularly occurring optical pulses can be captured In the software trigger mode the Beam Profiler Software processes images which exceed a brightness level set by the user The beam profile data may not represent profiles from each discriminated sin...

Page 43: ...the status bar informs you about a waiting software trigger event For frequently occurring pulses it is recommended to set the Exposure Time to a slightly shorter period than the pulse period so that only a single pulse is captured Prevent ambient light from entering the input aperture and use one of the neutral density filters for its attenuation Note that the image brightness of a captured singl...

Page 44: ...tible BNC Jack Note Use only shielded coaxial cables for connecting the trigger source Do not connect a trigger cable without a signal source because it may capture disturbing pulses that may trigger the shutter 2 Click the icon in the tool bar 3 Switch the camera in the beam Software to the mode Single Pulse to activate the response to a hardware trigger Please be aware that discrimination betwee...

Page 45: ... User Defined and the chosen ROI size and position is displayed within the controls on the right These values can also be modified by entering the desired Width Height Left and Top values into the appropriate controls Its unit can be switched between pixels or µm Note The ROI point of origin 0 0 is located in the upper left corner of the entire sensor area so that Left and Top describe the upper l...

Page 46: ...ighlighted green Note The Beam Profiler s point of origin X 0 Y 0 is always fixed to the center of the entire sensor area so that X and Y coordinates have a bipolar range Shifting the ROI off center will maintain the calculated beam position because these data are bound to the entire sensor area and not to the relative ROI coordinates ...

Page 47: ...lation Area can be equal to or smaller than the ROI and defines the image area that is used for all numerical calculations That is all pixels within the ROI are displayed while only the pixels within the Calculation Area are used for calculations Such a limitation is especially advantageous for Selecting and analyzing only a single beam spot among multiple beams Rejecting ambient or stray light Re...

Page 48: ...ically or drag and drop the borders of the user rectangle ellipse All values are in µm or pixels de pending on the unit selection and the point of origin is situated in the upper left corner of the entire sensor area X Y Positions describe the position of the left upper border of the user rectangle ellipse Further a defined calculation area can be rotated by entering numerically the desired rotati...

Page 49: ...yed This is the slowest mode Setting the frames to numbers higher than 1 enables noise reduction This option is helpful for unstable light sources with fluctuating intensity or beam shape or if the update rate on the screen is too high for easy data readout Also use this option to suppress Beam Profiler noise in case of low intensity 5 5 4 3 Clip Level In contrast to the Calculation Area Clip Leve...

Page 50: ...on 5 5 4 7 Profile Cut Position The profile cut position determines the location of the crosshair in the 2D Projection The position of these X and Y cross sections can be fixed to the ROI Center to the centroid to the peak or to a user defined position For the user defined position the X and Y positions are to be entered numerically 5 5 4 8 Reference Position The reference position influences the ...

Page 51: ...ls 1 pixel 6 45 µm The origin of the coordinate system X 0 Y 0 is the sensor center not the image center Positive X values go to the right positive Y values to the top of the image mW The Total Power of the beam is calculated from the integral intensity of the image using the wavelength dependent sensor response the Exposure Time and Gain of the camera as well as the filter attenuation and the pow...

Page 52: ...hat all data points beyond N will be discarded In other words after reaching the maximum number N of data points the plot stops 5 5 6 Translation Stage Control If a translation stage is detected as is the case when a M2MS measurement extension is con nected and powered the topics Translation Stage Control and M2 set appear as the last two topics of the Beam Settings panel The description in this s...

Page 53: ...t Pressing this button interrupts the continuous stage travel to a target position The slider bar on the bottom of the panel has two functions it shows the stage position and the slider can be moved with the mouse in order to start a stage travel M2 Set The panel M2 Set allows to set the lens parameters for the M2MS extension such that the beam waist before the lens can be calculated The Lens Type...

Page 54: ...entation Plot Environment Data Beam Stability Beam Quality M Manual Vergence Measurement Tuning View Beam Overlapping All above windows can be opened and closed by clicking the symbols in the toolbar or by se lecting the entries in the menu Windows Additional child windows are accessible through the menu bar The appearance of the Thorlabs Beam Software can be arranged according to your require men...

Page 55: ... within the selected Region of Interest ROI This window can be opened and closed via the menu item 2D Projection in the window menu or via the toggle button in the toolbar On the left side of the 2D Projection window a toolbar is located with the following toggle but tons Toolbar Icon Associated Action Save Diagram or Image Opens a dialog box to specify the properties of the saved screenshots diag...

Page 56: ...ggling the button Only pixels within this Calculation Area are interrogated and recognized for beam data calculation A drop down menu allows to make a choice from several pre sets additionally a rectangular or elliptical calculation area can be defined by the user Detailed explanations please see in section Beam Settings The crosshair that shows the X and Y profile cuts for calcula tion can be dis...

Page 57: ...tionally from multiple reflections The ROI is selected to 768x768 pixels so that all 3 beams are visible within the 2D Projection window But in order to limit the image interrogation to the main beam the calculation area was chosen much smaller Within this 2D Projection panel coordinates X and Y are defined as follows Independent of the selected unit pixel or µm within the Application Settings pan...

Page 58: ...mouse Rotate Press right mouse button and move mouse Move Press left mouse button and move mouse Zoom Scroll mouse wheel The following table summarizes the toolbar symbols available within the 3D Profile window and its appropriate action Toolbar Icon Associated Action Opens a dialog box to specify the properties of the saved screenshots dia grams Opens the 3D Profile Settings dialog box Toggles th...

Page 59: ...pixel row taken from the received camera image while the Y pro file shows a single pixel column The column and row are defined by the position of cross hair within the 2D Projection graph The yellow curve shows the measured profile while the red curve shows the approximated Gaussian fit function and the blue the approximated Bessel fit The curves can be shown hidden by toggling the appropriate but...

Page 60: ...eft mouse button pressed to a position inside the diagram The current values at the cursor po sition are shown in a rectangle next to the cursor in the colors of the plotted curve 5 6 4 Zooming and Panning Diagrams All diagrams e g X and Y profiles plot diagrams M and divergence diagrams that have a slider can be manipulated for X and Y scale zoom as well as for X and Y positioning pan Zoom Mode T...

Page 61: ...losed via the menu item Calculation Results in the window menu or via the toggle button in the toolbar The width of the columns is predefined but can be resized With the first start of the Beam Soft ware the parameters as shown above are displayed in this table Click the marked green icon in the table in order to select or deselect parameters to be calculated and displayed The fewer calculation re...

Page 62: ...ate fitted curves are still shown in the X and Y Profile win dows if enabled there Centroid Position This parameter is very sensitive to ambient light which may shift the calcu lated centroid See Ambient Light Correction The units of the calculations can be changed in Beam Settings Unit If a calculation failed the value turns to For details on these parameters please see section Application Note 2...

Page 63: ...rs Load Test Parameter Configuration Save Test Parameter Configuration Save Calculations opens a dialog box Select the destination folder see the preview pane Define the file name Select file format txt csv or xls Add date time stamp index optional Click Save Calculations Lock Unlock Test Parameters Load Save Test Parameter Configuration These functions are related to the configuration of the Pass...

Page 64: ...or time stamp optional Save Data Select either the time interval between two records 1 to 106 sec or the n th measurement to be recorded n 1 to 105 Stop Saving after Define when the sequential saving shall be terminated after reaching a certain file size 1 to 100 MB after reaching a certain recording time 1 to 106 sec after reaching a certain number of data sets 1 to 105 Click Start Sequential Sav...

Page 65: ...stage or a Thorlabs RLA Series of dovetail optical rails in combination with a RC series rail carrier and a post Open the Manual Vergence Measurement Window either by selecting the appropriate item from the Menu bar Windows g Manual Vergence Measurement or simply by clicking the icon 1 Click the icon in the left upper corner to open Settings for the Manual Vergence Mea surements Select the beam di...

Page 66: ...te The accuracy of the entered distance between the two positions shift of the Beam Profiler is significant for vergence measurement accuracy Hint If you are using the Beam Profiler together with a M2MS Extension Set the Manual Vergence measurement is even more simple Remove the focusing lens from the system Feed the laser beam into the M2MS BC207 Series input aperture and align it Open in the Bea...

Page 67: ...ical setup Select from the Menu bar Windows Tuning View or simply click the icon The tuning view can display either two needle scales or 4 bar graphs Each scale or graph can be assig ned to one of the following parameters Sensor Saturation Total Power Ellipticity Beam Width 4s X Beam Width 4s Y Peak Position X Peak Position Y Centroid Position X Centroid Position Y Ellipse Diameter min Ellipse Dia...

Page 68: ...07 Series Chapter 5 The Graphics User Interface GUI Page 61 MTN026962 D02 On the scales the observed minimum and maximum values are shown as blue triangles They can be reset using the buttons marked above ...

Page 69: ...n centric Select from the Menu bar Windows Beam Overlapping or simply click the icon Take a snapshot of the reference position by clicking to the button Save Shot 1 or Save Shot 2 The software instantly starts to overlay the live image from the Beam Profiler with the cap tured snapshot The overlay method can be selected in the box Composite Mode Overlay Plus In Plus mode the intensities of the sna...

Page 70: ...ded Overlay Difference Finally in the Difference mode the intensities are subtracted The more regions appear black within the overlay the better the live image fits to the snapshot The centroid shift between snapshot and live image is displayed in X and Y axis direction R is the resulting absolute distance between these centroids For improved visualization of the overlay the intensities of the sna...

Page 71: ...tus Zooming Diagram Axes Move the mouse cursor over an edge of the vertical or horizontal scroll bar slider The cursor changes to ô or ó Press and hold left mouse button and move the mouse This will zoom in on the appropriate part of the diagram axis Return to default view by right clicking to the diagram Panning the Diagram Axes Move the mouse pointer over the center of the vertical or horizontal...

Page 72: ...ak and of X and Y centroid positions can be displayed vs time Toolbar Icon Associated Action Save Diagram or Image Opens a dialog box to specify the properties of the saved diagram or image Save Data Opens a dialog box to specify the properties of the saved calcu lation data Clear all plots Show or Hide the grid in the diagram Autoscale ON OFF Show or hide the cursor ...

Page 73: ...truments is not calibrated vs wavelength it is based on a typical responsivity curve of the used sensor and the manually entered wavelength see Optical Setup Wavelength Toolbar Icon Associated Action Save Diagram or Image Opens a dialog box to specify the properties of the saved diagram or image Save Data Opens a dialog box to specify the properties of the saved calcu lation data Clear all plots S...

Page 74: ...e user adjusts settings This allows to easily monitor the behavior of the beam diameter 5 6 9 4 Plot Gaussian Fit Menu bar Windows Plot Gaussian Fit This window plots the Gaussian Intensity value see Calculation Results which shows the coefficient of determination of the fit Toolbar Icon Associated Action Save Diagram or Image Opens a dialog box to specify the properties of the saved diagram or im...

Page 75: ...I Rev 8 1 10 Jan 2022 Page 68 2022 Thorlabs Toolbar Icon Associated Action Save Data Opens a dialog box to specify the properties of the saved calcu lation data Clear all plots Show or Hide the grid in the diagram Autoscale ON OFF Show or hide the cursor ...

Page 76: ...ation in degrees of the ellipse see Calculation Results Toolbar Icon Associated Action Save Diagram or Image Opens a dialog box to specify the properties of the saved diagram or image Save Data Opens a dialog box to specify the properties of the saved calcu lation data Clear all plots Show or Hide the grid in the diagram Autoscale ON OFF Show or hide the cursor 54 ...

Page 77: ...ure sensor vs time The temperature axis is located to the left yellow curve the centroid position axis blue and green curves is shown to the right Toolbar Icon Associated Action Save Diagram or Image Opens a dialog box to specify the properties of the saved diagram or image Save Data Opens a dialog box to specify the properties of the saved calcu lation data Clear all plots Show or Hide the grid i...

Page 78: ...s Plots the trace of the centroid positions as a blue line Plots the most recent centroid position as yellow dot Plots the trace of the rolling centroid positions as a dark green line Plots the most recent rolling centroid position as a bright green dot Plots the trace of the reference positions as dark red line Plots the reference position as a bright red dot Plots the Gauss Bessel fitted centroi...

Page 79: ...cify the properties of the saved diagram or image Save Data Opens a dialog box to specify the properties of the saved calcula tion data Shows the Settings Dialog see below Reset Data Clears Beam Stability data only Stops and restarts the measurements clears all accumulated plot data Sets the zoom factor so that all data points are located within the diagram area Zoom out to the entire sensor area ...

Page 80: ...ed power range 6 Minimize ambient light entering the Beam Profiler aperture 7 Remove the filter cap 8 Connect the camera using the supplied USB 3 0 cable to the PC as described in Connection to the PC 9 Start the Beam Software 10 Switch on the light source Attention Do not stick anything into the Beam Profiler aperture The protective glass might be scratched Prevent dust or other contamination fro...

Page 81: ...pens and displays the Beam Settings panel the Cal culation Results 2D Projection and 3D Profile Child windows can be opened and closed via the entries in the menu Window or via the symbols in the toolbar of the main win dow The activated windows can be sized and arranged as desired The recognized Beam Profiler will be connected automatically and the continuous image ac quisition starts If more tha...

Page 82: ...rofile is plots the beam intensity with respect to the 3rd dimension Z scale Numerical calculation results are displayed in the appropriate Cal culation Results window The parameters to be calculated can be selected by clicking the icon in left upper corner the Calculation Results window All contents of the child windows including available options are explained in chapter Child Win dows 48 51 54 ...

Page 83: ...lumns Test results will be displayed in the column Test only for those parameters that are selected as test criteria The selected test criteria was fulfilled test passed The test criteria Min was underrun test failed The test criteria Max was exceeded test failed Note As per definition the beam ellipse has a major and a minor axis For a pass fail test a mini mum and maximum value can be entered in...

Page 84: ...cannot be changed In case of troubles please con tact Thorlabs for a solution Load Save Test Parameter Configuration The Load and Save buttons in the Calculation Results toolbar allow you to load and save the configuration of the pass fail test In order to reconstruct a pass fail test configuration automatically with the next session save the parameter to a test parameter configuration file This f...

Page 85: ... be reloaded into the Beam Software and allow to reconstruct the exact image with exception of the total power because the exposure time cannot be saved within a raw file Raw data format cannot be used for import to standard Windows applications bmp is the standard uncompressed RGB 24bit bitmap format Therefore the retrieved camera data are reduced to a 8 bit resolution and saved to the three colo...

Page 86: ...a channel that comprises the transparency information here white 255 for each pixel For this reason PNG are compressed 32 bit images jpg JPEG images are lossly compressed 24bit images The reduced to a 8 bit resolu tion camera image is saved to RGB channels and subjected to a memory saving compression Note Compressed images cannot be imported by the Beam Software ...

Page 87: ...ted values file format The comment Not for import is related only to importing into the Beam Software A data file cannot be imported in order to reconstruct a beam profile Intensity values are saved to a text matrix with a header The 1st value in the 1st line of the matrix represents the intensity of the left upper pixel in the 2D Projection ...

Page 88: ... start index Check the box Sequential Saving Save Data Select either the time interval between two records 1 to 106 sec or the n th measurement to be recorded n 1 to 105 Stop Saving after Define when the sequential saving shall be terminated after reaching a certain file size 1 to 100 MB after reaching a certain recording time 1 to 106 sec after reaching a certain number of data sets 1 to 105 Clic...

Page 89: ...Protocol A dialog box opens Here additional information can be entered in order to save it together with the test report The results of the measurement are saved to a compact test protocol It contains the Beam Profiler data and settings and selected numerical calculation results If the 2D Projection and the 3D Profile windows were activated these plots will also be included 54 ...

Page 90: ...decreasing K stands for poorer quality its reciprocal value M2 M2 1 optimal increasing M for poorer quality is used more often Please do not confuse the beam quality and times diffraction limit factor M2 1 Diffraction Limit Depending on the wavelength l and beam divergence angle q the theoretical limit for the mini mum beam waist diameter d0 is called the diffraction limit The beam waist cannot be...

Page 91: ... is not an indicator of high beam quality Therefore a single shot beam shape measurement from a Beam Profiler does not provide a correct information about the beam quality Although a single Beam Profiler result is not a measure of beam quality the Thorlabs Camera Beam Profiler Series can be used to accurately measure the beam quality For this purpose a beam propagation measurement is carried out a...

Page 92: ...lignment laser The beam under test enters the the focal lens 3 hits the two tilted mirrors 5 and leaves the enclosure towards the Beam Profiler s input aperture 1 The translation stage is moved step wise by the control software and in this way changes the path length between the focal lens and the Beam Profiler The maximum travel range of the stage 100 mm is doubled by the use of two mirrors The r...

Page 93: ...es In other words for a given focal length the smaller the waist diameter the closer M is to 1 The minimum waist diameter increases at a constant M with the wavelength Limitations to the measurement of the beam diameter are given by the capabilities of the Beam Profiler see Technical Data The initial unfocused beam diameter must not exceed the maxi mum measurable beam diameter the waist diameter m...

Page 94: ...eries as well as the former BC106N Series to scan through the light beam in the Z axis for the beam profiler to acquire an M2 value Suitable mounting adapters for the beam profilers of the BC207 Series and BP209 Series are supplied Please see the M2MS website for other adapters and information M2MS M Measurement System Extension Set with adapters for BC207 Series and BP209 Series as well as the al...

Page 95: ... with BC207 Series Camera Beam Profiler The BC207UV M or BC207VIS M in combination with the M2MS extension setup fea tures Accurate M Measurements Measures Divergence Waist Diameter Rayleigh Range and Astigmatism Compatible with CW and Pulsed Laser Sources Short Measurement Cycles Fully ISO11146 Compliant ...

Page 96: ...n damages to the translation stage it is locked when delivered This lock must be removed prior to powering up the stage and it must be re installed for trans portation Additionally the DDS100 stage is fixed at its initial position by a solenoid controlled latch which is the left stop in the photo 2 This latch fixes the stage when the power supply is switched off and releases the stage when power i...

Page 97: ...plied with the M2MS and remove the cover 3 Move the stop latch as indicated in the picture below and place the platform of the stage against the left stop Then install the transportation lock do not tighten the fixing screw yet 4 Push the platform to the left stop turn the lock counterclockwise and tighten the lock screw 5 Place back the top cover and fix it using the 4 screws Now the M2MS is read...

Page 98: ...BC207 Series Chapter 6 Operation Instructions Page 91 MTN026962 D02 6 3 6 1 Mounting the Beam Profiler Please mount your Beam Profiler as described above in chapter Mounting BC207 Series on M2MS AL 9 ...

Page 99: ...ion It is strongly recommended that only the supplied USB cables are used to connect the Beam Profiler and the control PC to the M2MS The use of other than the supplied USB cables may lead to USB connection instabilities Attention Do NOT connect the M2MS to a computer prior to installing the Beam Software 1 Remove the transportation lock 2 Connect AC power to the power supply and its output to the...

Page 100: ...he Device Selection window After the stage is identified and its serial number is read from its EEPROM double click the DDS100 M button in the device selection window 6 3 7 M Measurement Prior to starting the Beam Quality measurements with the M2MS and a BC207 Series Beam Profiler the beam of the laser under test needs to be aligned to the M2MS Measurement Sys tem It is important that the beam cen...

Page 101: ...ect the beam under test into the M2MS a combination of two adjustable mirrors is required Thorlabs offers a variety of such items The beam alignment is executed in 3 steps guided by a software wizard 1 Coarse Alignment Determine the correct location of the Laser Under Test output aperture by means of an auxiliary laser included 2 Beam Alignment of the Laser Under Test for minimum beam displacement...

Page 102: ...fine adjusted using the Alignment feature of the M measurement panel This is executed in two steps Preparation Switch off the alignment laser and replace it with your Beam Profiler Make sure the BC207 beam profiler is connected to the PC via the USB3 0 port When using an older BC106N beam profiler connect the beam profiler to one of the M2MS USB output ports Connection to the PC section Remove the...

Page 103: ...BC207 Series Chapter 6 Operation Instructions Rev 8 1 10 Jan 2022 Page 96 2022 Thorlabs ...

Page 104: ...l time at the end positions can be entered During the loop mode the software automatically cap tures the beam centroids yellow cross hair at the left and right stop Dwell Time Enter the desired time sec Disable the dwelling by clicking to the icon Centroid crosshair of the actual beam position Crosshair of the sensor center Beam Displacement Centroid shift in X Y direction between position 2 and 1...

Page 105: ...wer level must be adjusted in such way that the AD Saturation is between 80 to 95 The green bulb to the right of the numeric field indicates the GOOD range During alignment this condition must not change After initialization the stage is at Position 2 200 mm Click the capture button of Position 2 the centroid is captured and its crosshair color changes to amber As the actual beam centroid that is ...

Page 106: ...962 D02 Centroid captured at Position 2 Click to the Position 1 capture button 0 mm The stage moves to Position 1 and captures the second centroid position Centroid captured at Position 1 Now the beam displacement and the pointing angle are displayed numerically ...

Page 107: ...led bulbs must be at least yellow Well aligned beam position To toggle between the two positions the movement of the stage between the two stop po sitions can be controlled automatically by the software Just push the loop button and enter a convenient dwell time value The stage starts a loop move dwelling at the stop po sition for the given time During the dwelling a realignment can be made Please...

Page 108: ...BC207 Series Chapter 6 Operation Instructions Page 101 MTN026962 D02 Alignment Move Loop To terminate the loop click the button After finishing click Next to continue ...

Page 109: ...tered markers on the CXY1 translator and the lens holder should match place the the mounted focal lens back to the magnetic holder o Make sure that the bullet next to the AD Saturation is still in green or at least yellow o Observe the actual beam position and minimize the difference to the reference using the X Y translators of the lens holder until the indicators are green or at least yellow The...

Page 110: ... into 6 subpanels 1 Toolbar M2 Settings Opens the Settings for the M2 measurement Auto Save Data Save Beam Profile Data during M Measurement Start Stop Starts stops a M2 measurement M Switches to M measurement Divergence Switches to Divergence measurement Save Data After a successful M measurement this button is enabled and plot data can be saved Grid Disables Enables the grid in the diagram PDF T...

Page 111: ...ing The button between the toolbar and the diagram expands the diagram over the entire M win dow 3 Numeric Results In this area the Beam Quality measurement results are displayed in detail Please see section M Measurement Results for more details The displayed parameters can be configured through the icon in the upper left corner of subpanel 3 4 Position Bar The Position Bar below the M Diagram sh...

Page 112: ...culated out of ten frames at the beginning of each beam quality measurement Ellipticity The ellipticity of the fitted to an ellipse beam see Application Note Beam Diameter X µm Beam Diameter Y µm For 4s beam widths these are the ISO11146 compliant 4s beam dia meters in the transformed coordinate system not lab system at the actual Z position In case of ellipse clip level beam widths the shown valu...

Page 113: ... accuracy par ticularly when measuring narrow beams Measurement Parameters Setting the wavelength is mandat ory for a correct M measurement If the lasing wavelength is un known measure the wavelength using a spectrometer Attention Do not use the nominal wavelength of the laser use the actual measured value Accuracy of this input significantly impacts the measurement accuracy Measurement Range The ...

Page 114: ...is highly advised The coarse scan is suitable for a first estimate of the beam waist position or other preliminary measurements Reset Restores the default settings for M settings Parameter Default Setting Beam Width Beam Width Clip 1 e Wavelength 635 nm Timeout 15 sec Start 0 mm Stop 200 mm Min Data Points 10 Scan Method Normal Scan Calculation Area The settings for the Calculation Area can be mad...

Page 115: ...ic Auto Exposure On Ambient Light Correction remains as set Ellipse Clip Level 13 5 Approximate Ellipse On Note It is strongly recommended to run an ambient light correction prior to any measurement and then enable Ambient Light Correction This ensures the most accurate measurement Please be aware of the fact that ambient light correction is disabled any time the Beam Soft ware is started and or t...

Page 116: ...rs an automatic saving of beam profile data when an M measurement is executed 6 3 7 4 1 Saving M Test Results The beam quality measurement results can be saved in two different ways 1 Save Test Results Save measurement data as CSV default The Save Test Protocol dialog opens select the desired path file name and file format csv txt or xls fill in the desired fields and click Save 109 110 82 ...

Page 117: ... M measurement the beam profile calculation results the device data and the M measurement results can be saved automatically at each position of the translation stage To configure this automatic data export click the icon in toolbar on the left side of the M panel A dialog opens Section Data Export Select Enable to activate the automatic export The toolbar icon changes to and the status bar on the...

Page 118: ...BC207 Series Chapter 6 Operation Instructions Page 111 MTN026962 D02 Select Disable after next measurement to stop the automatic export after the first run of the M measurement ...

Page 119: ...vice Data The name of this file is formed by appending the string device to the base file name When M Divergence Measurement Results is enabled the M test results are saved in txt or csv format as well see section Saving M Test Results Section File Select the desired target file folder for the automatic data export Choose a file name Add the date optional Add the time stamp optional Add an index o...

Page 120: ...rmed up depending on the source this might take up to 1 hour The laser output is spatially and temporally stable Start the measurement by clicking the Start button You will be prompted to confirm the laser wavelength Verify the wavelength and click OK While running the measurement most of the buttons and options are disabled e g the M Mea surement Settings and the Toolbar This is intentional and p...

Page 121: ...he case that beam criteria different from the ISO standard beam width criteria were used see M Settings a successful measurement is shown without the ISO indication In general the X and Y axes do not coincide with the lab system described by the X and Y axes Furthermore the M value for X is independent from the one for Y For highly elliptical beams such as those from semiconductor lasers M2X and M...

Page 122: ...lso section M2 Theory Waist Diameter X Y is the beam diameter in the X Y direction at the focal point This is the calculated minimum beam diameter µm derived from the curve fit This value may differ from the smallest measured beam width Waist Asymmetry stands for the ellipticity at the waist position and is calculated by taking the ratio of the waist diameters in both X and Y directions A waist as...

Page 123: ...igmatism is calculated from the Astigmatism values divided by the mean of the Rayleigh Length in X and Y astigmatism_rel _Y _ X R Y R X Z Z Z Z 01 01 1 1 2 Full Divergence Angle is explained in section M2 Theory Divergence Asymmetry is the ratio of the divergence angles in Y and X axes Values differing from 1 0 indicate that the beam ellipticity is changing with Z position for instance when an ell...

Page 124: ...ver the measured curves For bet ter visualization the curves can be zoomed by dragging a rectangle As soon as the mouse pointer hits a measurement point its shape changes to Click this point The position and calculated values corresponding to the clicked point will appear in the Calculations Results of the Selected Point panel Note In contrast to the Results pane the results shown here are calcula...

Page 125: ...he button the active results become the reference Further the reference data are added to the diagram in a different color Reference Diagram Legend Beam Diameter Reference X Beam Diameter Reference Y Hyperbolic Fit Reference X Hyperbolic Fit Reference Y Clicking to the Clear icon deletes the reference data Please refer to section Saving M Test Results for details about how to save the results of t...

Page 126: ...ipse could be calculated if Clip Level Ellipse is se lected as beam width Use a lens with a longer focal length to increase focal beam size The beam does not hit the CMOS sensor Align the beam see section Beam Align ment q Parasitic reflections walk over the CMOS sensor during the measurement This may happen if the beam is not perfectly aligned and or the filters are not parallel to the CMOS chip ...

Page 127: ...l can be in fluenced by every optical element between laser and Beam Profiler For instance a focusing lens could be mounted with a tilt or could produce a height distortion which results in optical ab errations and reduced beam quality Filters and mirrors may impact on the beam profile as well in the case that surfaces are con taminated Clean surfaces according to manufacturer s instructions q Err...

Page 128: ...points is impossible Possible reasons are for example that the beam waist is far away from the scan range or that no focal lens was used Reset the M Settings to default that sets the scan range to its maximum Check your setup to make sure the beam waist is within the scan range If no focal lens was used only a divergence measurement is possible q Error message Waist position outside the scan range...

Page 129: ... width in the focus plane is minimized As the stage moves to the focal plane the Z slider on the bottom right moves under the lens fo cus LF icon The right panel shows the Beam Width and Centroid Position in X and Y Beam Width The displayed beam width is calculated based on the settings chosen in the Set tings Panel of this window opened through the icon on the left Centroid Position The Centroid ...

Page 130: ... the window This will switch the interface to the divergence measurement window 6 3 8 1 Beam Alignment Why Beam Alignment The Beam Profiler has a defined input aperture so when moving the translation stage it must be ensured that the laser beam remains within the aperture Ideally the beam centroid remains centered within the aperture during movement of the stage this is a precondition for correct ...

Page 131: ...Jan 2022 Page 124 2022 Thorlabs 1 Coarse alignment Determine the correct location of the Laser Under Test output aperture by means of an auxiliary laser included 2 Fine Alignment of the Laser Under Test for minimum beam displacement and pointing angle 125 125 ...

Page 132: ...cal lens from the magnetic holder Switch on the alignment laser Align your optical system so that the spot of the alignment laser hits the center of your light source 6 3 8 1 2 Fine Alignment After coarse alignment the beam under test needs to be fine adjusted using the Alignment feature of the M measurement panel This is executed in two steps Preparation Switch off the alignment laser and replace...

Page 133: ...BC207 Series Chapter 6 Operation Instructions Rev 8 1 10 Jan 2022 Page 126 2022 Thorlabs ...

Page 134: ...l time at the end positions can be entered During the loop mode the software automatically cap tures the beam centroids yellow cross hair at the left and right stop Dwell Time Enter the desired time sec Disable the dwelling by clicking to the icon Centroid crosshair of the actual beam position Crosshair of the sensor center Beam Displacement Centroid shift in X Y direction between position 2 and 1...

Page 135: ...ignment the optical power level must be adjusted in such way that the AD Saturation is between 80 to 95 The green bulb to the right of the numeric field indicates the GOOD range During alignment this condition must not change After initialization the stage is at Position 2 200 mm Click the capture button of Position 2 the centroid is captured and its crosshair color changes to amber As the actual ...

Page 136: ...962 D02 Centroid captured at Position 2 Click to the Position 1 capture button 0 mm The stage moves to Position 1 and captures the second centroid position Centroid captured at Position 1 Now the beam displacement and the pointing angle are displayed numerically ...

Page 137: ...led bulbs must be at least yellow Well aligned beam position To toggle between the two positions the movement of the stage between the two stop po sitions can be controlled automatically by the software Just push the loop button and enter a convenient dwell time value The stage starts a loop move dwelling at the stop po sition for the given time During the dwelling a realignment can be made Please...

Page 138: ...BC207 Series Chapter 6 Operation Instructions Page 131 MTN026962 D02 Alignment Move Loop To terminate the loop click the button After finishing click Next to continue ...

Page 139: ...e measurement M Switches to M measurement Divergence Switches to Divergence measurement Save Data After a successful Divergence measurement this button is enabled and plot data can be saved Grid Disables Enables the grid in the diagram PDF Test Protocol Saves the results of a Divergence measurement into a PDF file 2 Divergence Diagram The measured data are plotted in the diagram The 4 buttons abov...

Page 140: ...wing information Parameter Explanation Position mm The actual Z position of the translation stage for the selected data point Azimuth Angle deg For 4s beam widths the azimuth angle is the absolute azimuth angle calculated in accordance with ISO11146 1 using the 4s beam widths Note that the rotation range is not identical to the Orientation used for the ellipse Rotation angle range In case of ellip...

Page 141: ...ies Chapter 6 Operation Instructions Rev 8 1 10 Jan 2022 Page 134 2022 Thorlabs Delay Line Measurement range difference between Start and Stop positions Wavelength setting not relevant for divergence calculation ...

Page 142: ...d values for Stop are 5 mm Stop stage length Note It is advisable to set up a scan range 40 mm to ensure higher accuracy A scan over the entire translation length is often the best choice Timeout is the max waiting time for a valid camera image This is to allow the Auto exposure function to obtain a valid camera image Stage Position After Scan is not relevant for divergence measurement Angle Unit ...

Page 143: ...ngs for attenuation filter wheel are changed in the software 6 3 8 4 Saving the Divergence Measurement Results Besides the standard function Save Divergence Measurement Results the Thorlabs Beam Software offers an automatic saving of beam profile data when a Divergence measurement is executed For details please see section Saving the M Measurement Results Note The Divergence measurement results ca...

Page 144: ...scales automatically to the recorded beam widths 6 3 8 6 Divergence Measurement Results The green bulb indicates that the measurement was successful These values can also be found in the listing of the complete Results Negative values indicate a converging beam while positive values indicate a diverging beam Note All results are calculated from the applied linear fit Full Divergence Angle X Y is e...

Page 145: ... Chapter 6 Operation Instructions Rev 8 1 10 Jan 2022 Page 138 2022 Thorlabs Reference Measurement The actual measurement results can be saved and used as reference afterwards same as for M Measurement Results 118 ...

Page 146: ...x ample collimation can be optimized until the beam width in the focus plane is minimized As the stage moves to the focal plane the Z slider on the bottom right moves under the lens fo cus LF icon The right panel shows the Beam Width and Centroid Position in X and Y Beam Width The displayed beam width is calculated based on the settings chosen in the Set tings Panel of this window opened through t...

Page 147: ...etermines the distance from the beam waist to the position where the beam diameter has increased by a factor of Ö2 1 41 compared to the minimum diameter at the waist From the equation for d z it can be seen that the beam diameter increases linearly with z in the far field z zR The full divergence angle Θ can be calculated by For laser beams with fundamental mode TEM00 Gaussian Beam shape it can be...

Page 148: ...ider Reasons for Non Ideal Gaussian Beam with M2 1 Using a Gaussian beam is preferred because of its minimum divergence angle and the ability to achieve the minimal focus diameter Differences to Gaussian shape can be due to existence of higher order modes amplitude and phase distortions due to inhomogeneous gain medium in lasers presence of extraordinary beams These distortions lead to a larger be...

Page 149: ...BC207 Series Chapter 6 Operation Instructions Rev 8 1 10 Jan 2022 Page 142 2022 Thorlabs The appropriate power density at z0 is reduced by a factor M Also the Rayleigh Length increases by a factor of M ...

Page 150: ...ications In 32 bit systems only the 32 bit components are installed to C Program Files In 64 bit systems the 64 bit components are being installed to C Program Files while 32 bit components can be found at C Program Files x86 In the table below you will find a summary of what files you need for particular programming en vironments Programming environment Necessary files C C CVI h header file lib s...

Page 151: ...p Online Help for VXIpnp Instrument driver C Program Files IVI Foundation VISA WinNT TLBC2 Manual TLBC2 html NI LabVIEW driver The LabVIEW Driver is a 32 bit driver and compatible with 32bit NI LabVIEW 2016 and higher only C Program Files National Instruments LabVIEW xxxx Instr lib TLBC2 TLBC2 llb LabVIEW container file with driver vi s and an example LabVIEW xxxx stands for actual LabVIEW install...

Page 152: ...BC207 Series Chapter 7 Write Your Own Application Page 145 MTN026962 D02 C Program Files IVI Foundation VISA WinNT TLBC2 Examples CVI C Sample sample c ...

Page 153: ...Files IVI Foundation VISA WinNT TLBC2 Examples MS VS 2012 CSharp Demo BC2_CSharpDemo BC2_CSharpDemo csproj Example for LabView C Program Files National Instruments LabVIEW xxxx Instr lib TLBC2 TLBC2 llb LabVIEW container file with driver vi s and an example LabVIEW xxxx stands for actual LabVIEW installation folder Example for Python Solution File Python wrapper C Program Files IVI Foundation VISA...

Page 154: ... Win64 Bin TLBC2_64 dll Note This instrument driver is required for all development environments Header file C Program Files x86 IVI Foundation VISA WinNT include TLBC2 h C Program Files IVI Foundation VISA Win64 include TLBC2 h Static Library C Program Files x86 IVI Foundation VISA WinNT lib msc TLBC2_32 lib C Program Files IVI Foundation VISA Win64 lib msc TLBC2_32 lib C Program Files IVI Founda...

Page 155: ...on VISA WinNT TLBC2 Examples CVI C Sample TLBC2_CSample prj Source file C Program Files x86 IVI Foundation VISA WinNT TLBC2 Examples CVI C Sample sample c Example for C Solution file C Program Files x86 IVI Foundation VISA WinNT TLBC2 Examples MS VS 2012 CSharp Demo BC1_CSharpDemo sln Project file C Program Files x86 IVI Foundation VISA WinNT TLBC2 Examples MS VS 2012 CSharp Demo BC1_CSharpDemo BC...

Page 156: ...isplays relevant Beam Software data In case of a support request please submit the software version of the application This will help to locate the error 8 2 Cleaning Please clean the glass window which protects the sensor with compressed air or ethanol and cleaning tissues only ND Filters ND filters see Filter Wheel can be cleaned by conventional methods using pure ethanol and or cleaning tissue ...

Page 157: ...image The Beam Software selects a stored camera image automatically if no camera is found dur ing program start This is indicated by the image name in the status bar Connect a BC207 Beam Profiler to the PC and wait a few seconds until its LED lights up green Click Refresh Device List in the Device Selection panel Select the instrument and click Close See chapter Start the Application for a detaile...

Page 158: ...jack Provide a trigger signal q Menu toolbar and setting controls react slowly The performance of your PC s graphics adapter may be too poor Particularly the 3D Pro file window is resource consuming at high resolution which can decrease its update rate significantly See System Requirements The AD converter was set to Precision mode 12 bit data see Bit Depth Settings 2 ...

Page 159: ...ated Explanation Some pixels within the selected ROI or Calculation Area are saturated because they reach the maximum digit value 4095 in Precision Mode 12 bit data Therefore the local beam intensity may be even higher than displayed Beam parameters cannot be calculated correctly Resolving Decrease Exposure Time and Gain settings or reduce the beam intensity using a higher attenuation ND filter of...

Page 160: ...on The lowest pixel intensity within the selected camera ROI or Calculation Area is too high Therefore the beam edges cannot be detected or distinguished from a constant ambient light level The reasons are either the laser beam diameter is wider than the chosen ROI or the ambient light is too high Beam parameters cannot be calculated correctly Resolving Select the ROI so that its height and width ...

Page 161: ...on of the camera s baseline with ambient light valid at different exposure times An outstanding property of the ALC is that the original baseline of the camera black level is corrected for the average intensity of the ambient light noise This turns out to be a significant advantage particularly for M measurements the 4s values can be determined with a higher accuracy as in this case the interferen...

Page 162: ...d by the formula According to ISO11146 1 if the ellipticity is larger than 0 87 the beam profile may be con sidered to be of circular symmetry at that measuring location In this case ISO11146 1 allows the calculation of only one common 4s beam width 4s simplified Beam Diameter 4s simplified is the diameter derived from the second moment calculation on radial distance pixel centroid Effective Beam ...

Page 163: ...ensity SUM of pixels taken over the entire area AD Saturation Saturation level of the instrument s AD converter For a good SNR signal to noise ratio the saturation level should be not below 40 and not be above 95 Total Power Total power within the Calculation Area Peak Density Power on peak pixel divided by its area in µm 9 4 Ellipse Fitted The beam shape is fit to an ellipse using the set clip le...

Page 164: ...e supports a variable clip level the beam width is always dis played with its clip level in brackets Note Please note that Beam Width is always the diameter not the radius of the beam 9 6 Gaussian Fit Measurement The beam profiles of coherent light sources such as lasers and the output of fibers show a distribution more or less close to Gaussian If focusing a Gaussian beam it converges into a wais...

Page 165: ...location with highest intensity along the propagation direction Its dis tribution can be described by a Bessel function of the first kind Ideal Bessel beams do not exist but a good approximation a Bessel Gauss beam can be achieved by focusing a Gaussian beam using an axicon lens a narrow annular aperture or a axisymmetric diffraction grating The output of some step index fibers can also have a pro...

Page 166: ...ts 7 AR Coating Wavelength Range No AR Coating Available 350 700 nm Three Filters 650 1050 nm Three Filters Reflective Neutral Density Filters Nominal Attenuation Values 20 dB 30 dB 40 dB NA Sensor Chip Sony IMX264LLR Windowless 11 1 mm Diagonal 5 0 MP Aperture Size Max 8 45 mm x 7 07 mm Pixel Size 3 45 µm x 3 45 µm Resolution max 2448 x 2048 pixel ROI Selectable Camera Shutter Global Binning 1 x ...

Page 167: ...d if exposed to incident powers above 1 W for more than a few seconds 4 700 nm depending on beam diameter and ND filter 5 Damage threshold data is currently not available for the BC207 beam profilers For applications with pulsed lasers we recommend the following procedure as a guideline for determining a safe upper limit Set the beam profiler to the maximum integration time i e set the exposure to...

Page 168: ...and BC207VIS M The outer dimensions of all BC207 Series models are identical Thei only differ by the protec tion glass US or VIS and the filters in the filter wheel Metric and imperial version have 1 4 20 tapped mounting holes while metric devices have M6 x 1 0 tapped mounting holes ...

Page 169: ... ND Filter 200 nm 1200 nm NDUV30B 30 dB UV Fused Silica Reflective ND Filter 200 nm 1200 nm NDUV40B 40 dB UV Fused Silica Reflective ND Filter 200 nm 1200 nm 1 These filters are provided for use near the 400 nm upper wavelength range of the BC207UV M BC207VIS M Name on Filter Wheel Filter Type NE20B A 20 dB Absorptive ND Filter AR Coated 350 700 nm NE40B A 40 dB Absorptive ND Filter AR Coated 350 ...

Page 170: ... No Upper Limit Typical M Accuracy 5 Depending on Optics and Alignment Minimum Detectable Diver gence Angle 0 1 mrad Applicable Light Sources CW Pulsed Size 300 mm x 175 mm x 109mm without Beam Profiler Typical Measurement Time 15 30 s Depending on Beam Shape and Settings 1 Depending on the Beam Profiler Type 10 5 Wavelength Response 1 Wavelength Dependent Sensitivity of BC207 Models The following...

Page 171: ...r values when a filter is used The range within the dashed boundary lines stands for the highest attenuation that is available from the filter wheel 40 dB for BC207UV 60 dB for BC207VIS With other filter settings the power range is located between unbroken and dashed lines The max and min applicable power strongly depends on the actual beam diameter As for this reason find first the beam diameter ...

Page 172: ...igger selected Software Trigger OFF 50 min AD saturation Hardware Trigger OFF Rising Edge Single Pulse 100ms Target Delay Repetitive Pulses 1 000kHz Rep Rate 10 8 Compatibility with Older Hardware The Beam Software is downwards compatible with the following discontinued hardware com ponents BC106N UV BC106N VIS Camera Beam Profiler Electrical connections and mechanical setup should be carried out ...

Page 173: ...nsional 3D 3 Dimensional ADC Analog to Digital Converter AL Aluminum AR Anti Reflection BC Beam Profiler Camera CA Calculation Area cw Continuous Wave constant power source GUI Graphical User Interface ND Neutral Density PC Personal Computer FPS Frames Per Second ROI Region Of Interest USB Universal Serial Bus UV Ultra Violet wavelength range VIS VISible wavelength range ...

Page 174: ...personnel Before applying power to the PC system used to operate the Beam Profiler make sure that the protective conductor of the 3 conductor mains power cord is correctly connected to the protect ive earth contact of the socket outlet Improper grounding can cause electric shock with dam ages to your health or even death The instrument must only be operated with a duly shielded and low resistance ...

Page 175: ...BC207 Series Chapter 10 Appendix Rev 8 1 10 Jan 2022 Page 168 2022 Thorlabs 10 11 Certifications and Compliances ...

Page 176: ...ths start ing with the date of shipment in accordance with and subject to the terms and conditions set forth in Thorlabs General Terms and Conditions of Sale which can be found at General Terms and Conditions https www thorlabs com Images PDF LG PO 001_Thorlabs_terms_and_ 20agreements pdf and https www thorlabs com images PDF Terms 20and 20Conditions 20of 20Sales_Thorlabs GmbH_English pdf 10 15 Ex...

Page 177: ... of Life Policy WEEE Thorlabs verifies our compliance with the WEEE Waste Electrical and Electronic Equipment direct ive of the European Community and the corresponding national laws Accordingly all end users in the EC may return end of life Annex I category electrical and electronic equipment sold after August 13 2005 to Thorlabs without incurring disposal charges Eligible units are marked with t...

Page 178: ...47 Child Windows 149 Cleaning 13 Connection to the PC 154 Coordinate systems D 31 Dark Level 77 Data Export 74 Default Value 14 74 Device Selection 114 Divergence Angle 114 Divergence Assymetry 132 Divergence Display 123 136 Divergence Measurement 137 Divergence Results 135 Divergence Settings 13 Driver Installation 149 Duster Spray E 156 Eccentricity 156 Ellipse fit 156 Ellipticity 150 Error Mess...

Page 179: ...it 69 Plot Orientation 65 Plot Positions 66 Plot Power 64 Plots 31 Power Correction 164 Power ranges 152 Power too high 152 Power too low 31 Precision Mode 31 74 Preview Image 14 Program Start R 154 Raw Data Measurements 114 140 Rayleigh length 31 74 Region of Interest 2 Requirements 31 74 ROI 92 RS232 S 167 Safety 31 Saturation Levels 77 Save Measurement Results 25 Save Settings 7 Sensor Position...

Page 180: ...metry 140 Waist diameter 152 Warnings 31 74 140 Wavelength 163 Wavelength Dependent Loss of VIS ND Filters 163 Wavelength Dependent Reflectance of AR Coating on UV ND Filters 163 Wavelength Dependent Sensitivity 164 Wavelength Range 163 Wavelength Response X 52 X Y Profile ...

Page 181: ...www thorlabs com ...

Reviews: