System control: System states
2-7
C O N F I D E N T I A L
– limited rights
User Manual
Revision A
Feb 2018
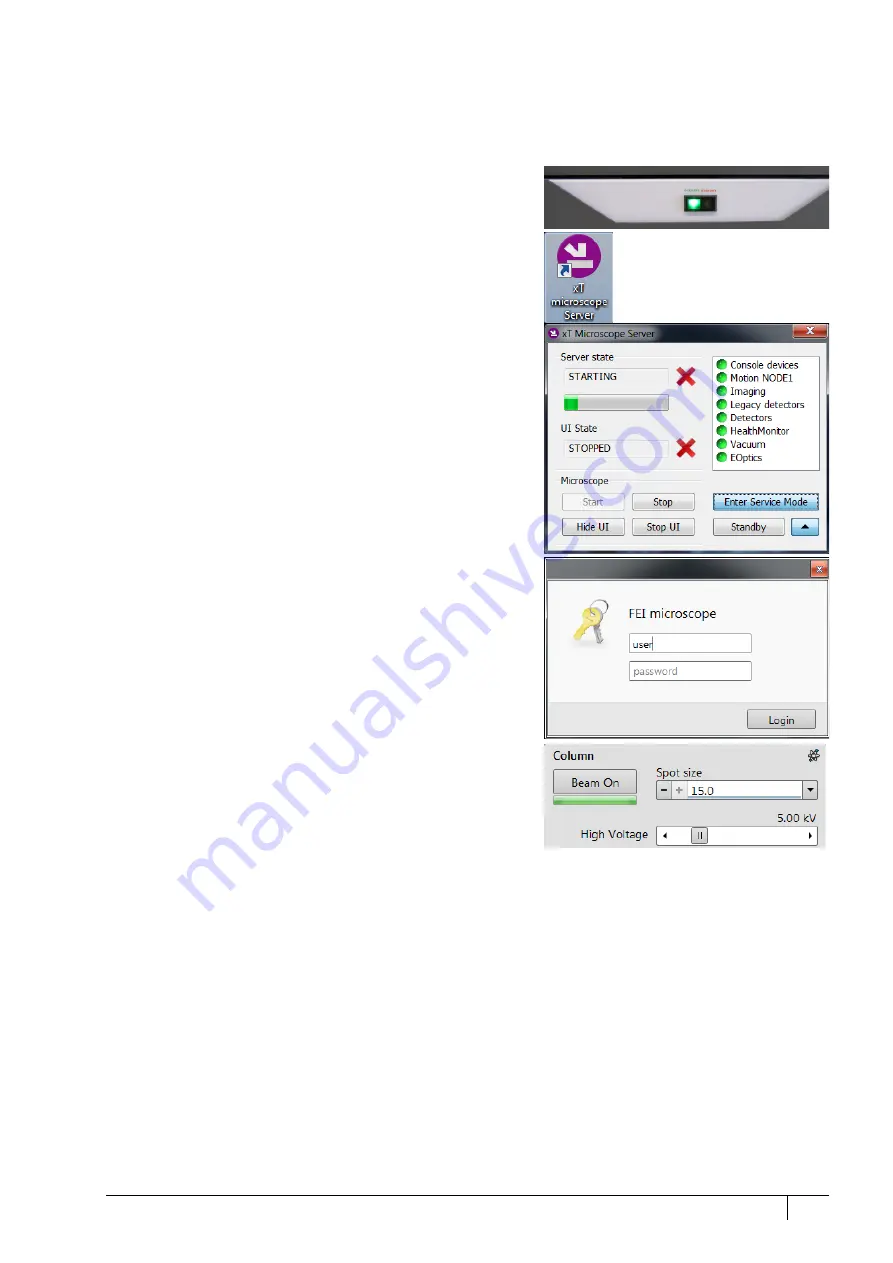
To bring the system back to operation, follow this procedure:
C a u t i o n !
When the Standby state was just entered, wait a minimum of 10 seconds before starting the microscope operation again
(by pressing the power button on the microscope front control panel)!
1.
Push the amber
Power
button on the Microscope console panel
– it changes to green
(a)
.
2.
Double-click on the
xT microscope Server
icon to start the
software (all visible LED’s should be green – Initialized).
3.
Click on the
Start
button to start the server. Wait until all
elements are fully functional (green – Initialized).
4.
Click on the
Start UI
button to start the Microscope Control
software. The main window appears behind the
UI Log On
dialog.
Note
This step can take place automatically, if the Advanced / Autorun
UI check box has been ticked.
Now the system is in the Overnight state. To proceed to the
Full
operation
state, follow this procedure:
5.
Enter your
Username
and a
Password
(b)
.
6.
Click on the
Column
module /
Beam On
button to start the
beam. The source awaking progress bar indicates the actual
status and the button turns orange when finished.
Note
d)
We strongly recommend always leaving the chamber evacuated
when it is not being used. When the sample chamber is left in the
LoVac mode, water vapor is likely to accumulate in it, PVP lifetime
decreases, and the water reservoir or gas cylinder empties prematurely.
e)
Waiting for a new user leaves the status of the Microscope Control
software non-operational and only the xT microscope Server software
is running. Therefore changing users does not require Logging off /
Logging on at the Windows 7™ level.


