21
Instructions to Our Customer / End User
! WARNING: If the burner does not operate properly after depressing the oil
primary reset button, turn off the electrical power to the furnace and close the
manual oil shutoff valve. Immediately contact a qualified heating contractor for
service.
Before leaving a new installation, the installer should show the customer or end user
where the furnace instruction manual is kept. He should also discuss the following points:
1) Describe the general operation of the furnace and, if properly equipped, the
cooling system.
2) Show the location of the furnace air filter(s) and those in the duct system, if
equipped. Demonstrate how to remove, clean, and replace the air filter(s).
3) Demonstrate how to set and adjust the room air temperature using the room
thermostat.
4) Demonstrate how to operate (turn on and off), the heating system and, if properly
equipped, the cooling system and the circulating air blower.
5) Show the location of the oil primary safety control in the furnace. Describe when
and demonstrate how to depress the oil primary reset button.
SERVICE
Control Diagnostics
The control boards are equipped Input Status LEDs. These are intended to provide a
quick view into furnace performance without requiring a voltmeter.
UT Control
Normal Operation Indicators
Thermostat Inputs: Green LEDs indicate 24V signal present at terminal.
Status: Red LED is on solid to indicate valid input signal. In Standby Red
LED is off.
Fault LED Indicator
Limit: Red LED will flash rapidly while 120VAC is missing from the limit
switch.
NRG Max Control
Normal Operation Indicators
Thermostat Inputs: Amber LEDs indicate 24V signal present at terminal
Status: Blue LED pulses at various speeds to indicate operational state
24V Transformer: Green LED indicates that 24V transformer is powered
Blower: Green LED indicates Blower Relay is energized
Burner: Green LED indicates Burner TT Relay is energized
Fault LED Indicator
Limit: Red LED indicates that High Limit is Open
Summary of Contents for OD6FA072D48
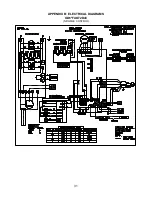
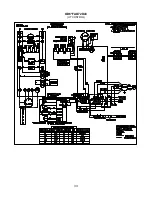
Page 32: ...31 APPENDIX B ELECTRICAL DIAGRAMS OD6 FAO72D48 NRGMAX CONTROL...
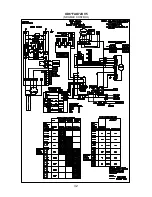
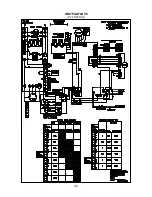
Page 33: ...32 OD6 FAO72DV5 NRGMAX CONTROL...
Page 34: ...33 OD6 FAO72D48 UT CONTROL...
Page 35: ...34 OD6 FAO72DV5 UT CONTROL...
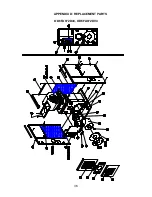
Page 37: ...36 APPENDIX D REPLACEMENT PARTS OD6FA072D48 OD6FA072DV4...
Page 38: ...37...
Page 39: ...38 OD6RA072D48 OD6RA072DV4...
Page 40: ...39...
Page 41: ...40...
Page 42: ...41...
Page 43: ...42...


