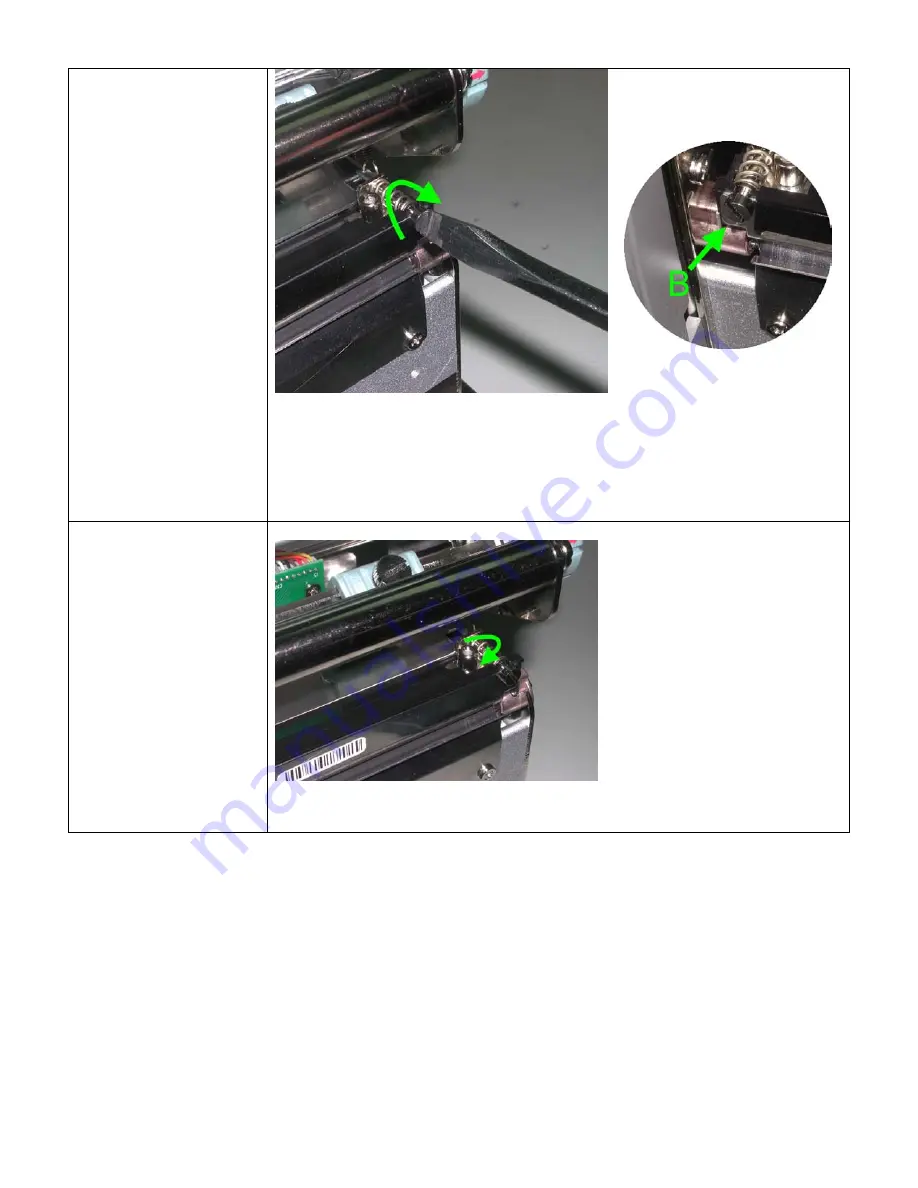
3. Move the Print Line
all the way back by
turning the screws
on each side of the
Printhead (marked
B) counterclockwise
4. Then turn the
screws clockwise a
quarter turn at a
time to move the
Print Line forward.
Adjust both screws
by the same
amount to ensure
that the Print Line
and the Platen
Roller are parallel.
One full turn of the screws (marked B) will move
the Thermal Printhead 0.5mm (.02”).
5. Once the Print Line
Adjustment is
completed, use a
flat tip screwdriver
to tighten the
screws on each side
of the Printhead.
6. Print a test label
with a black bar
across the entire
width of the label to
check print quality
and repeat steps 4
and 5 as necessary
to achieve proper
print quality.
- 36 -


