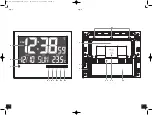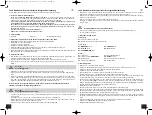
Radio-controlled wall clock with automatic backlight
Radio-controlled wall clock with automatic backlight
12
13
• If the clock cannot detect the DCF-signal (for example due to disturbances, transmitting distance,
etc.), the time can be set manually. The DCF symbol disappears and the clock will then work as a nor-
mal quartz clock. (see: Manual setting of the clock and calendar).
7. Radio-controlled time reception
The time base for the radio-controlled time is a caesium atomic clock operated by the Physikalisch Tech-
nische Bundesanstalt Braunschweig. It has a time deviation of less than one second in one million years.
The time is coded and transmitted from Mainflingen near Frankfurt via frequency signal DCF-77 (77.5
kHz) and has a transmitting range of approximately 1,500 km. Changeover from summer time or winter
time is automatic. In Daylight Saving Time DST is shown on the LCD. The quality of the reception
depends mainly on the geographic location. Normally there should be no reception problems within a
1,500 km radius around Frankfurt.
Please take note of the following:
• The recommended distance to any interfering sources like computer monitors or TV sets is at least 1.5
- 2 metres.
• Inside ferro-concrete rooms (basements, superstructures), the received signal is naturally weakened.
In extreme cases, please place the unit close to a window to improve the reception.
• During night-time, the atmospheric interference is usually less severe and reception is possible in most
cases. A single daily reception is adequate to keep the accuracy deviation under 1 second.
8. Operation
• Press and hold
▲
/12/24
or
▼
/°C/°F
button in the setting mode for fast running.
• The instrument will automatically quit the setting mode if no button is pressed within 15 seconds.
8.1 Manual setting of the clock and calendar
• Press and hold
MODE/SET
button in normal mode for three seconds.
• The time zone correction (0 defaults) appears on the display.
• The time zone correction is needed for countries where the DCF signal can be received but the time
zone (+12/-12) is different from the DCF time (e.g. +1=one hour later).
• Press the
▲
/12/24
or
▼
/°C/°F
button to adjust the time zone correction.
• Press the
MODE/SET
button again to make the settings in the following sequence: hours, minutes,
seconds, year, month, day, and day-of-the-week language. Press the
▲
/12/24
or
▼
/°C/°F
button to
adjust it.
• Confirm with the
MODE/SET
button.
• Day-of-the-week language: German (GER), English (ENG), French (FRE), Spanish (SPA), Dutch (DUT),
Italian (ITA), Polish (POL) and Czech (CZE).
• The manually set time will be overwritten by the DCF time when the signal is received successfully.
8.2 24 and 12 hours display
• Press the
▲
/12/24
button in normal mode to choose between 24- and 12 HR system (AM or PM
appears on the display).
• If the 12 HR system is chosen, the date display automatically moves from the European format (at first
the day then the month) to the American format (at first the month then the day).
8.3 Temperature display
• Press the
▼
/°C/°F
button to change between °C (Celsius) or °F (Fahrenheit) as temperature unit.
8.4 Setting of the alarm
• To enter alarm mode, press
MODE/SET
button in normal mode.
• AL and 0:00 (default) or the last adjusted alarm time appear on the display.
• Press and hold
MODE/SET
button for three seconds.
• The hour digits will be flashing.
• Press the
▲
/12/24
or
▼
/°C/°F
button to adjust hours.
• Confirm the setting with the
MODE/SET
button and set minutes in the same way.
• Confirm with the
MODE/SET
button.
• The display shows the adjusted alarm time.
• Press the
MODE/SET
button again to return to the current time.
8.5 Activate and deactivate the alarm
• To activate and deactivate the alarm function press the
ALARM/ON/OFF
button in normal mode.
• The alarm symbol or no alarm symbol appears on the display.
• When the adjusted alarm time is reached, the alarm will ring.
• The alarm symbol will be flashing.
• Press any button and the alarm will stop.
• If the alarm is not stopped manually, the increasing alarm will automatically turn off after two minutes
and will be reactivated at the same time.
• The alarm symbol stays in the display.
• When the alarm rings, press the
SNOOZE
button and the snooze function will be activated.
• Once the snooze function will be activated, Zz will be flashing on the display.
• The alarm will be interrupted for 4 minutes.
• The snooze function can be activated up to eight times.
• To turn off the snooze function press the
ALARM/ON/OFF
button.
• The snooze symbol disappears.
8.6 Backlight
• The device is equipped with a backlight which is also visible in bright ambient light and a night light-
ing which enables the user to read the display in the dark.
8.6.1 Battery operation
• Press the
SNOOZE
button to activate the backlight for 5 seconds.
• Slide the
ON/ECO/OFF
switch to ECO or ON and the night lighting turns on automatically as soon as
the light sensor registers darkness.
• To deactivate the night lighting slide the
ON/ECO/OFF
switch to the position OFF.
8.6.2 Adapter operation (optional)
•
Note:
Continuous backlight operation will only work with power adaptor!
• To activate the backlight permanently, slide the
ON/ECO/OFF
switch to the position ECO or ON.
• In the position ON the backlight is permanently active (by daylight and darkness)
• In ECO position the night lighting will be activated at darkness.
• To deactivate the permanent backlight and the night lighting slide the
ON/ECO/OFF
switch to the
position OFF.
• Press the
SNOOZE
button to activate the backlight for 5 seconds.
* Backlight via
SNOOZE
button (5 seconds)
9. Positioning and fixing
• Hang the clock with one to three stable nails or screws with plugs using the wall mount holes.
• With the foldable leg the instrument can be placed onto flat surfaces.
•
Note:
If you operate the clock with an adapter, insert the cable into the provided cable holder on the
back.
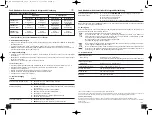
Function of the backlight
with battery
with adaptor
by daylight
at darkness
by daylight
at darkness
Switch at the
No
Night-
Permanent
Permanent
position “ON”
backlight
lighting
backlight
backlight
*
*
Switch at the
No
Night-
Permanent
Night-
position “ECO”
backlight
lighting
backlight
lighting
*
*
*
Switch at the
No
No
No
No
position “OFF”
backlight
backlight
backlight
backlight
*
*
*
*
TFA_No. 60.4508_Anleit_10_13 16.10.2013 11:35 Uhr Seite 7


