CH
ID
Mo
Ch
C02
Pro
ETUSPE>TUCPHA
>
NCNHEALNSNEETLUSPETUP
PR
PR
CH
ID
de
Mode
CH
01
01
_
_
_
_
_
_
_
an/FCrehqan/Freq
02
g
NPurmog
Num
01
02
C023
_
_
_
_
_
_
_
ChannC
elhIaDnnel
Id
C04
03
03
_
_
_
_
_
_
_
TV
SysTteVmSystemPAL-B
04
S42
NICAM
Off
SETUP
MENU
<Setup>
Video
<Setup>
Video
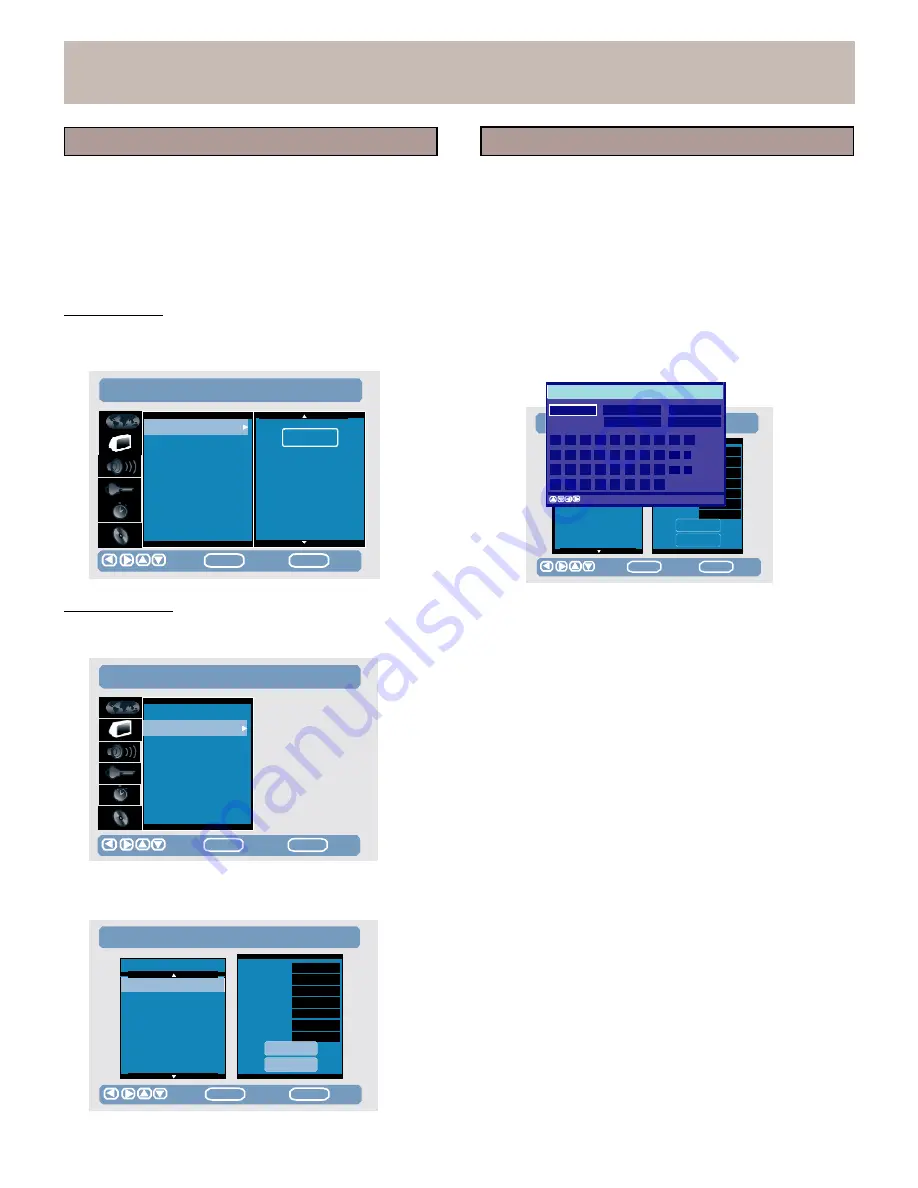
The
Setup
Video menu allows
you
to
perform
Channel
Scan,
Channel Setup,
and
to
set
Screen
format
and
Video
Output
.
1.
Press
SETUP.
2.
Use
the
arrows
keys
to
select
Setup
Video.
3.
Use
the
arrow
keys
to
select
and
set
the
following:
Channel
Scan
The
system
automatically
searches
for
all
channels
that
you
can
receive.
This
may
take
several
minutes.
2.
Use
the
up/down
arrow
keys
to
select
a
channel.
The
right
hand
box
will
contain
additional
information
for
the
selected
channel.
In
the
message
box,
to
key
in the Channel
ID
follow
the
instructions
below:
(1)
Use
the
arrow
keys
to
highlight
Channel
ID.
(2)
Press the right
arrow key,
a
keyboard will appear.
(3)
Use the arrow
keys
to
key in the ID.
(4)
Select
done
to
confirm.
SETUP
>
VIDEO
Channel
Scan
S
Delete
Clear
Done
Backsp
Cancel
Channel
Setup
Screen
Format
Video
Output
Start
0
1
2
3
4
5
6
7
8
9
A
B
C
D
E
F
G
H
I
J
K
L
M
N
O
P
Q
R
S
T
U
V
W
X
Y
Z
.
_
move
caret.
MENU
switch
Lowercase/Uppercase
G
05
S43
06
S44
Fine
Tune
Save
0
Move
ENTER
Select
SETUP
Exit
07
S45
Cancel
Move
ENTER
Select
SETUP
Exit
Channel Setup
After
Channel
scan,
to
setup
the
Channels,
follow
the
instructions
below:
SETUP
>
VIDEO
3.
To
delete
a
channel
from
the
list,
use
the
EDIT
key
on
the
remote
control
to
open
the
Channel
ID
menu, then
select
delete
and
select
done
to
confirm.
Channel
Scan
Channel
Setup
Screen
Format
Video
Output
Move
ENTER
Select
SETUP
Exit
1.
Press
the
Right
arrow
key.
A
list
screen
will
appear.
SETUP
>
CHANNEL
SETUP
PR
CH
ID
01
C02
02
C03
03
C04
04
S42
05
S43
Mode
Chan/Freq
Prog
Num
Channel
Id
TV
System
NICAM
Fine
Tune
CH
02
01
PAL
-BG
Off
0
06
S44
07
S45
Save
Cancel
Move
ENTER
Select
SETUP
Exit
19


