


EN
21
20
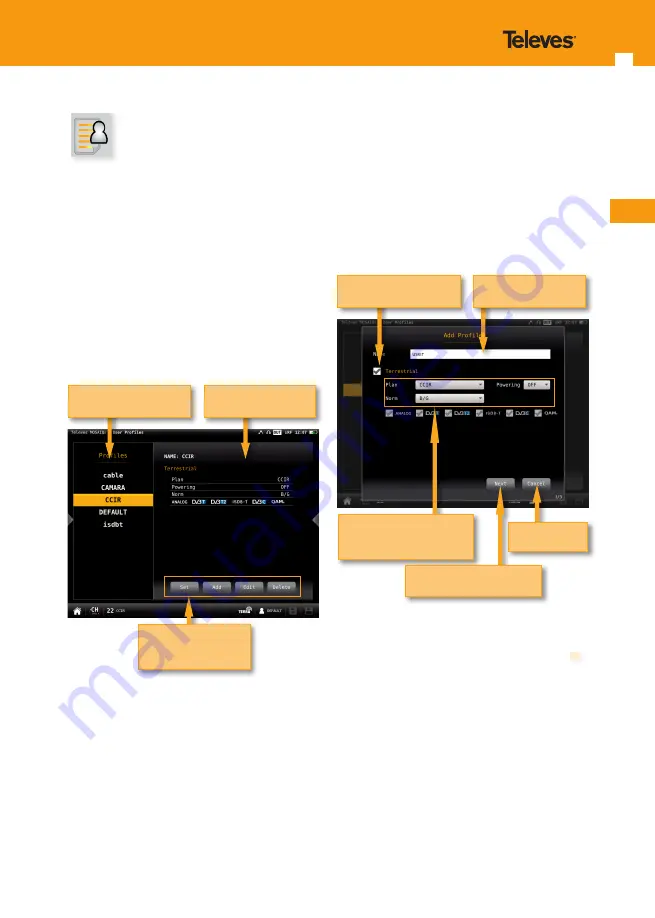
you must select the bands you want to include in
that profile and set up the parameters.
To select a band, you must select the corresponding
check box. The first step is the terrestrial band, then
tap on “Next” button pass to the satellite band, and
finally the radio band.
Once you have finished the radio band
configuration, tap on “add” button to save the user
profile.
If you include the satellite band in the profile,
you must select how many satellites you want to
include in that profile. Then you must set all the
parameters for each one.
Each satellite plan is automatically associated with
a DiSEqC command (fisrt plan with SAT A, second
pland wit SAT B, and so on). So, the powering is
always ON and automatically set to AUTO, but the
user can select any other value.
Tap to dropdown the list and
select the parameter from it
Tap to select/deselect
the band
Type the new profile
name
Tap to continue to the next
band
Tap to cancel
2. User profiles
Your
MOSAIQ6
allows to define as many user
profiles as you need. For each user profile, you
must indicate what band(s) is going to measure
that user profile and the main parameters.
If you select terrestrial band for a profile, you
must select the channel plan, the preamplifiers
powering and the norm.
If you select satellite band for a profile, you must
select the channel plan, polarity, powering, SCR
and DiSEqC.
If you select the radio band, you must select the
DAB channel plan.
.
2.1.- Set
Goes to the setting feature of the main menu (see
section 1.- Settings)
2.2.- Add
Adds a new user profile. When you tap on this
button, a popup window will open where the user
must set all the required parameters.
First of all, you must type the profile’s name. Then
Tap to select the action
List of profiles
Tap to select
Selected profile setting


