2-26
2. MAIN UNIT REPLACEMENT
EO18-33014
2.7.2 Set Up Tool
This software has the functions to adjust the sensors, set the destination, register the printer ID, and print the
result of the online check. To perform any operations, face the B-SP2D’s IrDA window to the IrDA jig (Actisys
IR) connected to a PC through the serial interface.
The IrDA jig shown below is recommended. Please procure it locally.
Name:
ACT-IR220L PLUS PC Serial IrDA Adaper
Manufacturer: ACTISYS
For details, please access to ACTISYS's homepage
http://www.actisys.com
Installing Software
To perform the above functions, the software “B-SP2D Series Production Process for Windows” must be
installed on a PC.
When you need the above software, please contact TOSHIBA TEC Subsidiaries or our Sales Department.
[System Requirements]
System
IBM compatible PC running Windows 95
®
, Windows 98
®
, or Windows 2000
®
(Performance of PC running other OS is not guaranteed.)
NOTE: Windows 95, Windows 98, and Windows 2000 are registered trademarks of Microsoft Corpora-
tion.
Installed memory of 16MB minimum (32MB or more is recommended.)
Available hard disk space of 10MB minimum (10MB or more is recommended.)
Interface
For IrDA communication, the IrDA interface should be provided for the PC (without drivers such as
IrLAP) or an IrDA device which is connectable to a serial port should be provided for the PC.
For RS-232C communication, more than one serial port should be provided for the PC.
[Setup disk]
The SETUP DISK for installation consists of 2 floppy disks (3.5", 2HD, 1.44 MB).
B-SP2D Series
Production Process
for Windows (V1.0.0)
WR.FD-SP2D-KOUTEI
DISK(1/2)
7FM00477000
7th March 2003
V001.000
Copyright
2003
TOSHIBA TEC CORPORATION
All Rights Reserved
2.7 SETTING AND ADJUSTMENT
1. While running Windows 98 (or Windows 95, Windows 2000), insert Setup Disk (1/3) into the PC
floppydrive.
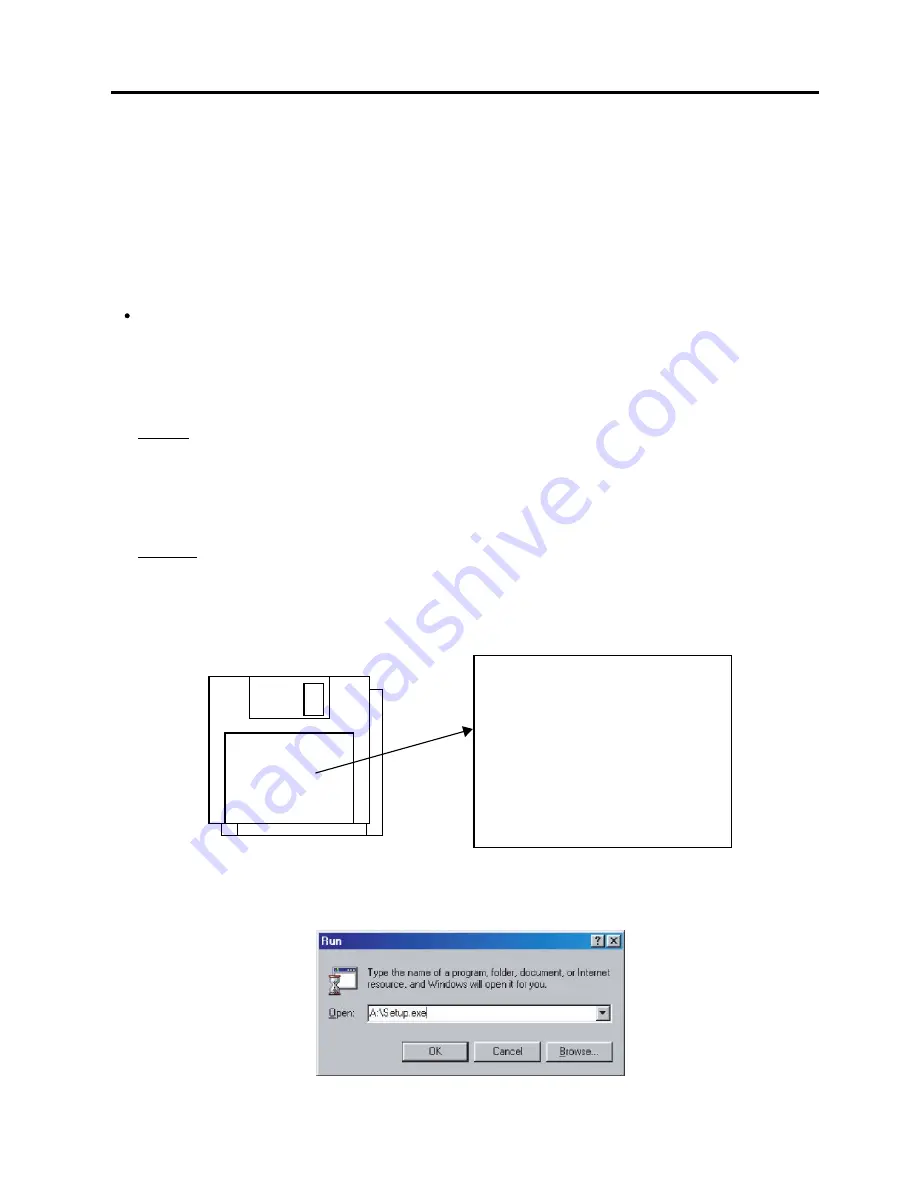
2. Click on the [START] button then highlight RUN and click on RUN.
3. When the RUN display appears, type in A:\SETUP.EXE and click on the [OK].
4. By following the messages on the screen, perform the installation.
5. When the installation was completed successfully, the end screen appears. Click on the [Finish]
button to end the installation.


