Maintenance, Service, and Repair
Tires and Wheels
Page 2
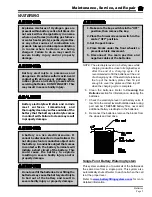
TIRE INFLATION
There are many tire options available with varying tire
pressures. Refer to the side wall of your tire for
information regarding the tire pressure for your tires.
The illustration to the right is an example of the side wall
information on a tire.
Tire pressures must be checked when the tire is cold.
1. Make sure the key-switch is in the “OFF”
position, then remove the key.
2. Place the forward-reverse switch in the
center “OFF” position.
3. Set the park brake.
4. Place blocks under the front wheels to
prevent vehicle movement.
5. Disconnect the main positive and
negative cables at the batteries.
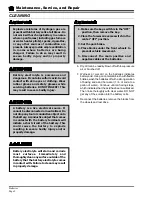
TIRE INSPECTION
6. Check the tire pressure. Refer to
Tire Inflation
section for information on checking the tire
pressure.
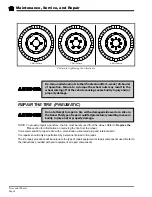
7. Inspect the tire tread depth. Minimum
recommended tread depth is 1/16-inch. There are
a series of tread depth wear indicators around
the circumference of the tire. They will appear as
1/2-inch bands across the tread as the tire
approaches its wear limit (see illustration below).
Replace the tire if any tread depth indicator can
be seen or any part of the tread depth is 1/16-
inch or less. Refer to
Replace the Tire
section
for information regarding replacing the tire.
8. Inspect for uneven tire wear on the front tires.
Uneven tire wear could be a result of an
improperly inflated tire or a misaligned or
damaged front end.
NOTE: Refer to
Tire Inflation
section or
Steering
Component Service
section for information
on proper tire inflation or front end wheel
alignment.
9. Inspect the inner and outer side walls for cracks.
If any cracks are seen, then the tire should be
replaced. Refer to
Replace the Tire
section for
information regarding replacing the tire.
10. Inspect the valve stem for cracks. If any cracks
are seen, then the valve stem should be replaced.
It is also recommended that the valve stem be
replaced whenever the tire is replaced.
NOTE: Refer to
Replace the Tire
section for
information regarding replacing the valve
stem.
11. Inspect the tread and side walls for debris in the
rubber that could lead to a puncture. If any debris
is found it should be removed and the tire
inspected for a leak.
Summary of Contents for ET-015-00
Page 2: ......
Page 14: ...TAYLOR DUNN...
Page 28: ...TAYLOR DUNN...
Page 48: ...Maintenance Service and Repair Steering Page 12 Exploded View of Steering Gear...
Page 60: ...Maintenance Service and Repair F2 F3 Transmission Page 12 EXPLODED VIEW...
Page 71: ...Maintenance Service and Repair Brakes Page 11 Rear Brake left side shown...
Page 72: ...TAYLOR DUNN...
Page 80: ...TAYLOR DUNN...
Page 90: ...TAYLOR DUNN...
Page 94: ...TAYLOR DUNN...
Page 100: ...TAYLOR DUNN...
Page 114: ...TAYLOR DUNN...
Page 116: ...TAYLOR DUNN...
Page 130: ...Illustrated Parts Parts Page 14 Rear Axle Axle tube 4 5 6 7 3 2 Rear Brakes...
Page 132: ...Illustrated Parts Parts Page 16 Rear Suspension 1 2 3 4 5 6 7 8 9 10 11 12 13 14 Drive Shaft...
Page 134: ...Illustrated Parts Parts Page 18 Motor direct drive Motor Mount direct drive...
Page 142: ...Illustrated Parts Parts Page 26 Instrument Panel dash...
Page 144: ...Illustrated Parts Parts Page 28 Speed Control Panel 1 2 3 4 5 6 7 8 9 10 11 12 4...
Page 152: ...Illustrated Parts Parts Page 36 Charger 2 1 15 12 11 4 3 5 8 10 6 7 9 13 14 16...

