background image

T h e   B e s t   W a y

To Go

A b o u t   Your

B u s i n e s s


 ®

Serial number Starting:  150778

MANUAL MB-T48-01

Operation, Troubleshooting and Re-

placement Parts Manual

Models Inlcuded:
B0-T48-48 Taylor Truck (T48)
ET-030-48 (ET 3000)

Published: 3/28/2002
Revision: K, 8/9/2011

Taylor Truck

ET 3000

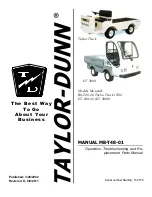
Summary of Contents for B0-T48-48 Taylor Truck T48

Page 1: ...i n e s s Serial number Starting 150778 MANUAL MB T48 01 Operation Troubleshooting and Re placement Parts Manual Models Inlcuded B0 T48 48 Taylor Truck T48 ET 030 48 ET 3000 Published 3 28 2002 Revis...

Page 2: ......

Page 3: ...parts or service should be obtained through your local dealer A dealer locator can be found on the Taylor Dunn website at www taylor dunn com If you do not have access to the internet you can call th...

Page 4: ...B2 48 With Dump Bed Option B2 10 Ambulance B2 48 with Steel Cab Foldaway 4 Passenger Seat and Stake Sides ET 3000 ET1 50 Full Size Truck P2 50 30 000 Pound Tow Tractor...

Page 5: ...ice Control System Troubleshooting Chargers Wire diagram Illustrated Parts Appendix A Special Tools Appendix B Suggested Torque Values Appendix C Brake Lining Handling Precautions Taylor Dunn Operator...

Page 6: ...pes of vehicles offered by Taylor Dunn B 2 48 36 Equipped with optional hydraulic dump bed BT 2 80 Eight passenger tram B 1 00 Personnel carrier C 4 25 Huskey tow tractor MX 1600 Equipped with optiona...

Page 7: ...2 Who Should Read This Manual 2 Responsibilities 2 How To Use This Manual 3 Conventions 3 How to Identify Your Vehicle 4 Taking Delivery of Your Vehicle 5 Shown with fiberglass steel cab options Show...

Page 8: ...pplicable models and serial numbers on the front cover Please be aware of all cautions warnings instructions and notes contained in this manual RESPONSIBILITIES Of the Owner The owner of this or any T...

Page 9: ...entions Symbols and or words that are used to define warnings cautions instructions or notes found throughout this manual Refer to the examples below Note Alerts the reader to additional information a...

Page 10: ...ill be in one of two locations as shown This vehicle conforms to requirements for Type E vehicles as described in O S H A Standard Section 29 CFR 1910 178 Powered Industrial Trucks and with all applic...

Page 11: ...Dunn vehicle is a factory authorized service technician Repairs made by unauthorized personnel may result in damage to the vehicles systems which could lead to an unsafe condition resulting in severe...

Page 12: ...Model B 1 00...

Page 13: ...irectional Signals Optional 7 Hazard Light Switch Optional 7 Charger Interlock 7 Seat Interlock Switch 7 Smart View Display 8 Vehicle Operational Guidelines 10 Safety Guidelines 10 Starting 10 While d...

Page 14: ...tive Type Hypoid Differential Motor DC Seperatly Excited Field 5 9 kW 7 9 Horse Power for 60 minutes Brakes 4 Wheel Hydraulic Disc Hand Operated Park Brake Steering Automotive Steering 24 1 Tires 20 5...

Page 15: ...h in the center OFF position 3 Set the park brake 4 Place blocks under the front wheels to prevent vehicle movement 5 Disconnect the main positive and negative cables at the batteries DRIVER TRAINING...

Page 16: ...trical options are installed see above Toggle the switch lever up for normal speed Toggle the switch lever down for slow speed 5 Accessory Switch Optional The accessory switch is located on the left s...

Page 17: ...he key clockwise to turn the vehicle power on counterclockwise to turn the vehicle power off The key switch should be in the OFF position whenever the operator leaves the vehicle This switch is also d...

Page 18: ...pull the lever up until it locks To release the park brake depress the foot brake pedal pull up on the park brake handle push the release button and lower the handle Accelerator Pedal The accelerator...

Page 19: ...rd lights pull the tab out To turn the hazard lights off push forward or pull back the directional signal lever Seat Interlock Switch A switch located under the driver s seat disables the power to the...

Page 20: ...emoved from service for charging Discharging beyond 90 will result in damage to the batteries that will shorten the battery life span HM There are two hour meter functions Key Hours and Run Time Hours...

Page 21: ...wiring to the controller 01005 Speed control overheated Allow the controller to cool off May be the result of an overloaded vehicle or an obstruction to the controller heat sink 01008 Optional speed e...

Page 22: ...parking brake 3 Hold down the foot brake 4 Rotate the Start switch to the ON position and wait 1 second 5 Release the parking brake 6 Release the foot brake 7 Slowly depress the accelerator pedal Whi...

Page 23: ...parking brake will be applied when the start switch is turned off or the operator leaves the driver seat It will also be applied if the control system loses power such as when the emergency battery d...

Page 24: ...d technician Incorrect repair or reassembly of the charger can result in an explosion electric shock or fire Battery electrolyte is poisonous and dangerous It contains sulfuric acid Avoid contact with...

Page 25: ...roperty damage WARNING Do not attempt to operate the vehicle while charging the battery Operating the charger and vehicle at the same time may lead to damage to the charger and or the vehicle resultin...

Page 26: ...y or death WARNING WARNING DO NOT disassemble the charger There are no user serviceable components in the charger Refer all repairs to a qualified technician Incorrect repair or reassembly of the char...

Page 27: ...n in rooms where batteries are being charged Failure to do so may result in severe bodily injury and or property damage WARNING This charger is rated for 115 VAC or 230 VAC operation nominal Confirm t...

Page 28: ...ds If the charger does not remain ON after releasing the switch then try again If the charger refuses to start then have the batteries and charger tested by an qualified technician Fault LED Status LE...

Page 29: ...the battery electrolyte once a week Do not charge the batteries if the battery electrolyte is low Charging when the electrolyte is low will damage the batteries and shorten their life span Only autho...

Page 30: ...RULES AND OPERATING INSTRUCTIONS Safety Rules Page 18 PERIODIC MAINTENANCE CHECKLIST NOTE A full page copy of the Periodic Maintenance Checklist is on the Vehicle Documentation CD under the Misc sub...

Page 31: ...only Inspect and tighten all nuts and bolts First 500 hours and then every 1000 hours 2 1000 Inspect and tighten all nuts and bolts Clean and repack front wheel bearings Inspect and tighten all wire...

Page 32: ...n Extreme temperature Bumpy dusty or ill maintained roads Excessively wet areas Corrosive or contaminated areas Frequent loading of vehicle at near capacity Use on multiple shifts 2 Any deficiencies f...

Page 33: ...Table of Contents General Maintenance Maintenance Guidelines 2 Troubleshooting Guide 3 Lubrication Chart 4 Model E 4 55 Tow Tractor Model C 4 25 Tow Tractor Examples of Taylor Dunn Tow Tractors...

Page 34: ...or cleaning parts Only properly trained and authorized technicians should perform maintenance or repairs to this vehicle Periodic maintenance and service must be performed on this vehicle Failure to c...

Page 35: ...n Drive Gears Front End Out of Alignment Defective Speed Control Abnormal Noise Worn Drive Gears or Bearings Worn Front Rear Axle Bearings Loose Lug Nuts Motor Bearings Worn Oil Leak in Rear Bearing A...

Page 36: ...pe 1 Ball Joints 4 General Purpose Grease 2 Pedal Linkages 3 General Purpose Grease 3 Front Wheel Bearings 2 High Temperature Wheel Bearing Grease 4 King Pin 2 General Purpose Grease 5 6 7 Drive Drain...

Page 37: ...and King Pin 2 Adjust Front Wheel Bearings 3 Front Axle Removal and Installation 4 Removal 4 Installation 4 Front Axle Disassembly 5 Replace Front Wheel Bearings 6 Replace the King Pins and Bushings 7...

Page 38: ...s in the OFF position then remove the key 2 Place the forward reverse switch in the center OFF position 3 Confirm the electric park brake is set 4 Place blocks under the front wheels to prevent vehicl...

Page 39: ...turns but is not loose 10 Spin the wheel and listen for any grinding noise Any grinding noise may be an indication of worn or damaged wheel bearings NOTE Refer to the Replace Front Wheel Bearings sec...

Page 40: ...ion 3 Confirm the electric park brake is set 4 Place blocks under the front wheels to prevent vehicle movement 5 Disconnect the main positive and negative cables at the batteries Installation 6 Raise...

Page 41: ...eering knuckles and king pin bushings Refer to the following sections for information regarding these procedures Replace the Steering Knuckle Replace the King Pins and Bushings NOTE The front axle doe...

Page 42: ...ys use a lifting strap hoist and jack stands of adequate capacity to lift and support the vehicle Failure to use lifting and support devices of rated load capacity may result in severe bodily injury 1...

Page 43: ...4 Place blocks under the front wheels to prevent vehicle movement 5 Disconnect the main positive and negative cables at the batteries 6 Raise the front of the vehicle and support with jack stands 7 R...

Page 44: ...hoist and jack stands of adequate capacity to lift and support the vehicle Failure to use lifting and support devices of rated load capacity may result in severe bodily injury 1 Make sure the key swi...

Page 45: ...5 Adjust the Steering Gear 6 Replace the Steering Shaft 7 Replace the Steering Wheel 8 Replace the Steering Gear 8 Replace the Ball Joints Tie Rods and Drag Link 9 Replacing the Drag Link 10 Replacing...

Page 46: ...nds of adequate capacity to lift and support the vehicle Failure to use lifting and support devices of rated load capacity may result in severe bodily injury 7 Turn the front wheels so that they are i...

Page 47: ...jam nuts on the drag link 16 Untie the steering wheel and the front wheels 17 Reconnect the main positive and negative cables at the batteries 18 Rotate the steering wheel from a full left turn to a...

Page 48: ...evices of rated load capacity may result in severe bodily injury 1 Make sure the key switch is in the OFF position then remove the key 2 Place the forward reverse switch in the center OFF position 3 C...

Page 49: ...orward reverse switch in the center OFF position 3 Confirm the electric park brake is set 4 Place blocks under the rear wheels to prevent vehicle movement 5 Disconnect the main positive and negative c...

Page 50: ...ailure to use lifting and support devices of rated load capacity may result in severe bodily injury 1 Make sure the key switch is in the OFF position then remove the key 2 Place the forward reverse sw...

Page 51: ...E Most vehicle configurations will now allow the steering shaft to slide off of the steering gear input shaft and then back down out of the steering column If there is not enough clearance for this pr...

Page 52: ...ng wheel remove the switch and disconnect the wires from the switch 7 Remove the steering wheel nut 8 Using a steering wheel puller remove the steering wheel 9 Position the front wheels in the straigh...

Page 53: ...ns required to remove the rod end from the steering sleeve This will make it easier to realign the wheels 10 Install the new rod end into the steering sleeve Screw it into the sleeve the same number o...

Page 54: ...amp at this time 12 Install the ball joint into the steering arm Tighten the ball joint nut to 40 45 ft lbs and install a new cotter pin 13 Realign the front wheels NOTE Refer to the Steering section...

Page 55: ...st and jack stands of adequate capacity to lift and support the vehicle Failure to use lifting and support devices of rated load capacity may result in severe bodily injury 1 Make sure the key switch...

Page 56: ...of turns in the original direction 2 Remove the worm bearing adjuster locking ring and the worm bearing adjuster 3 Remove the side cover pitman shaft assembly by removing the three side cover bolts an...

Page 57: ...r worm bearing on the worm shaft and install the worm shaft ball nut assembly into the housing being careful not to damage the worm shaft seal 10 Install the assembled worm bearing adjuster into the h...

Page 58: ...Maintenance Service and Repair Steering Page 14 Exploded View of Steering Gear...

Page 59: ...Repair the Brake Body 11 Replace the Master Cylinder 13 Repair the Master Cylinder 14 Brake Service Brake fluid specifications Vehicles up to serial number 151284 were shipped with DOT 5 brake fluid...

Page 60: ...could cause excessive brake rotor run out 2 Measure the thickness of the brake rotor in 3 places If the brake rotor thickness is less than 0 20 inches then the rotor must be replaced Disc Brake Pads...

Page 61: ...the brake body Refer to Repair the Brake Body for information on removing the park brake pin 9 Inspect all brake cables and linkages for any signs of damage wear or missing cotter pins 10 Inspect the...

Page 62: ...nd then loosen the linkage 1 turn 9 Tighten the jam nuts on the park brake linkage 10 Repeat this procedure for both rear wheels 11 Set the park brake 12 Reconnect the main positive and negative cable...

Page 63: ...g and a face shield when working with or around brake fluid SKIN CONTACT Flush area immediately with water for several minutes If a rash or skin irritation develops get medical attention immediately E...

Page 64: ...epress the foot pedal to the floor and then close the bleeder valve Do not release pressure on the brake pedal until the bleeder valve is closed 13 Slowly release the foot pedal allowing it to return...

Page 65: ...e OFF position then remove the key 2 Place the forward reverse switch in the center OFF position 3 Confirm the electric park brake is set 4 Place blocks under the front wheels to prevent vehicle movem...

Page 66: ...o prevent vehicle movement 5 Disconnect the main positive and negative cables at the batteries Always use a lifting strap hoist and jack stands of adequate capacity to lift and support the vehicle Fai...

Page 67: ...handling precautions 1 Make sure the key switch is in the OFF position then remove the key 2 Place the forward reverse switch in the center OFF position 3 Confirm the electric park brake is set 4 Pla...

Page 68: ...parts should be handled as if they contain asbestos Refer to Appendix C for recommended handling precautions 1 Make sure the key switch is in the OFF position then remove the key 2 Place the forward...

Page 69: ...damage and or severe bodily injury Do not ingest brake fluid or allow contact with skin or eyes Always wear protective clothing and a face shield when working with or around brake fluid SKIN CONTACT F...

Page 70: ...brake body making sure that the boot seats properly into the upper groove on the piston 16 Install any fittings or plugs that were removed from the brake body using teflon tape thread sealant 17 If t...

Page 71: ...use a lifting strap hoist and jack stands of adequate capacity to lift and support the vehicle Failure to use lifting and support devices of rated load capacity may result in severe bodily injury Do n...

Page 72: ...scard Remove the rubber boot Depress the plunger and remove the plunger spring clip retainer Pull the plunger and all seals out of the master cylinder bore Thoroughly clean inspect and replace parts a...

Page 73: ...TABLE OF CONTENTS Throttle Linkage Adjustments 2 Magnetic Module 2 Pot Box module 3 Throttle Linkage...

Page 74: ...he standard throttle position sensor consists of two micro switches and a magnetic sensor that detects the position of the throttle pedal Switch FS 3 is a normally open switch that is held closed by t...

Page 75: ...le is used on vehicles that are to be operated in areas with large magnetic fields The linkage to the pot box should be adjusted so that the FS 1 switch closes just as the pedal is depressed and the o...

Page 76: ...TAYLOR DUNN...

Page 77: ...r Removal and Installation 3 Rear Hub or Rotor 3 Removing and Installing the Rear Axles 4 Disassembly and Reassembly of the Primary Reduction Gear Case 6 Disassembling the 3rd Member 8 Assembling the...

Page 78: ...ack stands 7 Place a four quart drain pan under the drive assembly 8 Remove the drain plugs from the differential case and gear case 9 Once the oil has drained replace the drain plugs and lower the ve...

Page 79: ...olt 1 Make sure the key switch is in the OFF position then remove the key 2 Place the forward reverse switch in the center OFF position 3 Set the park brake 4 Place blocks under the front wheels to pr...

Page 80: ...the OFF position then remove the key 2 Place the forward reverse switch in the center OFF position 3 Set the park brake 4 Place blocks under the front wheels to prevent vehicle movement 5 Disconnect t...

Page 81: ...E Be sure not to damage the o ring 16 Use new bolts for the axle retaining plate 17 If the wheel hub was removed install the hub and rotor Torque the hub bolt to 275 ft lbs 17 Fill with oil to the lev...

Page 82: ...key switch is in the OFF position then remove the key 2 Place the forward reverse switch in the center OFF position 3 Set the park brake 4 Place blocks under the front wheels to prevent vehicle moveme...

Page 83: ...the front flange on the 3rd member and gear case cover NOTE Pack the motor seal with non acetic based grease 20 Fill the differential with oil NOTE Refer to Changing the Differential Oil for informati...

Page 84: ...on on removing the gear case 1 Make sure the key switch is in the OFF position then remove the key 2 Place the forward reverse switch in the center OFF position 3 Set the park brake 4 Place blocks und...

Page 85: ...ASSEMBLING THE 3RD MEMBER 1 Temporarily install the pinion gear hand tighten only 2 Install the carrier bearing race ring nuts into the housing and cover Cover Housing 3 Install the carrier bearing r...

Page 86: ...arrier bearing race ring nuts The two ring nuts must be turned equally in opposite directions NOTE To move the ring gear closer to the pinion Loosen the housing carrier bearing race ring nuts and tigh...

Page 87: ...This procedure is required only when replacing the front or rear pinion bearings and races or the ring and pinion gears NOTE To perform this procedure all parts must be clean and the bearings lightly...

Page 88: ...Maintenance Service and Repair Transmission Page 12 Figreu 1a Figure 2 Figreu 1b Figure 4 Figure 3 NOTE Values shown are for reference only D C...

Page 89: ...TABLE OF CONTENTS Suspension Replace the Rear Springs 2 Leaf 2 Replace the Front Springs 3 Leaf 3 Replace the Spring Bushings 4 Replace the Shocks 5 Front 5...

Page 90: ...use lifting and support devices of rated load capacity may result in severe bodily injury 8 Unbolt the spring from the axle housing 9 Support the spring so that it cannot fall out of the vehicle 10 R...

Page 91: ...the key switch is in the OFF position then remove the key 2 Place the forward reverse switch in the center OFF position 3 Set the park brake 4 Place blocks under the front wheels to prevent vehicle m...

Page 92: ...Always use a lifting strap hoist and jack stands of adequate capacity to lift and support the vehicle Failure to use lifting and support devices of rated load capacity may result in severe bodily inj...

Page 93: ...kage is seen then the shock must be replaced B Inspect the upper and lower shock bushings If any signs of damage or wear are seen then the shock must be replaced 9 Install the shock in reverse order 1...

Page 94: ...TAYLOR DUNN...

Page 95: ...tors with internal cooling fans 2 Enclosed Motors GE no cooling fan 2 Motor Removal and Installation 3 Motor Inspection 3 Replacing the Brushes 5 Replacing the Bearings 6 Repairing the Commutator 6 Se...

Page 96: ...Disconnect the main positive and negative cables at the batteries Typical motor with cooling fan indicated by the arrow Typical brush and brush holder Motors with internal cooling fans NOTE There are...

Page 97: ...the length of each motor brush If any one brush is less than or equal to the service limit specified in section Service Limits then all four brushes should be replaced Refer to Replacing the Brushes s...

Page 98: ...of digital multi meter check the continuity from any one of the commutator segments and the armature frame If it is not an open circuit then the armature is shorted and the motor must be replaced 11 R...

Page 99: ...Remove the brush covers 2 Loosen the brush wire retaining screw and remove the brush from the brush holder Be careful with the brush spring and do not let it slip off of the spring mount If the spring...

Page 100: ...Limits then the motor must be replaced 5 Thoroughly clean all copper debris from between the commutator segments Do not press against the outer race of the bearing Pressing against the outer race will...

Page 101: ...75 38 1 1 5 5BC58JBS6129B 0 635 0 025 66 75 2 625 19 05 0 75 38 1 1 5 5BC58JBS6129C 0 635 0 025 66 75 2 625 19 05 0 75 38 1 1 5 5BC49JB399C 0 635 0 025 78 97 3 109 19 05 0 75 5BC58JBS6110C 0 635 0 02...

Page 102: ...TAYLOR DUNN...

Page 103: ...TABLE OF CONTENTS Tire Inflation 2 Tire Inspection 2 Replace the Tire Wheel 3 Replace the Tire pneumatic 3 Repair the Tire pneumatic 4 Tires and Wheels...

Page 104: ...tread as the tire approaches its wear limit see illustration below Replace the tire if any tread depth indicator can be seen or any part of the tread depth is 1 16 inch or less Refer to Replace the Ti...

Page 105: ...emoved from the vehicle Refer to Replace the Tire Wheel section for information on removing the tire wheel assembly Tire replacement should only be performed by personnel trained in tire replacement T...

Page 106: ...severe bodily injury and or property damage REPAIR THE TIRE PNEUMATIC NOTE To properly repair a puncture the tire must be removed from the wheel Refer to Replace the Tire section for information on r...

Page 107: ...BLE OF CONTENTS Battery Service Cleaning 2 Testing 3 Charging 4 Watering 5 Replacing 6 volt batteries only 6 Moist Charge Batteries 7 Storage and Returning to Service 8 Storage 8 Returning to Service...

Page 108: ...may result in severe bodily injury and or property damage Battery electrolyte will stain and corrode most surfaces Immediately and thoroughly clean any surface outside of the battery that the battery...

Page 109: ...ctrolyte is poisonous and dangerous It contains sulfuric acid Avoid contact with skin eyes or clothing Wear rubber gloves and safety glasses while servicing batteries DO NOT INGEST This may result in...

Page 110: ...ger accepting a charge and should be replaced NOTE Refer to Charger Troubleshooting for information on checking the charging system The highest reading will be the cell that is accepting the most char...

Page 111: ...n contact with the battery terminals will initiate a short circuit of the battery This could cause the battery to explode resulting in severe bodily injury and or property damage Battery electrolyte i...

Page 112: ...be replaced 9 Remove all battery jumpers from both posts of the battery or batteries being replaced NOTE It is recommended to replace the battery jumpers when replacing the batteries 10 Remove the bat...

Page 113: ...that is formulated to be used in wet lead acid batteries and is available at most automotive parts distributors that carry batteries When torquing battery hardware use a backup wrench on the battery...

Page 114: ...l source It cannot be disconnected or neutralized Do not drop any tool or conductive object onto the battery A conductive object that comes in contact with the battery terminals will initiate a short...

Page 115: ...tion for information regarding checking the electrolyte level 8 Test the batteries Refer to Testing section for information on testing the batteries 9 The batteries are now ready to be put back into s...

Page 116: ...TAYLOR DUNN...

Page 117: ...itions 2 Terminology used 2 Important Notes and Instructions 2 Identifying Your Controller 3 Start Troubleshooting Here 4 Test 8 Anti Rolloff Fault 15 Test 9 Electric Motor Brake 16 Logic Voltage Refe...

Page 118: ...ems it must be in the failed mode for troubleshooting If it is running normally when the testing is done then the problem will not be identified Some tests refer to a High Low switch The High Low swit...

Page 119: ...Sevcon Troubleshooting Page 3 Electrical Troubleshooting Identifying Your Controller...

Page 120: ...battery check the following The batteries The wiring from the battery status indicator to the batteries for open circuits The battery status indicator The positive and negative circuit breaker The ma...

Page 121: ...r for open circuits Stop trouble shooting here and repair the problem When the repair is completed completely retest the vehicle before lowering the drive wheels to the ground TEST 1 3 Test the voltag...

Page 122: ...to the ground TEST 1 7 Depress the accelerator pedal to engage FS 1 only creep speed Perform the following tests Test the voltage at pin 10 on the 12 pin logic card connector If the voltage is below...

Page 123: ...fication table can be found in the Motor Service section If the test indicates an open circuit then repair or replace the motor Test continuity from F1 to the frame of the motor Any reading other than...

Page 124: ...to the frame on the motor and from F1 to A1 for open circuits Any reading other than an open circuit indicate a short in the motor If there is a short in the motor stop here and repair or replace the...

Page 125: ...at switch turn the key switch ON and wait 1 second until the Isolator contactor closes If the vehicle runs in reverse only then skip ahead to test 3 3 Place the forward and reverse switch in the FORWA...

Page 126: ...movement of the vehicle resulting in injury or property damage Stop do not continue Reaching this point indicates a failure in the Sevcon power unit or an error was made during testing Confirm all pr...

Page 127: ...ults may have occurred Broken Wire Check the wire from pin 8 in the 12 Stop do not continue Reaching this point indicates a failure in the Sevcon power unit or an error was made during testing Confirm...

Page 128: ...Low battery lamp is ON then the analyzer battery should be replaced Additional information regarding the analyzer can be found in the instructions provided with the analyzer D0 110 53 Disconnect both...

Page 129: ...se skip ahead to test 7 3 Place the forward and reverse switch in the FORWARD position Referencing battery positive test the voltage at the Blue Black wire on the F R switch If the voltage equals batt...

Page 130: ...ground TEST 7 4 Check the wires from the F R switch to the logic card connector for continuity After any repairs are made completely retest the vehicle before lowering the drive wheels to the ground F...

Page 131: ...tch in the center OFF position and turn the key switch ON TEST 8 1 Read the motor field current on the Ammeter If the field current is greater than specified in the Motor Specification table see Motor...

Page 132: ...ere and repair the problem When the repair is completed completely retest the vehicle before lowering the drive wheels to the ground Test 9 1 Close the seat switch turn the key switch ON place the for...

Page 133: ...eed controller Disconnect the electric brake harness connector and connect the electric brake to a 24 volt source This should release the brake and allow you to troubleshoot the vehicles control syste...

Page 134: ...low switch in high Low High low Switch in low High 7 Hand brake switch closed Low Hand brake switch open High 8 Key switch on ref battery positive Key switch off ref battery positive Battery Volts 9 S...

Page 135: ...te 4 Line contactor fault or open motor Contactor failure Open motor circuit Check contactor and motor 5 Not used 6 Throttle fault FS 1 switch failure Faulty wiring Throttle module Failure Check throt...

Page 136: ...d Level 4 Faults F04xxx F04001 Contactor Welded High voltage at power up to the controller B terminal Check wiring contactor and pre charge resistor on the contactor F04002 Steer Pot Steer Pot current...

Page 137: ...1 faults are a result of operator error or operation of the vehicle F01000 Power Steer Overheat Not used F01001 Traction Motor Brush Wear Not used F01002 Pump Motor Brush Wear Not used F01003 Power St...

Page 138: ...Sevcon Troubleshooting Page 22 Electrical Troubleshooting...

Page 139: ...g 19 Replacing the Charger 19 12 Turn the Key switch OFF BEFORE disconnecting the batteries Disconnecting the batteries with the key switch ON may corrupt the controller programming resulting in a fau...

Page 140: ...fully automatic microprocessor controlled SCR switching charger The charger turns itself on when it is plugged into the AC electrical outlet and turns off when the batteries are fully charged Once the...

Page 141: ...ff LED 4 LED 2 Fault O O OK B B Battery voltage out of range or battery capacity is too high S O Control Board faulty B S Current Sensor faulty S B AC voltage incorrect S S DC current out of range B O...

Page 142: ...the charger to the AC power source 2 The charger should automatically start as indicated by the flashing Status LED If the charger does not start try pressing the Low Voltage Start switch for 10 seco...

Page 143: ...nd 15 meg Ohms 4 If the reading is low then the gate is shorted If the gate has shorted on either SCR then it is likely that the control board has been damaged and must also be replaced Note Both SCR...

Page 144: ...in electrically grounded Disconnect both of the battery leads and unplug the charger from the AC source before disconnecting any electrical component or wire Failure to do so may result in serious bod...

Page 145: ...ecting any electrical component or wire Failure to do so may result in serious bodily injury Control Board Assembly There is no test for the control board assembly Test all other components and confir...

Page 146: ...d for Full River VRLA AGM DC Series batteries SLA batteries must be charged with a charger configured for SLA batteries Use of any other charger will result in damage to the batteries and premature fa...

Page 147: ...in the charger If the charger has failed then it must be replaced SLA batteries must be charged with a charger configured for SLA batteries Use of any other charger will result in damage to the batter...

Page 148: ...decreases the charger current while holding the batteries at the terminal voltage until the charging cycle is complete The charging cycle is complete when the current is down to A1 On the charger fac...

Page 149: ...harger has restarted Fully test the battery pack before assuming that the charger is not turning off or running too long A charger could turn off in less than 12 hours but still show symptoms of overc...

Page 150: ...y voltage must be less than 33 7v 36v charger Battery voltage must be less than 43 2v 48v charger Battery voltage must be less than 57 6v 4 Overheated Inspect for dirt or debris on the charger cooling...

Page 151: ...per off until the batteries are fully charged The batteries are fully charged when the charging current is down to A1 6 If the charger does not turn on there are no faults and the POWER light is ON th...

Page 152: ...ure that the AC electrical outlet is in good working condition Make sure that the AC voltage at the electrical outlet is the same as the AC voltage on the charger nameplate Make sure the batteries are...

Page 153: ...ger does not check the current state of charge when it is plugged in it assumes that the batteries require charging when it is connected For this reason it is recommended to discharge the batteries ap...

Page 154: ...ire Failure to do so may result in serious bodily injury High Voltage Do not touch the 14 gauge wires and make sure these two wires do not come into electrical contact with any other object Failure to...

Page 155: ...op here and repair the problem Test the AC voltage across the transformer low voltage secondary circuit The transformer low voltage secondary circuit can be tested at the two solid wires with the brow...

Page 156: ...on the meter If either one of the diodes are bad replace the diode assembly Stop here and repair the problem 3 Reconnect the lead to the diode 4 Connect the charger to the AC source Insert the DC cha...

Page 157: ...re and repair the problem If the DMM indicates an open circuit then the interlock relay is functioning normally 1 Make sure the start switch is in the OFF position then remove the key 2 Place the forw...

Page 158: ...Battery Charger Page 20 MN 402 000...

Page 159: ...when printed at this size A full size diagram 22 x 16 is inculded on the CD in PDF format You can access the diagram from a button on the CD menu The T48 diagram is SCH 00004 12v battery tap SCH 00042...

Page 160: ...UND GREEN CHARGER Blue MOTOR F2 Yellow F1 Green AC CHARGER CORD CHARGER INTERLOCK WHITE GROUND GREEN Blue Blue 2 1 Black Gray White Red White Blue Yellow Green Black Gray Black White Black Blue Black...

Page 161: ...Wire Diagrams Wire Diagrams Page 3...

Page 162: ...TURN L TURN 8 ISO NEG HORN BLACK BLACK BLACK BLACK BLACK BLACK BLUE Black White Yellow Blue Black Blue Black Green Brown Brown Brown Brown Brown Brown Red Yellow Gray Gray black Gray black Blue Green...

Page 163: ...ls and Tires 34 Instrument Panel up to S N 179999 36 Instrument Panel starting S N 180000 36 Resetting the Smart View Display 36 Illustrated Parts Speed Control Panel 38 Miscellaneous Frame and Body 4...

Page 164: ...d 9 must be broached or reamed to a final diameter of 1 25 0 001 after pressing into the axle 11 17 15 16 18 12 12 14 13 13 2 1 3 10 9 8 7 6 5 4 19 Bushings 8 and 9 must be broached or reamed to a fin...

Page 165: ...240 43 Sleeve Bushing 2 10 80 309 12 Thrust Bearing 2 11 45 338 00 Grease Seal 2 12 80 017 00 1 ID Tapered Bearing 4 13 80 103 00 Race Tapered Bearing 4 14 12 158 10 Hub Disc Wheel 5 Stud Includes 11...

Page 166: ...Illustrated Parts Parts Page 4 Front Brakes...

Page 167: ...7 88 067 21 Brake Body Bolt 4 28 41 350 30 Hydraulic Brake Body Assembly 2 28a 41 350 09 Boot Hydraulic Brake Body Not Shown 2 28b 41 350 10 Piston Hydraulic Brake Body Not Shown 2 28c 80 713 00 O Rin...

Page 168: ...Illustrated Parts Parts Page 6 Steering Linkage...

Page 169: ...2 88 159 85 1 2 20 NF Slotted Hex Nut 2 3 86 510 00 Ball Joint Clamp Assembly 2 4 18 057 00 Sleeve Steering Adjust 26 1 5 88 527 11 1 8 X 1 Steel Cotter Pin 2 DRAG LINK 18 037 10 ITEM PART DESCRIPTION...

Page 170: ...Illustrated Parts Parts Page 8 Steering Column 1 2 3 4 5 6 7 9 8 12 10 11 13 14...

Page 171: ...ering Shaft Bearing 1 5 20 031 63 Kit Steering Shaft w Clamp 1 6 18 308 45 Assembly Steering Clamp Includes s 5 7 1 7 18 308 21 Steering Gear 1 8 88 128 62 7 16 Split Lock Washer 3 9 88 120 15 7 16 X...

Page 172: ...Illustrated Parts Parts Page 10 Steering Gear 9 15 16 10 2 3 14 17 12 11 13 6 8 7 5 1 4...

Page 173: ...earing 1 5 18 308 22 Upper worm bearing race 1 6 18 308 77 Housing 1 7 18 308 78 Seal pitman shaft 1 8 18 308 80 Nut pitman shaft 1 9 18 308 81 Lock washer 1 10 18 308 79 Seal input shaft 1 11 18 308...

Page 174: ...Illustrated Parts Parts Page 12 Front Suspension...

Page 175: ...ITEM PART DESCRIPTION QTY 1 96 103 00 U Bolt Length 3 1 2 4 2 85 498 00 85 486 00 Leaf Spring Taylor Truck Leaf Spring ET 3000 2 2 3 32 214 50 Spring Bushing 12 4 96 240 00 Shackle Bolt 6 5 88 149 81...

Page 176: ...Illustrated Parts Parts Page 14 Transmission Gear Case...

Page 177: ...79 Bearing 1 21 GT 3273633 Pinion nut 1 23 See Note 1 previous page Spacer 1 24 GT 3287453 Output gear 30 1 0 or 1 GT 3287463 Output gear 24 1 0 or 1 GT 3287473 Output gear 18 1 0 or 1 GT 3287483 Outp...

Page 178: ...Illustrated Parts Parts Page 16 Transmission Differential Case...

Page 179: ...d pinion gear set 1 14 GT 3297193 Differential case cover 1 15 GT 3287133 Adjusting ring 2 16 GT 70417 Fill Level plug 1 17 GT 3287113 Differential housing 1 19 GT 3287143 Differential case 1 20 GT 72...

Page 180: ...le Axle Shaft Inner Bearing no o ring Outer Bearing O Ring O Ring Groove Inner bearing on optional double bearing axle does not have an oil seal or o ring Orientation of bearing should have o ring gro...

Page 181: ...used during the transition between the single bearing axles and the double bearing axles Use the following lists to determine what parts were used on vehicles manufactured during this transition Mode...

Page 182: ...Illustrated Parts Parts Page 20 Rear Brakes Brake Body...

Page 183: ...m 2 16 88 069 82 1 4NC locknut grade 8 4 Brake Body ITEM PART DESCRIPTION QTY 1 99 588 00 Bleeder screw 2 2 99 588 01 Bleeder adapter 2 3 41 350 43 Brake body left 1 41 350 44 Brake body right 1 4 80...

Page 184: ...Illustrated Parts Parts Page 22 Rear Suspension 1 2 3 5 6 5 FORWARD FORWARD 4 7 8 9 10 11 12 4 13 14 15 16 17 18 Left Side Suspension Overload Spring Bushing...

Page 185: ...ing 1 41 290 67 Axle Tube Left double bearing 1 11 96 114 00 U Bolt single axle bearing 4 12 16 861 44 Spring Axle Mount Bracket Left 1 13 16 861 45 Spring Axle Mount Bracket Right 1 14 89 113 30 Bolt...

Page 186: ...Illustrated Parts Parts Page 24 Motor...

Page 187: ...at time of printing The original motor provided under part number 70 054 40 has been discontinued It has been replaced by 70 054 41 The 70 054 41 motor has slightly more power torque The 70 054 40 mo...

Page 188: ...Illustrated Parts Parts Page 26 Electric Brake 1 2 3 4 5 7 8 9 10 6 11 Automatic Electric Brake Component View...

Page 189: ...4 NC Grade 8 1 11 96 500 04 Tool Manual Auto Electric Brake Release 2 75 152 30 Wiring Harness Not Shown 1 AUTOMATIC ELECTRIC BRAKE PARTS SPECIAL ORDER 1 Magnet and Coil Sub Assembly 1 2 Hub 1 3 Arma...

Page 190: ...Illustrated Parts Parts Page 28 Master Cylinder 2 3 4 1 5 6 7 8...

Page 191: ...QTY 1 88 080 14 5 16 X 1 1 2 NC Hex Bolt 2 2 88 088 61 5 16 Washer 4 3 88 089 81 5 16 Lock Nut 2 4 99 511 20 Master Cylinder 1 5 99 511 51 Rubber Boot Master Cylinder 1 6 99 511 52 Cap Seal Master Cy...

Page 192: ...Illustrated Parts Parts Page 30 Brake Lines...

Page 193: ...ex Bolt 2 13 88 088 61 5 16 Washer 4 14 88 089 81 5 16 Lock Nut 2 15 99 511 20 Master Cylinder 1 16 99 605 77 Brake Line 1 17 99 605 76 Brake Line up to serial 158863 1 99 607 59 Brake Line starting s...

Page 194: ...Illustrated Parts Parts Page 32 Brake Linkage parking brake...

Page 195: ...88 61 5 16 Washer 4 3 51 344 80 Park Brake 1 4 88 089 81 5 16 Locknut 2 5 96 813 00 Adjusting Brake Cable Assembly 1 6 96 771 00 3 8 x 3 4 Clevis Pin 1 7 01 204 32 Brake Equalizer 1 8 96 760 00 Brake...

Page 196: ...Illustrated Parts Parts Page 34 Wheels and Tires Ref wheel hub 1 2 3...

Page 197: ...heels and Tires ITEM PART DESCRIPTION 1 Wheels 12 025 00 8 x 10 Tubeless 2 Tires 10 264 00 20 x 8 x 10 LR E 9 97 236 00 Wheel Nut Not Shown 13 989 00 Valve stem tubless tire only Tire and Wheel Assemb...

Page 198: ...reset after the preventative maintenance has been performed Taylor Dunn part number 62 027 40 Hand set available with instructions as part number 62 027 61 must be used to reset the meter Refer to th...

Page 199: ...99 Item No Part No Description Qty 1 71 100 00 Auxiliary switches 0 1 2 2 71 039 11 Auxiliary switches 0 1 2 3 88 817 07 Screw 6 4 5 01 200 09 Console 1 6 74 010 00 Smart View gauge shoen 0 1 74 009 4...

Page 200: ...Illustrated Parts Parts Page 38 Speed Control Panel...

Page 201: ...eaker 10 amp 1 4 79 840 20 Circuit Breaker 20 amp 2 5 73 005 01 Alarm 1 6 73 004 20 Horn 1 7 79 844 20 Circuit Breaker 200 amp 1 8 62 400 11 Controller Heatsink 1 01 200 08 Control Panel Not Shown 1 6...

Page 202: ...Illustrated Parts Parts Page 40 Miscellaneous Frame and Body...

Page 203: ...88 817 07 Name plate screw 6 94 201 11 Name plate fastener plastic 2 6 94 050 10 Left headlight 1 7 00 248 32 Front cowl weldment not painted 1 8 K6 006 95 Driver Passenger seat cushion 2 9 90 140 00...

Page 204: ...Illustrated Parts Parts Page 42 Charger Lestronic 6 8 5 4 3 7 11 1 2 8 3 4 5 10 7 6 2 1 8 9 Typical Built In charger Typical Portable charger...

Page 205: ...n 1 Ammeter 79 851 10 2 Timer Assembly 79 805 65 79 805 68 79 805 68 S O Relay for 2 79 808 20 79 808 20 79 808 20 79 808 20 3 Capacitor 79 902 00 79 902 00 79 902 00 79 902 00 4 Diode Assembly 79 749...

Page 206: ...HB1000 48 Flooded 79 309 42 HB1000 48 GEL 79 309 43 Notes There are no user serviceable components inside the charger The AC cord is included with the charger Cutting the AC cord will void the charge...

Page 207: ...Harness Chassie control 3 75 152 00 Harness Control panel used up to 10 4 2000 75 152 13 Harness Control panel used starting 10 5 2000 4 75 152 12 2Gauge link wire for control panel 5 10 5 62 033 48 T...

Page 208: ...Illustrated Parts Parts Page 46 Batteries NEG POS NEG POS NEG POS NEG POS NEG POS NEG POS 12 Volt Negative tap Main Positive Main Negative 1 2 3 4 5 6 7 8 1 NEG POS NEG POS...

Page 209: ...00 244AH T 145 77 047 50 250AH TD 250 77 047 80 244AH T 145 Moist charge dry 77 048 00 250AH J 250 77 048 80 250AH J 250 Moist charge dry 77 051 00 160AH Gell Note requires special charger 3 50 243 1...

Page 210: ...Illustrated Parts Parts Page 48 Decals 1 2 4 3 5 6 7...

Page 211: ...ect Decal 1 2 94 313 00 Battery Warning Decal 1 3 94 373 10 Vehicle Identification Decal 1 4 94 309 00 Brake Warning Decal 1 5 94 313 20 Safety Warning Decal 1 6 94 384 01 Not A Motor Vehicle Decal 1...

Page 212: ...Illustrated Parts Parts Page 50 Strobe Light...

Page 213: ...1 4 72 082 10 Turn Signal Bulb 12V 2 5 72 082 20 Socket Turn Signal 2 STROBE LIGHT COMPONENTS 6 72 023 20 Strobe Light Amber 1 7 72 023 30 Pole Mount 1 8 88 025 06 Screw 8 32 X 1 2 Phillips Head 3 9...

Page 214: ...Illustrated Parts Parts Page 52 Steel Cab T48 Page 1...

Page 215: ...n Nut 1 4 NC 2 CAB 91 012 62 Kit Cab Orange 1 91 012 63 Kit Cab Specify Color 1 9 91 012 00 Cab unpainted 1 10 90 852 30 Windshield 1 11 98 310 00 Window Channel Rubber 20 ft 12 90 850 10 Rear Window...

Page 216: ...Illustrated Parts Parts Page 54 Steel Cab T48 Page 2...

Page 217: ...emale Right 1 10 88 069 81 Locknut 1 4 NC 2 11 88 060 22 Bolt 1 4NC X 3 4 Hex Head 1 12 88 068 61 Washer 1 4 SAE 1 13 88 065 09 Screw 1 4NC X 3 4 Phillips Truss Head 2 14 88 068 62 Lockwasher 1 4 2 15...

Page 218: ...Illustrated Parts Parts Page 56 Tops T48...

Page 219: ...e 1 F I B E R G L A S S T O P C O V E R 1 0 0 2 4 8 3 6 T u b u l a r T o p F r a m e 1 2 0 0 2 4 8 3 5 P o s t T o p F r a m e 4 3 8 8 1 0 2 1 1 B o l t 3 8 N C X 1 C a r r i a g e 3 2 4 8 8 1 0 9 8...

Page 220: ...Illustrated Parts Parts Page 58 Doors T48...

Page 221: ...0 1 1 1 2 1 1 3 9 1 0 1 1 6 8 K i t C a b D o o r L e f t O r a n g e i n c l u d e s 1 0 1 1 1 2 1 9 1 0 1 1 6 7 K i t C a b D o o r R i g h t S p e c i f y C o l o r i n c l u d e s 1 0 1 1 1 2 1 9...

Page 222: ...Illustrated Parts Parts Page 60 Optional Deckboards T48...

Page 223: ...065 08 Screw 1 4 NC X 5 8 Phillips Truss Head Not Shown 3 88 069 87 Nut 1 4 NC Keps Not Shown 3 WATERING SYSTEM 48 VOLT NOT SHOWN 77 201 60 Kit Watering System 48 Volt 1 77 201 40 Flow Indicator Water...

Page 224: ...Illustrated Parts Parts Page 62 Cargo Box...

Page 225: ...Front Rear unpainted 1 2 90 471 00 Deckboard Front 40 X 35 1 2 1 3 90 472 00 Deckboard Rear 40 X 38 3 4 1 4 90 850 10 Window 13 7 8 X 31 7 8 1 5 98 310 00 Window Channel Rubber 19 6 90 851 00 Window R...

Page 226: ...Illustrated Parts Parts Page 64 Stake Sides...

Page 227: ...3 88 065 13 Screw 1 4 NC X 1 1 4 Phillips Truss Head 4 4 88 069 87 Nut 1 4 NC Keps 4 5 90 542 05 Side Gate Left Black 1 6 90 542 06 Side Gate Right Black 1 7 90 544 20 Pocket Outer Weld on 8 8 90 544...

Page 228: ...Illustrated Parts Parts Page 66 1 2 7 8 3 4 5 5a 9 11 12 13 14 16 10 6 18 17 15 Cab Deck ET 3000...

Page 229: ...nt headlight bulb 2 9 91 017 65 Front Bumper 1 88 103 09 Screw Socket Head 3 8 X 3 4 Front Bumper Hardware 2 88 109 81 Locknut 3 8 Front Bumper Hardware 2 10 72 005 21 Headlight Support 1 11 72 052 00...

Page 230: ...Illustrated Parts Parts Page 68 3 4 5 6 1 2 Door Latch 9 8 7 Cab Components ET 3000...

Page 231: ...0 Window Door Right 3 Pieces 1 3 90 854 01 Latch Window Door 1 4 91 017 02 Strap Door Brackets Included 1 5 91 017 31 Handle Inside Door Left 1 6 91 017 32 Handle Inside Door Right 1 7 72 015 10 Light...

Page 232: ...Illustrated Parts Parts Page 70 Misc Frame ET 3000 1 2 10 11 19 27 26 23 24 25 9 20 18 17 16 15 21 22 12 13 14 15 5 6 3 4 7...

Page 233: ...Post Left Side Panel 2 17 Header Rear Right 1 18 Latch 4 19 89 080 16 Bolt 8mm X 16 1 2 2 0 H i n g e A l u m i n u m 6 2 1 A l u m i n u m T H i n g e 6 22 P l a t e T h r e a d e d 8 m m 6 23 88 081...

Page 234: ...TAYLOR DUNN...

Page 235: ...ed Torque Limits for Standard Hardware 3 Hardware Identification 3 Standard Head Markings 3 Hex Bolts 3 Other Bolts 3 Hex Nuts 4 Hex Lock Nuts stover 4 Other Nuts 4 Suggested Torque Values non critica...

Page 236: ...set the Smart View display maintenance meter includes instructions 62 027 61 Sevcon Handset Analyzer with Speed Adjust Capability Same as 62 027 61 above plus allows a limited range of speed adjustmen...

Page 237: ...Carriage Bolt grade 2 unless marked as above Other Bolts NOTE Torque value used should be for lowest grade of hardware used If a grade 2 nut is used on a grade 8 bolt use grade 2 torque value NOTE Toq...

Page 238: ...as S A E Grade 2 Lock nuts use a letter to indicate the grade of the nut Grade A locknuts would be the equivelent of Grade 2 hex nuts Grade B as Grade 5 and Grade C as Grade 8 NOTE Nuts with no marki...

Page 239: ...2 13 39 59 60 90 85 128 95 1 2 20 44 66 68 102 96 144 110 9 16 12 56 84 87 131 123 184 140 9 16 18 63 94 97 146 137 206 160 5 8 11 78 117 120 180 170 254 195 5 8 18 88 132 136 204 192 288 225 3 4 10 1...

Page 240: ...center section Dana F N R 25 35 300 420 34 47 6 Carrier cap bolts Dana 100 120 1200 1440 136 163 2 Differential Cover plate Dana H12 18 25 216 300 24 5 34 Drain plug Dana H12 25 40 300 480 34 54 4 Dra...

Page 241: ...um cleaner or any alternate method approved by OSHA to minimize the hazard caused by airborne asbestos fibers and brake dust Do not grind sand break or chisel the brake pads shoes as this will cause u...

Page 242: ...Taylor Dunn Mfg 2114 W Ball Rd Anaheim CA 92804 800 688 8680 714 956 4040 FAX 714 956 0504 Visit our Website www taylor dunn com...

Reviews: