background image

3-16


Initial Power-Up Tests

Coral FlexiCom 6000 Installation Manual

Co

mm

on

 C

o

nt

ro

l T

est 

3

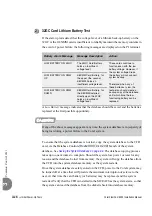
If the start-up tests detect that the voltage level of a lithium back-up battery on the 

32GC or the 4/8XMM card is insufficient to reliably maintain the memory contents in 

the event of power failure, the following messages are displayed on the PI terminal.

Low Battery

 message indicates that the database should be saved and the batteries 

replaced at the first possible opportunity.

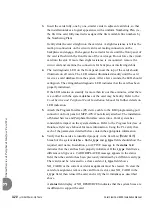
To ensure that the system database is not lost, copy the system database to the CFD 

card, via the Database Controls 

(Route: ROOT,0,10,2,0,0)

 branch of the system 

database. See 

Saving the System Database on page 4-4

. The database copying process 

takes up to one minutes to complete. Should the system lose power or reset for any 

reason and the database be lost from memory, the system will copy the database from 

the CFD into the system database memory as the system restarts.

Once the system database is safely stored on the CFD, power to the Coral system may 

be turned off at a time that will provide the minimum interruption of service to the 

user. At that time the card battery (or batteries) may be replaced, and the system 

restarted. Verify that the CFD is installed in the MCP-ATS as the system starts, so that 

the system can read the database from the diskette back into database memory.

...................................................................................................

2

32GC Card Lithium Battery Test

Battery Alarm Message

Message Description

Action:

LOW BATTERY ON 32GC

The 32GC Card Battery 
holds an insufficient 
voltage level.

These cards continue to 
function even with the low 
battery voltage. However, if 
the system voltage drops, 
the battery will not support 
system backup. 

Therefore, when any of 
these batteries is low, the 
technician should create a 
backup copy of the database 
until which time the low 
functioning battery can be 
replaced.

LOW BATTERY ON XMM 
UP

4/8XMM Card Battery, for 
the upper (the second) 
4/8XMM, holds an 
insufficient voltage level.

LOW BATTERY ON XMM 
DOWN

4/8XMM Card Battery, for 
the 4/8XMM installed 
directly upon the 32GC, 
holds an insufficient 
voltage level.

If any of the above messages appear at any time, the system database is in jeopardy of 

being lost during a power failure to the Coral system.

Summary of Contents for Coral FlexiCom 6000

Page 1: ...Coral FlexiCom 6000 Installation Procedure and Hardware Reference Manual Creating a new world of IPportunities Edition 6 ...

Page 2: ......

Page 3: ... or liability to make changes in equipment design or specifications Information supplied by the Manufacturer is believed to be accurate and reliable However no responsibility is assumed by the Manufacturer for the use thereof nor for the rights of third parties which may be affected in any way by the use thereof Any representation s in this document concerning performance of the Manufacturer s pro...

Page 4: ......

Page 5: ...mporary discontinuance of service may be required If advance notice is not practical the telephone company will notify the customer as soon as possible Also you will be advised of your right to file a complaint with the FCC if you believe it is necessary The telephone company may make changes in its facilities equipment operations or procedures that could affect the operation of the equipment If t...

Page 6: ... complies with the following EN 60950 1 EN 55022 CISPR 22 EN 55024 CISPR 24 Australia and New Zealand Compliance Statement Equipment certified for Australia and New Zealand has been tested and complies with the following AS NZS 4117 AS NZS 60950 1 ACA TS001 TS002 TS003 TS004 AS NZS CISPR22 ...

Page 7: ...ssions limits of FCC Rules the following precautions must be observed while installing and operating the equipment 1 Install the equipment in strict accordance with the manufacturer s instructions 2 Verify that the power supply and associated A C powered equipment are connected to a properly grounded electrical supply and that power cords if used are unmodified 3 Verify that the system grounding i...

Page 8: ...lectronic Equipment WEEE and with any applicable law and regulation promulgated in its respective Member State in connection with such Directive Accordingly the Distributor is responsible for and shall bear all costs related to the collection treatment recovery reporting and environmentally sound disposal of all electronic waste related to the products For the purpose of this paragraph the term Di...

Page 9: ... Site Inspection 2 1 Space Requirements 2 1 Installation Environment 2 3 Electrical Requirements 2 5 2 2 Equipment Installation 2 7 Unpacking the Shipping Container 2 7 Cabinet Mounting and Placement 2 9 Ground and Power Wiring 2 11 Input Output I O Cables 2 20 Power Supplies 2 30 Circuit Card Installation 2 32 Cabling between the Control and Peripheral Shelves 2 41 2 3 Program Interface Device Co...

Page 10: ...Files on the CFD 4 7 Viewing CFD Directory Details 4 9 Automatic Daily Database Back Up 4 10 Error Messages 4 11 4 3 Hot Standby Configuration Modes 4 13 Hot Standby System Side Definitions 4 13 Switching between System Sides 4 15 4 4 Upgrading the Coral Version 4 21 4 5 System Diagnostics 4 25 Peripheral Units Diagnostics 4 25 PB ATS Fault Messages 4 27 5 External Connections 5 1 External Connect...

Page 11: ...13 Installation 7 14 Adjustment 7 15 Ringer Database Programming 7 16 Specifications 7 17 7 3 PS ATS 7 19 General Description 7 19 Circuit Description 7 21 PS ATS Orientation and Installation 7 22 Troubleshooting 7 25 Specifications 7 30 8 Common Control Cards 8 1 Common Control Shelf 8 1 General Information 8 1 Control Shelf Backplane Connections 8 3 Control Card Assignments 8 6 Card Handling Pro...

Page 12: ...tions 8 74 8 4 4 8XMM 8 75 General Information 8 75 Specifications 8 80 8 5 CLA ATS 8 81 General Description 8 81 Card Description 8 82 Inserting the CLA ATS Card 8 88 Installing a CFD in the Teknor cPCI MXP CLA ATS Card 8 89 BIOS Settings 8 90 Network Connections 8 94 Database Programming Areas 8 94 Applications 8 95 Specifications 8 97 8 6 PB ATS 8 99 General Description 8 99 Circuit Description...

Page 13: ...Peripheral Card Placement 2 37 Figure 2 13 Odd Numbered Shelf Peripheral Card Placement 2 38 Figure 2 14 Control Card Slots for a redundant system 2 40 Figure 2 15 Backplane Wiring Schematic for Peripheral Shelves to Control Shelf 2 42 Figure 2 16 PBD24S to PBD ATS Cabling 2 45 Figure 2 17 MPG ATS with Ground Connections 2 46 Figure 2 18 PBD ATS Ground Connections 2 47 Figure 2 19 PI DB9 Terminal ...

Page 14: ...ot Assignment 6 13 Figure 6 12 4 Shelf Expansion Cabinet with 4 Peripheral Shelves installed Front Card Slot Assignment 6 14 Figure 6 13 Coral FlexiCom 6000 Backplane Slot Diagram Rear View 6 16 Figure 6 14 Connector Pair Allocation 6 18 Figure 6 15 Connection Layout for 66 Type Punch Blocks 6 18 Figure 6 16 Coral FlexiCom 6000 RJ 45 I O Connections from Front Panel to Rear Panel 6 19 Figure 6 17 ...

Page 15: ... 7 11 Coral FlexiCom 6000 Control Shelf Power Cabling and Fuses 7 28 Figure 7 12 PS ATS Side View 7 29 Figure 8 1 Control Shelf Rear Backplane 8 4 Figure 8 2 MPG ATS Interface Card Layout 8 5 Figure 8 3 Coral Control Shelf Front View 8 6 Figure 8 4 Control Card Slots and Coded Keys 8 8 Figure 8 5 Inserting the Control Card 8 11 Figure 8 6 Removing the MCP ATS Card 8 13 Figure 8 7 Control Shelf Fan...

Page 16: ...tribution for 32GC 8 68 Figure 8 24 Software Authorization Unit SAU Detail 8 70 Figure 8 25 4 8XMM Card Layout 8 77 Figure 8 26 XMM installed on 32GC 8 79 Figure 8 27 CLA ATS Front Panel Upright Position 8 84 Figure 8 28 CLA ATS Card Layout 8 85 Figure 8 29 CLA ATS card with CFD Drive removed 8 86 Figure 8 30 CLA ATS Functional Block Diagram 8 87 Figure 8 31 CoraLINK Application Telephony Server 8...

Page 17: ...Coral FlexiCom 6000 Installation Manual Chapter 1 Introduction 1 1 Document Description 1 1 1 2 System Description 1 5 1 3 Special Symbols 1 9 1 4 Recommended Tools 1 11 ...

Page 18: ......

Page 19: ...complete hardware reference Installation Procedure Guide Chapters 2 3 4 and 5 comprise the Installation Procedure which describes the Hardware Installation Initial Power Up Test Software Installation and External connections The chapters listed below outline the step by step process for installing a new complete Coral system Peripheral devices can be installed at any time after system installation...

Page 20: ...Initial Power Up Tests After completing installation use this chapter to enable the Coral FlexiCom 6000 system to process calls Chapter 4 Software Installation Procedure Use this chapter to upgrade the Coral FlexiCom 6000 software and save the database Chapter 5 External Connections The pinout tables for peripheral card connections are found here The tables are used during the installation procedu...

Page 21: ...D CoralVIEW Designer Guide Backup 1 PI Program Interface and Database Reference Manual Chapter 21 2 Database Binary Backup PC Utility Coral FlexiCom 300 400 5000 systems Descriptions and Installation Procedure Chapter 5 External Connections Coral FlexiCom 300 400 5000 Installation and Hardware Reference Manual Coral Software Installation and Upgrade FMprog PC Utility Reference Manual Coral FlexAIR...

Page 22: ... T208M T207M NP and T208M BL IP station Installation Manual T207S T208S T207S NP and T208S BL IP station Installation Manual FlexSet IP 280S IP station Installation Manual FlexSet 120 120D 120L 120S 121S 280 280D 280D Z 280S 281S APDL PEX APA and CPA Digital Station Terminal Equipment Installation Manual DKT DST and VDM Digital Station Terminal Equipment Installation Manual FlexIP SoftPhone User G...

Page 23: ...itry are passed through the Group Controller which provides driver and time slot interchange functions for the PCM highways and the HDLC channels The peripheral circuitry is further divided into Shared Service and Peripheral Interface functions The Shared Service circuitry provides the equipment necessary to establish calls between Peripheral interfaces The Peripheral Interface circuitry provides ...

Page 24: ...may be replaced while the system is operational The operating software stored in the Compact Flash memory Disk CFD of both control system sets provides complete long term stability The Database program is stored in a battery protected SRAM in the appropriate components of both control system sets All generated data stored in the memory of the Active control system is automatically recreated in the...

Page 25: ...n use Simultaneously per Peripheral Unit 512 512 Quantity of PB ATS Cards per Even Peripheral Shelf Two PB ATS cards for redundant peripheral buffer functions are installed side by side in slots 1 and 2 of the even Peripheral Shelves A single PB ATS configuration provides high call traffic throughout the system without using the PB ATS redundancy option The single PB ATS card occupies slot 1 of th...

Page 26: ...onnected to house additional Shared Service and I O Card slots The Control Shelf includes one Control Card the 32GC for a single system The dual system FlexiCom 6000 R includes two 32GC cards placed side by side on the same control shelf Other control accommodating cards also reside on the control shelf as well See Chapter 6 for further cabinet and card details The Coral FlexiCom 6000 system is ea...

Page 27: ...ates important information demanding special attention Points out a special procedure or a definition that is relevant but not central to the text Tip Advice that makes it easier to follow the steps of a procedure This manual includes information for the Coral configurations in all geographic market areas Much of the information is relevant for all hardware configurations and all market areas Ther...

Page 28: ...1 10 Introduction Coral FlexiCom 6000 Installation Manual Special Symbols Used in this Document 1 NOTES ...

Page 29: ...tallation or service personnel have the following list of tools as a minimum at their immediate disposal for any Coral installation site Required Tools and 5 16 straight blade Screwdriver 1 and 2 Phillips blade Screwdriver Diagonal Wire Cutters Long Nosed Pliers Electrician s Pliers Slip Joint Pliers Adjustable Wrench Telephone Cable Cutters Telephone Cable Insulation Strippers Standard Crimping T...

Page 30: ...ar Line Polarity Tester Flashlight Tone Continuity Talk Battery Generator Tone Detector Amplifier Probe Telephone Line Test set with MF tone signaling capability Alligator Clip Leads AMPTM ChampTM Installation Tool Soldering Iron and high quality rosin core solder and Cable Staple Gun Analog Line Transmission Analyzer Portable DS1 E1 Analyzer Bit Error Rate Tester and channel demultiplexer Related...

Page 31: ...Coral FlexiCom 6000 Installation Manual Chapter 2 Hardware Installation Procedure 2 1 Site Inspection 2 1 2 2 Equipment Installation 2 7 2 3 Program Interface Device Connection 2 49 ...

Page 32: ......

Page 33: ...ensions and Clear space requirements for the different cabinet types Table 2 1 Cabinet Dimensions and Clear Space 2 Verify that there is sufficient space for the Main Distribution Frame MDF in addition to the space required by the cabinet The MDF should be located immediately adjacent to the Coral cabinet The bottom of the MDF should be no lower than 2 feet 61cm and the top should be no higher tha...

Page 34: ...lated to the Coral system such as the Program Interface terminal or a PC Voice Mail system External Public Address system etc 4 Verify that there is sufficient space for a technician s desk or work table if one is provided as part of the installation 5 Verify that there is sufficient space for Power Backup equipment if it is provided as part of the installation No specific requirements can be deta...

Page 35: ...el of 70 foot candles at each work surface As a general rule in a room with an eight foot 2 5m ceiling one 48 inch fluorescent tube provides sufficient illumination for 20 25 sq ft 1 9 2 4m2 5 Verify that ventilation of the installation area is capable of maintaining an ambient temperature of 32 104 F 0 40 C and a relative humidity of 20 80 non condensing while the system is operating as listed in...

Page 36: ...olid reinforced walls and a locking door The Coral system and the service it provides to users represents a substantial investment During an emergency reliable service may be crucial in protecting lives and property Access to the system should be limited and controlled to prevent unauthorized tampering The system uses hazardous working voltages and extremely high short circuit currents and the are...

Page 37: ...computers or test instruments to be operated near the system 5 Table 2 3 lists the voltages and current requirements for each cabinet DC Electrical Requirements DC powered units must comply with the following instructions 1 Restricted Access Area The DC powered equipment should only be installed in a Restricted Access Area 2 Installation Codes The equipment must be installed according to country n...

Page 38: ...ice is not allowed in the earthed circuit between the DC supply source and the frame earthed circuit connection Table 2 3 Coral System Power Requirements Cabinet Type Branch Circuit for Coral Auxiliary Branch Circuit 48VDC 115 VAC 230 VAC 115 VAC 230 VAC Main with 2 Peripheral Shelves 20A 10A 15A 10A 12A Main with 3 Peripheral Shelves 20A 15A 15A 10A 18A 2 Shelf Expansion Add 10A Add 5A N A N A Ad...

Page 39: ... three plastic bands around the shipping carton 4 Lift the top of the shipping carton 5 Remove the front and rear nameplates from the depressions in the top foam inserts and carefully place them aside Remove any other items on top of the foam insert and place aside 6 Remove the top foam inserts and set aside 7 Remove any circuit card boxes laying on top of the Coral system cabinet 8 Remove the pla...

Page 40: ... inside bottom of the shipping carton then continue to raise the pallet until its weight begins to balance on the bottom edge 12 Have one assistant move to the open side of the shipping carton and push gently on the cabinet to prevent the cabinet from tilting out of the shipping carton Continue to raise the shipping pallet until the cabinet is vertical Have the second assistant move to the open si...

Page 41: ...t by turning it clockwise if necessary Spin each of the four leveling feet to the left extending them to the floor With the help of an assistant tilt the front top of the cabinet back slightly and turn the front two leveling feet one or two additional turns so that the weight of the cabinet rests on the leveling feet instead of the casters Repeat this procedure for the rear two leveling feet Place...

Page 42: ...forming a complete shield against electromagnetic and radio frequency signals Each door should fit snugly into the cabinet opening however undue force should not be required to open or close any door The edges of the doors are perforated at the corners to allow the edge to be bent with relatively light hand force Bending an edge of a door inward or outward controls the pressure applied by the cont...

Page 43: ...recommended Wiring Procedure 1 Power cables may be routed from above the Coral cabinet through a cable entry point in the left rear corner of the cabinet top or from below through a similar entry point in the rear left corner of the cabinet bottom Determine whether cables should be routed from the top or bottom of the cabinet Figure 2 4 illustrates the possible power cable routing through the cabi...

Page 44: ... power cable is routed from the bottom of the cabinet remove the two circular covers through which the cables are to be routed One is located on the cabinet front left bottom and the other on the cabinet top behind the cable clamps Forcibly push up the covers releasing them from their spring fixings and discard ...

Page 45: ... Supply To AC Power Coral FlexiCom 6000 Cabinet MPS Power Supply Master Ground F1 F2 SPARE FUSE PIC Power Input Card FUSE 30A 60V GND SGND Ground Cable Entry Clamp Power Cable Entry Clamp Building Entrance Ground 48V RTN 48V IN 1st Floor Ground 2nd Floor Ground MDF Ground Network Termination Ground 48VDC 1 0 ohm max 2 Separate Wires Circuit Breaker Panel ...

Page 46: ...with Battery Chargers Layout Coral FlexiCom 6000 Cabinets Master Ground 48V Bus Bar Panel To AC Power MPS Power Supply Circuit Breaker Panel F1 F2 SPARE FUSE PIC Power Input Card FUSE 30A 60V GND SGND F1 F2 SPARE FUSE PIC Power Input Card FUSE 30A 60V Building Entrance Ground 1 0 ohm max 48VDC 48V RTN 48V IN 48V RTN 48V IN SGND GND ...

Page 47: ...Cable Routes side and rear views Side View Cable Exits through Top and Re enters through Cable Clamps Power Cable Enters from Bottom Power Cable from Bottom Loops Over Here Cable Clamps Hole for Cable Exit Route Power Cable from Bottom Hole Upward Along the Left Side Top View Bottom View Rear View Hole for Cable Entry Power Input Cavity ...

Page 48: ...Input Card in the power input cavity The Cable Guide may be removed to ease the insertion of the conductors into the power input cavity see Figure 2 5 7 Route the red positive conductor through the right larger cable clamp in the Cable Guide above the 48V RTN IN terminal lug on the Power Input Card in the power input cavity 8 Route the black negative conductor through the right larger cable clamp ...

Page 49: ...Manual Hardware Installation Procedure 2 17 Equipment Installation 2 12 Install the front and rear cabinet nameplates at the top of the cabinet front and rear respectively 13 Continue with Input Output I O Cables beginning on page 2 20 ...

Page 50: ...lation Manual Equipment Installation 2 Figure 2 5 Coral DC Power Input Terminals 48V IN SPARE FUSE PIC Power Input Card FUSE 30A 60V F1 F2 GND SGND 48V RTN Ground Cable Entry Clamp Decorative Panel Pull to Remove Power Cable Entry Clamp Power Input Cover Coral 6000 ...

Page 51: ...Coral FlexiCom 6000 Installation Manual Hardware Installation Procedure 2 19 Equipment Installation 2 NOTES ...

Page 52: ...eripheral shelves 4 Carefully route the connector end of each I O cable through the right cable entry point at the top or bottom of the cabinet threading the cable through the guide rings along the right side of the backplane to each I O connector as shown in Figure 2 6 Coral I O Champ Cable Routes from Bottom of Cabinet rear view and Figure 2 7 Coral I O Champ Cable Routes from Top of Cabinet rea...

Page 53: ... left across the lower I O connectors and then from right to left across the upper I O connectors When all sixteen I O cables are installed on the lower peripheral shelf move up to the peripheral shelf above until all the required I O cables are in place Table 2 4 I O Champ Connector to Card Slot Relationships Coral I O Champ Connectors Associated Card Slots J37 J38 3 4 J39 J40 5 6 J41 J42 7 8 J43...

Page 54: ...O Champ Cable Routes from Bottom of Cabinet rear view I O Cables from Bottom Enter Here J37 J41 J52 J50 J48 J44 J40 J46 J38 J42 J51 J49 J47 J45 J43 J39 J51 J49 J47 J43 J39 J45 J37 J41 J52 J50 J48 J44 J46 J38 J42 J40 Route I O Cables Through Guide Rings Along Right Side of Backplane Knockout Panel for I O Cables Entry A A ...

Page 55: ...p Cable Routes from Top of Cabinet rear view I O Cables from Top Enter Here Rear View Top View J37 J41 J52 J50 J48 J44 J40 J46 J38 J42 J51 J49 J47 J45 J43 J39 J51 J49 J47 J43 J39 J45 J37 J41 J52 J50 J48 J44 J46 J38 J42 J40 Route I O Cables through Guide Rings along Right Side of Backplane Cover RJ 45 I O Cables Enter Here Screw ...

Page 56: ... with the I O cable according to Table 2 4 andFigure 2 8 8 Attach the front decorative panel nameplate and rear cabinet panel at the top of the cabinet front and rear see Figure 2 5 and lock into place Figure 2 8 Coral Card Slot Position to I O Cable Pair Relationship Ensure that each I O cable is secured with its own hook and loop fastener strap on the Coral cabinet rear so that the cables do not...

Page 57: ... interface circuits to be fully protected against radio frequency interference RFI and meet or exceed all requirements and specifications of telecommunications and electrical safety authorities world wide 1 Remove the rear decorative panel nameplate on the top of the cabinet See Figure 2 11 2 Route the crossover cable Catalog Number 7244 8000624 from the front panel of the peripheral cards to the ...

Page 58: ...hapter 5 9 of the Coral FlexiCom 300 400 5000 Installation Procedure and Hardware Reference Manual 7 Connect one side of the RJ 45 cable routed in Step 5 to the LAN WAN PSTN router LTU CSU etc 8 Carefully route the other side of the RJ 45 cable routed in Step 5 through one of the three cable entry points in the top rear of the Coral cabinet as shown in Figure 2 10 Connect the RJ 45 connector to th...

Page 59: ...pment Installation 2 Figure 2 9 Coral Cabinet I O RJ 45 Crossover Cable Routing UDF for PRI T1 30T 30TM layout UDT 2DT Optional PUGW T1 PRI 30T 30TM layout UDT 2DT LDF for MAP CLA PUGW UGW E UGW IPG RJ 45 Cables to Front Panels of Peripheral Cards Crossover H624 Cat No 7244 8000624 ...

Page 60: ...tallation Manual Equipment Installation 2 Figure 2 10 Coral I O RJ 45 Cables Routing Rear View Top View RJ 45 Cables RJ 45 Cables from PSTN or LAN WAN Enter Here PSTN or LAN WAN RJ 45 Cables to Front Panels of Peripheral Cards Crossover H624 Cat No 7244 8000624 ...

Page 61: ...Coral FlexiCom 6000 Installation Manual Hardware Installation Procedure 2 29 Equipment Installation 2 Figure 2 11 Coral LDF UDF RJ 45 Connectors Decorative Panel Coral 6000 Pull to Remove ...

Page 62: ...r to Figure 2 14 and Figure 2 12 for power supply placement in the Common Control shelf and Peripheral Shelves respectively See Chapter 7 Power Supplies for further details on the PS ATS units Installing the Power Supply Units Two Power Supply units are normally shipped in the Common Control Shelf of the system already fastened into place Verify that the two power supplies are installed in slots P...

Page 63: ...the circuit card edges with the card edge guides in the card cage or shelf and gently slide the power supply straight into the card slot A slight resistance is felt as the multi pin connectors on the power supply meet the mating connectors on the backplane and engage 4 Push the power supply into its slot for the PPS and RPS push against the extractor levers until the front panel of the power suppl...

Page 64: ...nly a single RPS is required to supply power for the peripheral shelf unit although a second RPS may be installed on the odd Peripheral shelf when needed Tip The 8 24SA card does not require RPS for industry standard single line telephones SLT The ringer generator is provided by the 8 24SA card Inserting a Coral Circuit Card To insert a circuit card into a card slot grasp the card with both hands ...

Page 65: ...ard cage These cards are inserted completely after the Power Up tests performed in Chapter 3 Some Shared Service and Peripheral Interface cards may require changes to option straps on the card which determine the electrical characteristics or operation of each interface circuit Refer to specific card descriptions in the Coral Service and Peripheral Cards Installation Manual for details Peripheral ...

Page 66: ...MR 4TPF 8TPF DPC 4TBR 8TBR 30T 30TM 30T x PRI23 PRI30 2DT UDT and T1 evenly among all peripheral shelves in the system rather than concentrate trunk interface cards in one or two shelves This practice ensures that the failure of a single peripheral shelf has minimal impact to trunk service In cabinets with three peripheral shelves 48 card slots place all single line and magneto ports 8SLS 16SLS 24...

Page 67: ...heral Analog Trunk Interface and remaining Auxiliary and Digital Trunk Interface cards starting at card slot 18 and moving to the left Distribute heavy consumer cards cards with a large number of ports among the slot sets as evenly as possible based on their PCM highway distribution see Time Slot Distribution among the Peripheral Units on page 6 21 The Peripheral Shelf Unit Unit 2 shelves comprise...

Page 68: ...nk Interface 4 8T 4 8T C 4 8T CID 4TMR 4 8TPF 4TEM 4TEM P 4 8T S 4 8ALS 4 8ALS M 8DID 8BID 4GID 4TWL Peripheral Digital Trunk Interface PRI 23 PRI 30 T1 30T 30TE 30TM 30T x 2DT UDT 4 8TBR 8TBRP DPC SS7 Peripheral Station Interface 8 16 24SFT 8SM 8 24SA 8 16 24SLS 16SH LL 8 16SKK VoIP Interface PUGW UGW UGW E IPG FlexiGate BRI FlexiGate E M Peripheral Auxiliary Interface 8DRCM 8DRCF RMI These cards...

Page 69: ...NIV I O Card Type J51 52 b Card Type J51 52 a J49 50 b J49 50 a J47 48 b J47 48 a J45 46 b J45 46 a J43 44 b J43 44 a J41 42 b J41 42 a J39 40 b J39 40 a UNIV I O UNIV I O UNIV I O UNIV I O UNIV I O UNIV I O UNIV I O UNIV I O UNIV I O UNIV I O UNIV I O UNIV I O UNIV I O UNIV I O Card Type Card Type Card Type Card Type Card Type Card Type Card Type Card Type Card Type Card Type Card Type Card Type ...

Page 70: ...O Card Type J51 52 b Card Type J51 52 a J49 50 b J49 50 a J47 48 b J47 48 a J45 46 b J45 46 a J43 44 b J43 44 a J41 42 b J41 42 a J39 40 b J39 40 a UNIV I O UNIV I O UNIV I O UNIV I O UNIV I O UNIV I O UNIV I O UNIV I O UNIV I O UNIV I O UNIV I O UNIV I O UNIV I O UNIV I O Card Type Card Type Card Type Card Type Card Type Card Type Card Type Card Type Card Type Card Type Card Type Card Type Card T...

Page 71: ...p The cards installed on the left side of the shelf are inserted up side down with the card LED at the bottom Preparing the Control Cards for Installation 1 The standard FlexiCom 6000 Common Control cards are normally shipped already inserted in their respective card slots Upon removing the packaging of the Control cage verify that these cards are indeed inserted into their respective card slots a...

Page 72: ...one designated for that card Irreparable damage may occur if a Common Control card is placed in an incorrect slot with power applied Inserting Control Cards The Control shelf is shipped with the 32GC s the MCP ATS s and the Power Supply Unit s already set in their appropriate slots and fastened into place The CLA ATS is shipped separately and must be installed separately see Inserting the CLA ATS ...

Page 73: ...MPG ATS via a PBD24S located on the backplane of the odd shelf connected to their related PBD ATSs on the even shelf via FC16 100cm or FC18 50cm discontinued cables See Figure 2 15 for a wiring schematic The arrangement of these connections define the shelf numbering mainly used for the Programming Interface Updates and Displays See Peripheral Shelf Numbering beginning on page 6 26 for shelf numbe...

Page 74: ...tallation 2 Figure 2 15 Backplane Wiring Schematic for Peripheral Shelves to Control Shelf 1st PB ATS PBD ATS P2 Right 32GC J11 J12 PBD24S 2nd PB ATS Even Shelf Backplane Odd Shelf Backplane FC19 Cable Left 32GC P3 FC19 Cable P1 MPG ATS B A C K P L A N E FC16 Cable P6 P7 29 27 H 41 Cable P1 ...

Page 75: ...cable to the next free MPG ATS P1 P2 P8 connector by pushing it onto the pins until the connector locks onto the pins For Redundant systems connect another FC19 cable to its Pn pair between P9 and P15 with the same Unit number as the first The MPG ATS connectors are paired as follows P1 and P9 Unit 0 P5 and P13 Unit 4 P2 and P10 Unit 1 P6 and P14 Unit 5 P3 and P11 Unit 2 P7 and P15 Unit 6 P4 and P...

Page 76: ...peripheral shelves those containing no PB ATSs are connected to the 32GC via their respective even shelves those containing a PB ATS The odd shelf is connected to the even shelf via a FC16 100cm or FC18 50cm discontinued cable on the shelves backplanes see Odd or Even Shelves on page 6 26 for determining odd and even shelves 1 Locate the PBD24S cards not already connected to an even shelf One FC16...

Page 77: ...om 6000 Installation Manual Hardware Installation Procedure 2 45 Equipment Installation 2 Figure 2 16 PBD24S to PBD ATS Cabling 1 1 P6 P7 4 4 PBD24S PBD ATS J2 J3 P1 P1 P1 P2 P3 FC16 flat cable Even shelf Odd shelf ...

Page 78: ... Ground Connections UP P9 P8 P10 P7 P1 1 P6 P12 P5 P13 P4 P14 P3 P15 P2 P16 P1 P20 P19 P18 P17 GND 8 GND 7 GND 6 GND 5 GND 4 GND 3 GND 2 FC 19 cable to PBD ATS P3 FC 19 cable to PBD ATS P2 Ground cable GND 1 GND 9 GND 10 GND 11 GND 12 GND 13 GND 14 GND 15 GND 16 MPG ATS MPG ATS P1 P8 to PBD ATS P3 MPG ATS P9 P16 to PBD ATS P2 ...

Page 79: ...tallation Manual Hardware Installation Procedure 2 47 Equipment Installation 2 Figure 2 18 PBD ATS Ground Connections 1 1 P1 P2 P3 GND2 P6 P7 4 4 PBD ATS GND3 FC 19 cable to MPG ATS P9 FC 19 cable to MPG ATS P1 Ground cables ...

Page 80: ...2 48 Hardware Installation Procedure Coral FlexiCom 6000 Installation Manual Equipment Installation 2 4 NOTES ...

Page 81: ... data terminal and modem PC with VT emulator PC with CoralVIEW Designer CVD PC with CoralVIEW Administrator CVA The Program Interface PI menu driven interface enables the technician to update the system software backup and restore the system database and view system components as needed The PI terminal device PC or data terminal must be equipped with an RS 232 asynchronous serial data interface wh...

Page 82: ...rial programming port on the front panel of each MCP ATS card The KB0 port end of the serial programming cable requires a male DB 25P style connector wired as shown in either Figure 2 19 or Figure 2 20 If the PI device uses a DB 25P or DB 25S connector wire the connectors according to the diagram in Figure 2 19 If the PI device is a personal computer equipped with a DA 9P connector wire the connec...

Page 83: ... DATA TERMINAL READY 4 6 9 CARRIER DETECT 1 RECEIVE DATA 2 TRANSMIT DATA 3 SIGNAL GROUND 5 9 PIN PC ASYNC SERIAL PORT USE FEMALE CABLE CONNECTOR 4 1 2 3 5 6 9 KB0 PROGRAMMING PORT USE FEMALE CABLE 9 PIN CONNECTOR 13 4 DATA TERMINAL READY 25 14 1 1 2 RECEIVE DATA 3 TRANSMIT DATA 5 SIGNAL GROUND DATA SET READY 6 CLEAR TO SEND 5 REQUEST TO SEND 4 RECEIVE DATA 3 TRANSMIT DATA 2 SIGNAL GROUND 7 PC Asyn...

Page 84: ...2 52 Hardware Installation Procedure Coral FlexiCom 6000 Installation Manual Program Interface Device Connection 2 ...

Page 85: ...Coral FlexiCom 6000 Installation Manual Chapter 3 Initial Power Up Tests 3 1 Power Supply Test 3 1 3 2 Common Control Test 3 9 3 3 Shared Service Peripheral Interface Card Test 3 19 ...

Page 86: ......

Page 87: ...ttings and verify that the leads are connected properly If after checking the meter and connections a zero voltage reading remains the associated power supply is faulty and must be replaced 1 General Before proceeding verify that all internal power supplies PPS RPS and PS ATSs and circuit cards in the Coral system are only partially inserted into their respective card slots with the front panels p...

Page 88: ...st be approximately 48 volts DC Refer to Figure 3 1 3 Place the power input cover over the power input cavity Refer to Figure 3 1 4 Insert the two screws into the power input cover and tighten them 5 Push the front and rear decorative panels into place 6 Repeat the above steps for each Coral cabinet in the system 2 Power Input If a minus sign appears in the meter display the polarity of the 48VDC ...

Page 89: ...er Up Tests 3 3 Power Supply Test 3 Figure 3 1 Power Input Terminals 48V IN SPARE FUSE PIC Power Input Card FUSE 30A 60V F1 F2 GND SGND 48V RTN Ground Cable Entry Clamp Decorative Panel Pull to Remove Power Cable Entry Clamp Power Input Cover Coral 6000 ...

Page 90: ...1 Forcibly push each PS ATS unit back into its slot See PS ATS beginning on page 7 19 for more information on the PS ATS units 2 The technician must only verify that the green POWER indicator on each PS ATS front panel is illuminated and that the red FAIL indicator is off after power is applied to the Control Shelf 3 Fasten the four captive screws on each corner of each PS ATS to secure it into pl...

Page 91: ...est point Verify that there is approximately 5 volts between them 5 Insert the positive lead into the 5V RTN test point and the negative lead into the 5V test point Verify that there is approximately 5 volts between them 6 Insert the negative lead of the meter into the 12V RTN test point and the positive lead into the 12V test point Verify that there is approximately 12 volts between them 7 Insert...

Page 92: ...Peripheral Power Supply Test Points F1 INPUT ON OFF ADJ RTN ADJ RTN RTN ADJ RTN RTN 5V 48V 12V 12V 5V 8A F2 INPUT 15A PERIPHERAL POWER SUPPLY PPS Input fuse 48V PPS DC DC converters Input fuse 48V PPS control peripheral cards Power switch Output test points Output voltage adjust Power on green indicator ...

Page 93: ...n the front panel of the RPS 1 Verify that the output voltage selection tap is set to 75VAC as required by UL rules see RPS Card Layout page 7 12 2 Insert the RPS power supply completely into its card slot 3 Turn ON the RPS power switch Verify that the green Power indicator on the front panel illuminates 4 Measure the AC voltage between the TP1 and TP2 test points Verify that the DMM shows a volta...

Page 94: ... 3 Figure 3 4 RPS Ring Generator Power Supply Test Points F1 INPUT F2 INPUT 1A 2A OUTPUT 25 Hz 20 Hz 16 Hz TP1 TP2 VOLTAGE ADJUST ON OFF RINGER POWER SUPPLY RPS BRV output fuse 48VDC input fuse Power Switch Output frequency selector Output voltage adjust Test points Power On indicator ...

Page 95: ...e Extracting Control Circuit Cards on page 2 39 Locate a desk or table upon which to place the card If the top surface might be damaged by sharp objects place a protective sheet of cardboard or similar material over the top surface Next place an anti static sheet the card s plastic shipping bag will suffice over the desk or tabletop 4 Place the 32GC card on the anti static sheet 5 Carefully remove...

Page 96: ...front panel with one hand on the top lever and the other hand on the bottom lever 11 Align the edges of the circuit card with the card edge guides in the card cage 12 Gently slide the card straight into the card slot Resistance is felt as the multi pin connectors on the circuit card meet mating connectors on the backplane and engage 13 Push the injector ejector levers inward until the front panel ...

Page 97: ...such as the card s plastic shipping bag over the desk or tabletop 20 Place the MCP ATS on the anti static sheet 21 Insert the appropriate compact flash memory CFD disk into the drive on the MCP ATS card The Serial number printed on the front of this CFD must match the serial number for the SAU that was attached to the front panel of the 32GC on this side of the Control Shelf see step 17 Reinsert M...

Page 98: ...s 31 Verify that the following messages appear on the PI device during system start up Two separate PI devices are required for the FlexiCom 6000 R Hot Standby system The PI device connected to the MCP ATS on the right side of the control shelf is by default the Active side while the PI Device connected to the MCP ATS on the left side of the control shelf is by default the Standby side Each side s...

Page 99: ...G ATS CONTROLS CHECK CHECKSUM END CHECK CHECKSUM Attaching Device Attaching Files This is a HOT STAND BY SYSTEM Initializing CCS First Initialization starting First Configuration phase completed Partial initialization phase starting HSB SYSTEM CONFIGURATION ESTABLISHED This is the ACTIVE side 32 16GC BROADCAST RESET System configuration identified Initializing CLA card CCS is on the air ROOT CCS x...

Page 100: ...8 Loading work d om8 Loading work au om8 Loading work p om8 End Loading File Start Build Checksum End Build Checksum Start Set CC END Set CC CHECKING SAU END CHECKING SAU CHECKING ATS CONTROLS END CHECKING ATS CONTROLS Check Patch Flag Patch Loaded Start Set CC END Set CC CHECKING SAU END CHECKING SAU CHECKING ATS CONTROLS END CHECKING ATS CONTROLS CHECK CHECKSUM END CHECK CHECKSUM Attaching Devic...

Page 101: ...ION ESTABLISHED This is the INACTIVE side System configuration identified CCS is on the air ROOT CCSxx xx xx FAULTY Copyright c 2001 yyyy NAME site name SAU Join process began date and time Changing configuration to STANDBY ROOT CCS xx xx xx STANDBY Copyright c 2001 yyyy NAME site name SAU Join process succeeded ...

Page 102: ...o the Coral system may be turned off at a time that will provide the minimum interruption of service to the user At that time the card battery or batteries may be replaced and the system restarted Verify that the CFD is installed in the MCP ATS as the system starts so that the system can read the database from the diskette back into database memory 2 32GC Card Lithium Battery Test Battery Alarm Me...

Page 103: ...the positive symbol appearing on top Explosion and Environmental Hazards There is a danger of explosion if the battery is replaced incorrectly Replace the battery only with the same or equivalent type recommended by the manufacturer Dispose of used batteries according to requirements specified by the battery manufacturer and or local regulatory agencies ...

Page 104: ...3 18 Initial Power Up Tests Coral FlexiCom 6000 Installation Manual Common Control Test 3 NOTES ...

Page 105: ...ower Supply units into their slots if this has not already been done and turn them on Handling Procedures Each card contains circuitry which is sensitive to electrostatic discharge ESD Failure to observe safe handling procedures for static sensitive circuitry may result in permanent damage to a card Note that there is an anti static wrist strap at the top of the cabinet above the card cage This wr...

Page 106: ...t with the system database or the card may be faulty Refer to the Coral Service and Peripheral Cards Installation Manual for further details on LED indication 5 Attach the Program Interface PI device cable to the KB0 programming port connector on front panel of MCP ATS if not already attached The installation of Shared Service and Peripheral Interface cards into a Coral system has considerable imp...

Page 107: ...ripheral Interface Card Test 3 A status field of UNAUTHORIZED indicates that there are not enough SAU ports The different card slot messages are described below in Table 3 1 For a complete list of card slot status messages see Chapter 6 in the Program Interface Database Reference Manual ...

Page 108: ...port unsupported sub circuits for 8DRCM 8DRCF card Partial Active for the iDSP card is not critical Readjust the parameter value only when needed REPLACED P_TYPE and I_TYPE are not compatible Install proper card or enter NO_CARD in the I_TYPE option WAIT_DB Card has not received database or has not reported initialization Continue waiting NO_RESOURCES Insufficient system memory to initialize card ...

Page 109: ...llation Manual Chapter 4 Software Installation Procedure 4 1 Generic Feature Software 4 1 4 2 System Database Control 4 3 4 3 Hot Standby Configuration Modes 4 13 4 4 Upgrading the Coral Version 4 21 4 5 System Diagnostics 4 25 ...

Page 110: ......

Page 111: ...re is described in Common Control Test beginning on page 3 9 The CFD is a 64MB or more Flash Memory card that contains three types of data Generic Feature Software Version and Boot Code Authorization Database Backup The CFD card can be inserted into a PC slot using any PCMCIA application adapter for loading a new Coral software version Whenever an updated version of the Coral FlexiCom 6000 softwar...

Page 112: ...ion Unit SAU information Should it be necessary to reinstate or copy system files copies of all the system s files exist and are available for use via the FMprog Utility Use the FMprog Utility to Manage the new database versions Load Coral Generic Versions Authorization and Database information onto the CFD Extract Version Authorization and Database information from source files Upgrading the Cora...

Page 113: ...rogrammed to save the database to the CFD automatically on a daily basis at a particular time The CFD is capable of storing up to 64MB or more of information A saved database file may be loaded at any time into the system s database memory This is a good way to copy the database of one system into another to change the system configuration or restore the database into the RAM of a new 32GC memory ...

Page 114: ... and Date branch Route TIME of the system database if necessary 2 From the Database Control Branch Disk Menu Route 0 10 2 0 press 0 to save the database to the CFD s The system prompts for the selection of a destination file number either DB0 DEF or DB1 DEF with DEST FILE 0 1 The DB0 DEF file is used for automatic saves at a preset time each day see Automatic Daily Database Back Up on page 4 10 an...

Page 115: ...Standby side Active Side Message DBS stored to DB1 DEF Standby Side Message DBS stored to DB1 DEF Executing a Save Command may take from a few seconds to a few minutes Therefore changes to the system configuration such as changing the system to Night Service cannot be completed during the save operation until the database save process is completed Press N to cancel and return to the Database Disk ...

Page 116: ...nt time at the intended site 1 From the PI Database Control Branch Disk Menu Route 0 10 2 0 press 2 to load the new database The system prompts to select a source disk file number either DB0 DEF or DB1 DEF with FILE 2 Press 0 or 1 according to Table 4 1 above to choose which file to load The system prompts EXECUTE Y N 3 Press Y to begin loading the database from the CFD or press N to return to the...

Page 117: ...copying procedure is only possible from the Active side of a Hot Standby system However messages indicating a successful copy appear on both system sides 1 From the Database Control Branch Disk Menu Route 0 10 2 0 press 3 to copy one database file to the other The system prompts for the selection of the method used to identify files to be copied by database file number 0 or 1 or by file name with ...

Page 118: ...low priority task Copying a database file generally takes a few seconds to a few minutes depending on the system size provided no other priority tasks are required of the Main Processor When the copy process is completed the system reports DB0 DEF COPIED TO DB1 DEF or vice versa Copying one database file to another destroys the original contents of the destination file by overwriting it with the c...

Page 119: ...ing the directory generally takes only a few seconds provided no other priority tasks are required of the Main Processor Figure 4 1 illustrates a typical CFD directory Figure 4 1 CFD Directory Display The directory display lists each file on the CFD The FILE_NAME field identifies each file The VERSION field is a store count and indicates the relative age compared to other files of the same type Th...

Page 120: ...OF DAYS BETWEEN BACKUPS 2 Enter the number of days between automatic backups For example entering 1 causes the system to automatically backup the database every day Entering 2 causes the system to automatically backup the database every other day The default is set to backup every week every 7 days Enter N to disable the automatic backups and thus enable manual backups 3 The next parameter prompts...

Page 121: ... description of the problem s cause and possible resolution Table 4 2 Software Installation and Database Control Error Messages 6 Error Messages Error Message Cause ATTACH DB0 DEF FAILED STATUS xx OPEN DB0 DEF FAILED STATUS xx DETACH DB0 DEF FAILED STATUS xx may also specify DB1 DEF Save Database The CFD does not have Database information ATTACH DB0 DEF FAILED STATUS xx may also specify DB1 DEF Co...

Page 122: ...4 12 Software Installation Procedure Coral FlexiCom 6000 Installation Manual System Database Control 4 NOTES ...

Page 123: ...s Inactive Control System A control system becomes Inactive when the Active or Standby system either fails Faulty mode or is manually transferred to the Maintenance mode In Maintenance mode the system continues diagnostics tests alarm activation for service calls and reports faults to the Active system An Active Control system is automatically transferred to Fault mode when diagnostics determines ...

Page 124: ...the left H The Active control system is on the left and the Standby system is on the right Abnormal I The Active control system is on the right while the Inactive system Maintenance or Faulty is on the left I The Active control system is on the left while the Inactive Maintenance or Faulty system is on the right Single Control No Redundancy I An Active system Control system is on the right side of...

Page 125: ...the HSB branch by typing HSB from anywhere in the PI or enter 0 11 from the Root Menu 2 The PI prompts 0 Update 1 Display Enter 1 to display the parameters and their current values 3 The PI immediately displays all the parameters describing the HSB setup Table 4 4 includes a list of all the PI parameters for the HSB branch with a short description of each parameter 4 View the following read only p...

Page 126: ...lt 1 00 Defines the time to perform the automatic hot swaps Auto Maintenance Termination Yes No Default No If the Standby side was manually switched to Maintenance mode setting this parameter to Yes safeguards the system by automatically reverting the system back to Standby mode after a predetermined number of hours Auto Maintenance Termination Time 1 to 255 Hours Default 24 Defines the time perio...

Page 127: ...ssing Enter being careful not to change any of the other parameters until reaching the STATUS parameter 4 Determine to which System mode this Active side is to be switched Type 1 to switch this system side to Standby the other side must be transferred to Active mode in the next parameter Type 3 to switch this system side to Maintenance the other side must be transferred to Active mode in the next ...

Page 128: ...lly revert the Standby side back to Maintenance mode after a finite number of hours defined in the next parameter When this parameter is set No the technician must manually restore this system side to Standby when appropriate and skip the next step 4 Press Enter to continue to the next parameter AUTO MAINTENANCE TERMINATION TIME Determine the number of hours after which the system should switch th...

Page 129: ...ot Standby Configuration Modes 4 8 Enter Yes to update the change requests Enter No to retract If AUTO MAINTENANCE TERMINATION was set to No the technician must remember to manually return the system to Standby when appropriate This is done from the PI terminal of the Active side ...

Page 130: ...matically swap system sides The next two parameters determine the swap time and frequency Enter Yes to activate automatic Hot Swaps 4 The PI prompts with the next parameter NUMBER OF DAYS BETWEEN HOT SWAPS 1 5 Enter a number between 1 and 255 The default is set to 1 so that Hot Swaps are performed daily at a set time 6 The PI prompts with the next parameter SET AUTO SWAP TIME 1 00 7 Enter the time...

Page 131: ...p 6 5 Remove the MCP ATS for Coral FlexiCom 6000 R HSB systems remove both MCP ATSs by unscrewing and pulling them out see Removing a Control Card on page 8 12 6 Replace the new CFDs in each MCP ATS For HSB systems ensure that exactly the same Coral generic version is loaded on both CFDs Additionally ensure that the number on the SAU device exactly matches the number on the CFD installed on the sa...

Page 132: ... backup of the current database To make a backup of the database perform the procedure described in Saving the System Database on page 4 4 13 In order for the Coral FlexiCom 6000 R system to function as a Hot Standby system both MCP ATSs must have the same Coral generic version loaded on their CFD cards Otherwise the system is not in Hot Standby mode and automatically reverts to a single sided sys...

Page 133: ...Manual Software Installation Procedure 4 23 Upgrading the Coral Version 4 Hot Standby systems require the same Coral generic version loaded on both system sides Otherwise the system functions as a single sided system with no redundancy ...

Page 134: ...4 24 Software Installation Procedure Coral FlexiCom 6000 Installation Manual Upgrading the Coral Version 4 NOTES ...

Page 135: ...ss the Peripheral Shelf UNITS branch by typing SYSGEN 5 from anywhere in the PI or enter 0 0 0 5 from the Root Menu 2 The PI prompts 0 Update 1 Display Enter 1 to display the parameters and their current values 3 Enter the range of Units to be viewed from the lowest Unit to the highest Unit FROM UNIT TO UNIT The default range is 0 to 7 representing Peripheral Shelf Units 0 to 7 Enter the required ...

Page 136: ...functioning properly then the parameter displays either No Clock or PCM Fault depending on the fault PB_STATUS 2 3 PB_SELECT 4 1 Slot 1 2 Slot 2 Describes which PB ATS card is Active for this unit The technician may change this value This parameter is used when the technician must remove a faulty card Before removing the faulty card a working PB ATS card must be defined in this parameter POWER_SUP...

Page 137: ...quipment should be removed as soon as possible For Hot Standby systems where duplicate cards exist for all system cards the standby card may sometimes need to be activated manually such as for the PB ATS The Control Shelf cards automatically switch to standby mode as needed The following messages appear for PCM Stream Highway or Time Slot faults stream error PCM STREAM FAULT date SHELF x highway e...

Page 138: ...many categories only the items relevant to the Coral FlexiCom 6000 systems are listed below Faulty Objects Alarms PI Alarm Text and Description Major or Minor Alarm 6 PCM HW HIGHWAY FAILURE DATE TIME Details the failed PCM highway and date and time of fault Major 7 PCM LINKS HIGHWAY TIME SLOT T R T Transmit R Receive Details the failed PCM highway as well as the failed time slot and date and time ...

Page 139: ...stem side reverted to Faulty mode Other MCP Maintenance The other system side was put in or automatically achieved Maintenance Mode This situation can resolve itself automatically Minor 13 OTHER SIDE Real Time Clock Alarm Memory Alarm Lock Device Alarm ATS Disk Alarm CNTL Alarm Batteries Alarm These messages indicate a faulty item for the Standby system side of a Hot Standby system and is not rele...

Page 140: ...e either the SAU is physically missing or the software is incompatible with the defined system or the SAUs on both systems sides are not identical Fan Fault Indicates that one of the fans or fan fuses is faulty and must be replaced see Determining the Fan Fault and Replacing the Fan Fuses on page 8 15 Minor PS ATS 1 2 3 Details which PS ATS is faulty Either one of the PS ATS fuses must be replaced...

Page 141: ... Highway Time Slot 32h Highway TS Minor PB ATS 50h Shelf PB Major PPS 50h Shelf PPS Major RPS 50h Shelf RPS Major 32GC Battery 11 0 Minor Battery for first lower XMM installed 11 1 Minor Battery for top XMM if a second XMM is installed 11 2 Minor Fan Fault A2 Minor Power Supply 1 PS ATS 1 A4 0 Minor Power Supply 1 PS ATS 2 A4 1 Minor Power Supply 1 PS ATS 3 A4 2 Minor CFD Disk Fault A5 Major CNT1 ...

Page 142: ...lay Enter 0 to enable changing the active PB ATS card 3 Enter the Unit number for the faulty PB ATS in both parameters FROM UNIT TO UNIT 4 The PI prompts for the requested parameter Enter 4 or PB_Select to display the parameter PB_SELECT 1 2 Enter the slot number for the other or currently Standby PB ATS If a faulty PB ATS is chosen or does not exist the following error message appears SELECTED PB...

Page 143: ...Coral FlexiCom 6000 Installation Manual Chapter 5 External Connections 5 1 External Connections 5 1 ...

Page 144: ......

Page 145: ...ections For External Connections refer to Chapter 5 of the Coral FlexiCom 300 400 5000 Installation Procedure and Hardware Reference Manual The pinout tables for MDF connections are described The tables are used during the installation procedure performed in Chapter 2 of this manual 1 External Connections ...

Page 146: ...5 2 External Connections Coral FlexiCom 6000 Installation Manual External Connections 5 NOTES ...

Page 147: ...Coral FlexiCom 6000 Installation 0DQXDO Chapter 6 Cabinet Descriptions 6 1 Cabinet Descriptions 6 1 ...

Page 148: ......

Page 149: ...iCom 6000 Control Shelf and two or three Peripheral shelves A maximum of 4 Expansion cabinets consisting of only peripheral shelves made be connected to the main cabinet Each Expansion cabinet may contain one two three or four Peripheral shelves Figure 6 1 shows the Coral FlexiCom 6032 system s cabinet structure and card slot assignments for a 3 shelf Main Cabinet Figure 6 2 shows the Coral FlexiC...

Page 150: ...lf cabinet Figure 6 2 Coral FlexiCom 6048xx Main Cabinet Structure and Card Slot Assignments for a 4 shelf cabinet Universal I O slots Shared Service or PB ATS slots Peripheral ringer power supplies Left common control Right common control Fan tray Universal I O slots Shared service or PB ATS slots Peripheral ringer power supplies Left common control Right common control Fan tray ...

Page 151: ...Detail Card Slots Each card cage consists primarily of a metallic frame assembly and a printed circuit board referred to as a motherboard or backplane Guides at the top and bottom of the card cage align the cards and assemblies during their insertion with multi pin connectors mounted on the backplane The guides and associated connectors comprise a card slot The connectors provide metallic paths fr...

Page 152: ...f Slots Peripheral Shelves The Peripheral Shelves or card cages house the peripheral and ringer power supplies shared service cards peripheral interface cards and PB ATS cards The main cabinet may house a maximum of 3 peripheral shelves Each expansion cabinet can house a maximum of 4 peripheral shelves Shelf Positions The shelf positions are denoted as the first second third or fourth cabinet shel...

Page 153: ...ich define the unique slot see Figure 6 4 These keys prevent the insertion of the wrong card in a control shelf slot Power Supply Unit Slots Three slots are provided for Power Supply units PS ATS indicated in Figures 6 5 and 6 6 as PS1 PS2 and PS3 Two PS ATS units are installed While each of the two PS ATS units is independently capable of supplying the full power needs of the Control Shelf the tw...

Page 154: ...criptions 6 Figure 6 4 Control Shelf with Coded Keys Placement 32 GC 32 GC CLA optional ATS CLA ATS optional PS 3 PS 2 MCP ATS MCP ATS 1 2 3 PS FusesSAU SAU FAN 1 FAN 2 FAN 3 Fuse Fuse Fuse LEFT control Bottom row of coded keys Top row of coded keys RIGHT control optional PS 1 ...

Page 155: ...w Figure 6 6 Redundant Dual Control Shelf Front View 32 GC CLA optional PS 2 MCP 1 2 3 PS Fuses SAU FAN 1 RIGHT Single control Fuse Fuse Fuse FAN 2 FAN 3 Spare Fuse 32GC 32GC CLA optional ATS CLA ATS optional PS 3 PS 2 PS 1 MCP ATS MCP ATS 1 2 3 PS Fuses FAN 1 FAN 2 FAN 3 Fuse Fuse Fuse LEFT control RIGHT control optional SAU SAU ...

Page 156: ...e 6 1 EVEN Peripheral Shelf Card Slot Assignments Table 6 2 ODD Peripheral Shelf Card Slot Assignments The PBD ATS backplane card located behind the PB ATS provides two sets of connectors for the redundant cabling coming from the Control Shelf backplane For more information about the PBD ATS see PBD ATS beginning on page 8 107 Cabinet Card Slot Assignment Illustrations Figures 6 7 and 6 8 illustra...

Page 157: ... O SLOT UNIVERSAL I O SLOT UNIVERSAL I O SLOT UNIVERSAL I O SLOT UNIVERSAL I O SLOT UNIVERSAL I O SLOT UNIVERSAL I O SLOT UNIVERSAL I O SLOT UNIVERSAL I O SLOT UNIVERSAL I O SLOT PERIPHERAL POWER SUPPLY RINGER POWER SUPPLY OR PERIPHERAL POWER SUPPLY 1 2 3 4 5 6 7 8 9 10 11 12 13 14 15 16 17 18 PPS RPS OR PPS UNIVERSAL I O SLOT UNIVERSAL I O SLOT UNIVERSAL I O SLOT UNIVERSAL I O SLOT UNIVERSAL I O ...

Page 158: ...HERAL POWER SUPPLY 1 2 3 4 5 6 7 8 9 10 11 12 13 14 15 16 17 18 PPS RPS OR PPS UNIVERSAL I O SLOT UNIVERSAL I O SLOT UNIVERSAL I O SLOT UNIVERSAL I O SLOT UNIVERSAL I O SLOT UNIVERSAL I O SLOT UNIVERSAL I O SLOT UNIVERSAL I O SLOT UNIVERSAL I O SLOT UNIVERSAL I O SLOT UNIVERSAL I O SLOT UNIVERSAL I O SLOT UNIVERSAL I O SLOT UNIVERSAL I O SLOT UNIVERSAL I O SLOT UNIVERSAL I O SLOT PERIPHERAL POWER ...

Page 159: ...NIVERSAL I O SLOT UNIVERSAL I O SLOT UNIVERSAL I O SLOT UNIVERSAL I O SLOT UNIVERSAL I O SLOT UNIVERSAL I O SLOT UNIVERSAL I O SLOT UNIVERSAL I O SLOT UNIVERSAL I O SLOT UNIVERSAL I O SLOT UNIVERSAL I O SLOT PERIPHERAL POWER SUPPLY RINGER POWER SUPPLY OR PERIPHERAL POWER SUPPLY PB ATS or SHARED SERVICE SLOT 1 2 3 4 5 6 7 8 9 10 11 12 13 14 15 16 17 18 PPS RPS OR PPS UNIVERSAL I O SLOT UNIVERSAL I ...

Page 160: ...RSAL I O SLOT UNIVERSAL I O SLOT PERIPHERAL POWER SUPPLY RINGER POWER SUPPLY OR PERIPHERAL POWER SUPPLY 1 2 3 4 5 6 7 8 9 10 11 12 13 14 15 16 17 18 PPS RPS OR PPS UNIVERSAL I O SLOT UNIVERSAL I O SLOT UNIVERSAL I O SLOT UNIVERSAL I O SLOT UNIVERSAL I O SLOT UNIVERSAL I O SLOT UNIVERSAL I O SLOT UNIVERSAL I O SLOT UNIVERSAL I O SLOT UNIVERSAL I O SLOT UNIVERSAL I O SLOT UNIVERSAL I O SLOT UNIVERSA...

Page 161: ...UNIVERSAL I O SLOT UNIVERSAL I O SLOT UNIVERSAL I O SLOT UNIVERSAL I O SLOT UNIVERSAL I O SLOT UNIVERSAL I O SLOT UNIVERSAL I O SLOT UNIVERSAL I O SLOT UNIVERSAL I O SLOT UNIVERSAL I O SLOT UNIVERSAL I O SLOT PERIPHERAL POWER SUPPLY RINGER POWER SUPPLY OR PERIPHERAL POWER SUPPLY 1 2 3 4 5 6 7 8 9 10 11 12 13 14 15 16 17 18 PPS RPS OR PPS UNIVERSAL I O SLOT UNIVERSAL I O SLOT UNIVERSAL I O SLOT UNI...

Page 162: ...PLY RINGER POWER SUPPLY OR PERIPHERAL POWER SUPPLY 1 2 3 4 5 6 7 8 9 10 11 12 13 14 15 16 17 18 PPS RPS OR PPS UNIVERSAL I O SLOT UNIVERSAL I O SLOT UNIVERSAL I O SLOT UNIVERSAL I O SLOT UNIVERSAL I O SLOT UNIVERSAL I O SLOT UNIVERSAL I O SLOT UNIVERSAL I O SLOT UNIVERSAL I O SLOT UNIVERSAL I O SLOT UNIVERSAL I O SLOT UNIVERSAL I O SLOT UNIVERSAL I O SLOT UNIVERSAL I O SLOT UNIVERSAL I O SLOT UNIV...

Page 163: ... O Connector Relationship The I O connections for each card slot are divided between two I O connectors one upper and one lower There are a total of twenty four wire pairs for each card slot Each card in an odd even slot is allotted 16 wire pairs on its corresponding upper I O connector and 8 wire paris on its corresponding lower I O connector Each card in an even odd slot is allotted eight wire p...

Page 164: ... 10 11 12 13 14 15 16 17 18 UNIVERSAL I O SLOTS SHARED SERVICE SLOTS RPS PPS POWER SUPPLIES 1 2 3 4 5 6 7 8 9 10 11 12 13 14 15 16 17 18 RPS PPS PPS PPS LOWER Peripheral Shelf J51 J49 J47 J43 J39 J37 J41 J45 J52 J50 J48 J44 J40 J46 J38 J42 J51 J49 J47 J43 J39 J45 J37 J41 J52 J50 J48 J44 J40 J46 J38 J42 UP J5 J7 J2 J6 J8 J1 MPG ATS P9 P7 P8 P10 P1 1 P12 P6 P5 P13 P14 P4 P3 P20 P19 P18 P17 P15 P16 P...

Page 165: ... I O Champ Connector Relationships Cable Pairs Card Slots Slot 1 8 upper 1 8 lower 9 16 upper 3 5 7 9 11 13 15 17 Odd Even 9 16 lower 17 24 upper 17 24 lower 4 6 8 10 12 14 16 18 Even Odd 25 Not Used Associated Card Slots Upper Connector Lower Connector 3 4 J37 J38 5 6 J39 J40 7 8 J41 J42 9 10 J43 J44 11 12 J45 J46 13 14 J47 J48 15 16 J49 J50 17 18 J51 J52 ...

Page 166: ...SLOTS Ports 8 15 Wht Blu Pairs 1 8 Pairs 9 16 Red Grn Red Brn Ylw Blu Ylw Org Vio Brn Pairs 17 24 Pair 25 Not used EVEN SLOTS Ports 0 7 EVEN SLOTS Ports 16 23 ODD SLOTS Ports 0 7 Wht Blu Pairs 1 8 Pairs 9 16 Red Grn Red Brn Ylw Blu Ylw Org Vio Brn Pairs 17 24 1 26 2 27 3 28 4 29 5 30 6 31 7 32 8 33 9 34 10 35 11 36 12 37 13 38 14 39 15 40 16 41 17 42 18 43 19 44 20 45 21 46 22 47 23 48 24 49 25 50...

Page 167: ...iCom 6000 RJ 45 I O Connections from Front Panel to Rear Panel The connections between the RJ 45 jack on the front panel of the PUGW UGW E UGW IPG or 30T 30TM T1 PRI 23 PRI 30 layout UDT or 2DT peripheral cards and the RJ 45 jacks on the LDF and UDF panels at the rear side of the cabinet are to be made by a H624 crossover cable The crossover cable ensures that the pinout order from the peripheral ...

Page 168: ...d meet or exceed all requirements and specifications of telecommunications and electrical safety authorities world wide The Coral FlexiCom 6000 cabinet is supplied with 1 one LDF panel four RJ 45 connectors for UGW UGW E PUGW and IPG cards 4 four H624 crossover cables Additional H624 cables and three LDF UDF panels may be field installed as required For further information on How to make the conne...

Page 169: ...trol HDLC highways the pulse code modulation PCM streams and all the Clock and Sync signals from the control card to the PB ATS cards for the Peripheral Shelf Unit The Clock signal is used to identify the bit period of the HDLC and PCM highways The Sync signal is used to identify the beginning of time slot 0 on the PCM highways Time Slot Distribution among the Peripheral Units The 32GC card suppor...

Page 170: ...onsisting of two shelves The same PCM highways support the odd and even peripheral shelf of the same Unit PCM highway A3 supports cards 9 to 12 in both even and odd shelves If only one shelf existed the 512 time slots would be divided only among the even shelf thereby enhancing call traffic ...

Page 171: ...r UGW with MG 30 or MG 60 units evenly among the slot sets i e one heavy consumer card per card slot set The least blocking sets are the slot sets that have the highest ratio of Number of Time Slots to Number of Peripheral Card Slots in Table 6 4 Table 6 4 Coral FlexiCom 6000 Time Slot Distribution 6 Tips for Peripheral Card Distribution Set Peripheral Shelf Unit Peripheral Shelf Card Slots of Per...

Page 172: ...single slot set 18 Unit 4 8 and 9 5 8 8 slots 128 19 Unit 4 8 and 9 9 12 8 slots 128 20 Unit 4 8 and 9 13 18 12 slots 128 21 Unit 5 10 and 11 1 4 6 slots 128 22 Unit 5 10 and 11 5 8 8 slots 128 23 Unit 5 10 and 11 9 12 8 slots 128 24 Unit 5 10 and 11 13 18 12 slots 128 25 Unit 6 12 and 13 1 4 6 slots 128 26 Unit 6 12 and 13 5 8 8 slots 128 27 Unit 6 12 and 13 9 12 8 slots 128 28 Unit 6 12 and 13 1...

Page 173: ...SLOT 10 SLOT 11 SLOT 12 SLOT 13 SLOT 14 SLOT 15 SLOT 16 SLOT 17 SLOT 18 512 time slots PB ATS 512 time slots PB ATS 512 time slots PB ATS 384 time slots PB ATS 512 time slots PB ATS 512 time slots PB ATS 512 time slots PB ATS 512 time slots Coral FlexiCom 6000 512 time slots per Peripheral Shelf Unit 4K time slots per 32GC 64 128 time slots for each Peripheral Shelf Unit time slots each hifhway Ev...

Page 174: ...in the Unit does not house any PB ATS cards and is given an odd shelf number Odd or Even Shelves Peripheral Shelves are defined as odd or even based on whether a PB ATS card is installed on the shelf The Z5 and Z6 jumpers located on the backplane of the PB ATS cards and behind the PBD ATS card are set to reflect this even or odd shelf definition see Figure 6 19 for the Z5 and Z6 jumper definitions...

Page 175: ...iptions 6 Figure 6 20 FlexiCom 6000 with Shelf ID Jumper Locations and Strapping UP J5 J7 J2 J6 J8 J1 MPG ATS PS3 PS2 PS1 SHELF I D BLOCK SHELF I D BLOCK Z5 Z6 Even Shelf PB ATS on Shelf Z5 Z6 Odd Shelf NO PB ATS on Shelf Note These jumpers are located the PBD ATS or PBD24S behind ...

Page 176: ...Even Shelf Numbering The even shelf number is defined based on its connection to the MPG ATS card via the FC19 cable from P3 and P2 for a redundant system of the PBD ATS The peripheral shelf is defined as Shelf 0 2 4 6 or 8 based on which P connector the FC19 cable is fastened to on the MPG ATS card see Figure 6 21 and Table 6 5 to determine the shelf number For Example The shelf to which MPG ATS ...

Page 177: ...PG ATS PS3 PS2 PS1 UP P9 P8 P10 P7 P1 1 P6 P12 P5 P13 P4 P14 P3 P15 P2 P16 P1 P20 P19 P18 P17 M P G A T S MPG ATS P3 P9 To PBD ATS P3 To PBD ATS P2 Left 32GC P11 P1 Shelf 4 Shelf 4 Shelf 0 Shelf 0 1 1 P6 P7 4 4 P2 P3 P1 To Left 32GC To Right 32GC Shelf 0 Shelf 4 FC 19 FC 19 Right 32GC Right control front view Left control front view PBD ATS P B D A T S PBD ATS ...

Page 178: ...f PBD ATS and left 32GC 0 0 P1 P9 1 2 P2 P10 2 4 P3 P11 3 6 P4 P12 4 8 P5 P13 5 10 P6 P14 6 12 P7 P15 7 14 P8 P16 UP MPG ATS FC 19 cables P20 P7 P5 P3 P1 P10 P12 P14 P16 P11 P13 P15 P8 P6 P4 P2 P9 UNIT 0 UNIT 2 UNIT 4 UNIT 6 UNIT 7 UNIT 5 UNIT 3 UNIT 1 UNIT 1 UNIT 3 UNIT 5 UNIT 7 UNIT 6 UNIT 4 UNIT 2 UNIT 0 P19 P18 P17 Shelf 6 Shelf 4 Shelf 2 Shelf 2 P2 P2 P2 P2 P3 P3 P3 P3 Even shelf numbers are ...

Page 179: ...S P20 P7 P5 P3 P1 P10 P12 P14 P16 P11 P13 P15 P8 P6 P4 P2 P9 UNIT 0 UNIT 2 UNIT 4 UNIT 6 UNIT 7 UNIT 5 UNIT 3 UNIT 1 UNIT 1 UNIT 3 UNIT 5 UNIT 7 UNIT 6 UNIT 4 UNIT 2 UNIT 0 P19 P18 P17 Shelf 2 To PBD ATS P3 To PBD ATS P2 Shelf 4 Shelf 6 Shelf 8 Shelf 10 Shelf 12 Shelf 0 Shelf 14 Shelf 0 Shelf 2 Shelf 4 Shelf 6 Shelf 8 Shelf 10 Shelf 12 Shelf 14 Even shelf numbers are defined by the MPG ATS Pn cabl...

Page 180: ...an even shelf above or below via an FC16 100cm or FC18 50cm discontinued cable see Figure 6 24 The FC16 cable is connected between the PBD24S located on the backplane of the odd shelf and P1 on the PBD ATS of the related even shelf Its shelf number is defined as the even shelf number 1 Therefore the odd shelf connected to Shelf 0 is defined as Shelf 1 the odd shelf connected to Shelf 2 is defined ...

Page 181: ...iptions 6 33 Cabinet Descriptions 6 Figure 6 24 PBD24S to PBD ATS cabling UP J5 J7 J2 J6 J8 J1 MPG ATS PS3 PS2 PS1 Shelf 0 Shelf 1 PBD24S PBD ATS 1 1 P6 P7 4 4 PBD24S PBD ATS J2 J3 P1 P1 P2 P3 FC16 flat cable 1 1 P6 P7 4 4 P1 J2 J3 P1 Odd shelf Even shelf ...

Page 182: ...hind the slot which is J7 for slot 4 see Figure 6 25 Secondary Synchronization Source Connection The secondary synchronization signal cable is connected between the P19 connector on the MPG ATS and the digital trunk card that has been chosen to be the Secondary Synchronization source via an H 43 cable Conventionally this Secondary Synchronization Source is a digital card located in Slot 4 labeled ...

Page 183: ...nally into two pairs The cable attaches to either the first and the third pins or the second and fourth pins If one of these delicate pins is damaged the other pair remains functional Figure 6 25 Synchronization Cabling UP J5 J7 J2 J6 J8 J1 MPG ATS PS3 PS2 PS1 C32 Pin 9 9 10 5 C1 15 20 25 30 J7 from slot 4 J7 J7 C32 9 10 5 C1 15 20 25 30 H 43 cable UP MPG ATS P7 P5 P3 P1 P10 P12 P14 P16 P8 P6 P4 P...

Page 184: ...onnector 2 wire cables are used to connect between P6 P7 and P3 The three pin connector can be attached to the upper 3 pins or lower 3 pins of P6 P7 so that if one of the pins break there is always an alternative wiring option The H41 cable orientation is significant Verify that the white colored wire is connected between the lowest of the three pins in P6 P7 to the right pin of Pin 27 Pin 29 Figu...

Page 185: ...nd RPS Inter Shelf Cabling Detail UP J5 J7 J2 J6 J8 J1 MPG ATS PS3 PS2 PS1 PBD24S PBD ATS PBD ATS Shelf 0 Shelf 1 TO MBC TO UPPER MBS3 TO LOWER MBS3 1 5 10 15 25 29 32 C A P3 27 19 20 TO MBC TO UPPER MBS3 TO LOWER MBS3 1 5 10 15 20 25 32 C A P3 WHITE DOT 7 29 1 1 P6 P7 4 4 P1 1 1 P6 P7 3 J2 J3 P1 WHITE DOT FC1 FC1 3 ...

Page 186: ...supply is protected by a fuse located near the input terminal The 48V IN and 48V RTN IN are then routed from the power input cavity to two bus bars mounted along the right rear of the cabinet via The bus bar which runs closest to the backplane The is the 48V RTN IN or positive side of the 48 volt power supply The bus bar running closer to the back of the cabinet is the 48V IN or negative side of t...

Page 187: ... the bottom shelf is always the control shelf The system may also include a maximum of 4 Expansion cabinets Cabinet Code Configurations The Cabinet Code configuration is printed on the label inside of the Coral cabinet and can be decoded as follows The cabinets are described with the amount of shelves and the number and location of the relevant PB ATS cards as well as the maximum number of ports i...

Page 188: ...0002 32GC Control Empty Empty Empty 0 NA Expansion 302220 None Empty Even 2 x PB Even 2 x PB NA 800 1024 303320 None Even 2 x PB Even 2 x PB Even 2 x PB NA 1200 1536 303220 None Even 2 x PB Odd 0 x PB Even 2 x PB NA 1200 1024 404220 None Even 2 x PB Odd 0 x PB Even 2 x PB Odd 0 x PB 1600 1024 404420 None Even 2 x PB Even 2 x PB Even 2 x PB Even 2 x PB 1600 2048 Control Cabinet Second Cabinet Third...

Page 189: ...ed as follows see below for switching configurations Hot Standby Configurations Condition Config Control Shelf Description Config Control Shelf Description Normal H The Active control system is on the right and the Standby system is on the left H The Active control system is on the left and the Standby system is on the right Abnormal I The Active control system is on the right while the Inactive s...

Page 190: ...6 42 Cabinet Descriptions Coral FlexiCom 6000 Installation Manual Cabinet Descriptions 6 NOTES ...

Page 191: ...Coral FlexiCom 6000 Installation Manual Chapter 7 Power Supplies 7 1 PPS 7 1 7 2 RPS 7 9 7 3 PS ATS 7 19 ...

Page 192: ......

Page 193: ...eck each output of the PPS and produce alarm signaling to the Coral system main processor in the event of abnormality Each PPS is designed with the capacity to support two fully populated peripheral shelves one Peripheral Shelf Unit with an average mix of port types The outputs of the PPS are designed to be paralleled with the outputs of a second PPS offering load sharing of power supplies Coral F...

Page 194: ...tion for SKK cards used in FlexAIR systems PPS Front Panel Figure 7 1 illustrates the front panel of the PPS which contains test points for measuring all output voltages In addition the 5VDC 5VDC and 12VDC regulators are voltage adjustable via potentiometers Two panel mounted fuses protect the PPS circuitry from current overload F1 protects the 5VDC 5VDC 12VDC and 12VDC DC DC converters while F2 p...

Page 195: ...ure 7 1 PPS Front Panel Layout F1 INPUT ON OFF ADJ RTN ADJ RTN RTN ADJ RTN RTN 5V 48V 12V 12V 5V 8A F2 INPUT 15A PERIPHERAL POWER SUPPLY PPS Input fuse 48V PPS DC DC converters Input fuse 48V PPS control peripheral cards Power switch Output test points Output voltage adjust Power on green indicator ...

Page 196: ... monitoring circuitry produces an alarm signal to the system processor and shuts the PPS down The green power indicator of a PPS in shut down condition is still illuminated Following a shutdown and when there is no clear reason for the voltage to drop out of tolerance the power ON OFF switch must be turned to OFF and then to ON in order to return the power supply to working order Figure 7 2 PPS Bl...

Page 197: ...tage i e 5VDC 12VDC or 5VDC test jack to the corresponding return test point Using the incorrect return test jack may cause erroneous measurements Note the initial voltage measured Gently insert a small straight blade screwdriver into the adjustment hole for the appropriate voltage in the front panel of the PPS Rotate the screwdriver slightly using gentle even pressure Watch the voltmeter to deter...

Page 198: ...the card cage pass through companion positioning holes on the card front panel A slight resistance should be felt as the multi pin connectors engage at the rear of the power supply and backplane Do not force the power supply into the card cage Irreparable damage may occur if the multi pin connectors mis align while attempting to insert the unit into the card cage If more than slight resistance is ...

Page 199: ...ts with 2 peripheral shelves the power supply slots of both peripheral shelves are wired in parallel In cabinets with 3 peripheral shelves the lower two peripheral shelves are wired in parallel while the top peripheral shelf stands alone In cabinets with 4 peripheral shelves the lower two peripheral shelves are wired in parallel and the upper two peripheral shelves are wired in parallel 2 Turn the...

Page 200: ...2VDC Nom Regulated 8 0A Max 12VDC Nom Regulated 0 15A Max 48VDC Unregulated 8 0A Max Indicators Power ON Output Voltages Test Jacks Fuses Input DC DC Converter F1 8A Input Peripheral F2 15A Controls and Adjustments ON OFF Power Switch 5V Adjust 12V Adjust 5V Adjust 6 Blown main or circuit fuse breaker in the building electrical panel Indicators Power ON OFF green ALARM red Protected by a fuse on t...

Page 201: ...h convert the 48VDC input power to 75 85 or 105 volts 16 20 or 25Hz alternating current AC for use as a ringing and message waiting signal on industry standard single line telephones SLTs and magneto telephone station ports The output voltage is selected by choosing a tap on the output transformer The output voltage is regulated and adjustable from the front panel Voltage monitoring circuitry chec...

Page 202: ...Panel Figure 7 3 and Figure 7 4 illustrate the RPS front panel and card layout The frequency selection is made from the front panel The RPS front panel contains test points for measuring the voltage output The output is voltage adjustable via a potentiometer and frequency select via a sliding switch Two panel mounted fuses protect the RPS circuitry from current overload F1 protects the oscillator ...

Page 203: ...or Power Supply Unit 7 Figure 7 3 RPS Front Panel F1 INPUT F2 INPUT 1A 2A OUTPUT 25 Hz 20 Hz 16 Hz TP1 TP2 VOLTAGE ADJUST ON OFF RINGER POWER SUPPLY RPS BRV output fuse 48VDC input fuse Power Switch Output frequency selector Output voltage adjust Test points Power On indicator ...

Page 204: ...000 Installation Manual RPS Ring Generator Power Supply Unit 7 Figure 7 4 RPS Card Layout SPAR E FU SES UND ER SID E 105V 9 85V 8 75V 7 0V 6 Green Yellow Orange Red Brown Blue White RIN GER OUTPUT VOLTA G E SELECT LEAD W hite W ire 2A 1A ...

Page 205: ... monitoring circuit is satisfied relay K1 is operated passing the RPS output to BRV OUT the BRV bus of the first peripheral shelf The RPS output also is passed through the released contacts of relay K2 to BRV IN which is connected to the BRV bus of an adjacent peripheral shelf If an RPS also is installed in the adjacent shelf relay K2 is operated However the BRV bus of both shelves are still bridg...

Page 206: ...ear of the power supply and backplane Do not force the unit into the slot Irreparable damage may occur if the multi pin connectors mis align while attempting to insert the unit If more than slight resistance is encountered partially slide the unit out of the card cage and verify the alignment of the guide ridges with the unit edge guides If alignment appears to be correct remove the unit from the ...

Page 207: ... Cabling beginning on page 6 36 Insert the RPS into the RPS card slot far left and turn the power switch ON Measure the AC voltage across the test points TP1 and TP2 using a high impedance AC voltmeter set for the 200 volt or next higher scale Adjust the output voltage using the front panel potentiometer With no load adjust the output voltage to read within 5 volts of the selected output transform...

Page 208: ... per peripheral shelf Otherwise by default every 4 shelves may ring only a maximum of MAX_RING SLTs simultaneously Therefore by default even if an RPS is installed on each shelf shelves 0 to 3 will ring only a maximum of 20 SLTs simultaneously unless the Ringer PS parameters are updated accordingly When a single RPS supplies power to SLT ringers located on two adjacent shelves the adjacent shelf n...

Page 209: ...Input 42 to 58VDC 1A max Output Voltage Faston Selectable 75 85 or 105VAC Frequency Switch Selectable 16 20 or 25Hz Capacity 20VA Max Indicators Power ON OFF Output Voltage Test Jacks Fuses Input 48V 2A S B Output 1A S B Controls and Adjustments ON OFF Power Switch Output Voltage Adjust Output Ring Frequency Output Voltage Select Blown main or circuit fuse breaker in the building electrical panel ...

Page 210: ...7 18 Power Supplies Coral FlexiCom 6000 Installation Manual RPS Ring Generator Power Supply Unit 7 ...

Page 211: ... charge rate Under power failure until the batteries are completely discharged PS ATS Front Panel Figure 7 6 illustrates the front panel of the PS ATS unit The following items located on the front panel are described in the following table 1 General Description Feature Description Power green Indicator Lights when power is supplied to the system Fail red Indicator Lights when the PS ATS is faulty ...

Page 212: ... units is capable of providing the full power supply needs of the entire control system when one of the PS ATS units malfunctions Alarms indicate the fault and inform the administrator via the various alarm indication facilities The faulty PS ATS unit can be replaced while the system is live and operating Hot Standby without the need to shutdown any part of the system POWER POW ER FAIL FA I L PS A...

Page 213: ...oses The Control and Alarm monitoring circuitry verifies that each voltage output with the exception of the 48VDC output is within specification Should an output voltage deviate from specification the monitoring circuitry produces an alarm signal to the system processor displayed on the PI terminal causing the red Fail indicator to illuminate Additionally the green Power indicator remains illumina...

Page 214: ...y slot in the upper right hand corner slot PS3 This slot is for future Coral Configurations 1 To insert the PS ATS unit s grasp its handle with one hand 1 Verify that the power supply is oriented correctly When installing the PS ATS in either slot on the right side in slots PS2 and PS3 ensure that the Fail and Power LEDs are located at the top of the unit see Figure 7 8 for correct card orientatio...

Page 215: ... of the control shelf fasten the four captive mounting screws on each corner of the unit 5 After power is supplied to the system verify that the green Power indicator illuminates Figure 7 8 PS ATS Orientation for Installation in Slots PS2 and PS3 Irreparable damage may occur if the multi pin connectors are misaligned during unit installation ...

Page 216: ...7 24 Power Supplies Coral FlexiCom 6000 Installation Manual PS ATS Control Power Supply Unit 7 Figure 7 9 PS ATS Orientation for Installation in Slot PS1 ...

Page 217: ... units or one of the Control Cards or the backplane unit Following the shutdown of a PS ATS unit the fuse should be changed If this does not restore the unit then the PS ATS unit should be replaced Determining the Cause of the Fail Indicator The red Fail indicator can be activated by malfunctions in the PS ATS the control shelf cards or the backplane 1 Turn off the Main Power to the Coral System 1...

Page 218: ...ontrol shelf backplane and MPG ATS unit must be checked for faults and replaced if needed 10 After the faulty unit has been located and replaced and after returning power to the Coral thus powering the PS ATS unit s turn on all the Peripheral Power Supply units in each peripheral shelf of the Main and Expansion cabinets PS ATS Fuses The PS ATS units are wired in series with fuses located on the fr...

Page 219: ...8 P10 P7 P1 1 P6 P12 P5 P13 P4 P14 P3 P15 P2 P16 P1 P20 J5 PS3 PS2 PS1 1 2 3 J7 J2 J6 J8 J1 P19 P18 P17 GND 8 GND 7 GND 6 GND 5 GND 4 GND 3 GND 2 GND 1 GND 9 GND 10 GND 11 GND 12 GND 13 GND 14 GND 15 GND 16 J12 white MPG ATS J1 Power supply fuses J5 J7 48VDC 48VDC 48VDC 48VDC 48VDC Return to power supplies Power to fans FANS To PS fuses FAN alarm 48VDC 48VDC 48VDC 48VDC 48VDC ...

Page 220: ...led PS1 PS2 or PS3 The technician must determine which of the three PS1 2 or 3 fuses has blown The fuses located on the front panel of the control shelf have a red indicator which can be clearly viewed at the top of the fuse case once it has blown If none of those fuses has a red tip then the F1 fuse inside the indicated PS1 2 or 3 has blown and must be changed 48VDC left bar PS1 J1 J7 J2 Red Blac...

Page 221: ...placing the PS ATS F1 Fuse 1 Unscrew the mounting screws at the top and bottom of the faulty PS ATS 2 Remove the PS ATS by gripping the handle and pulling with slight force 3 Place the PS ATS on its side such that the handle is closest to the table 4 Insert a flat head screwdriver in the F1 position see Figure 7 12 Turn the screw driver counterclockwise until the fuse pops up and remove it 5 Repla...

Page 222: ...ontrol Power Supply Unit 7 PS ATS Coral systems IPx 4000 FlexiCom 6000 Input 40VDC to 60VDC 6A Max Output 5 2VDC 20A Max 3 3V 20A Max 12V 1A Max 12V 0 5A Max Indicators Power ON green ALARM FAIL red Fuses Input 10A 250V S B Controls and Adjustments None 5 Specifications ...

Page 223: ...FlexiCom 6000 Installation Manual Chapter 8 Common Control Cards 8 1 Common Control Shelf 8 1 8 2 MCP ATS 8 17 8 3 32GC 8 61 8 4 4 8XMM 8 75 8 5 CLA ATS 8 81 8 6 PB ATS 8 99 8 7 PBD ATS 8 107 8 8 PBD24S 8 111 ...

Page 224: ......

Page 225: ... there is no interference to the continuity of the system operations The Common Control portion of the Coral system provides the control mechanism for establishing audio and data connections or calls via the PCM bus between Peripheral I O ports in the system Common Control is divided into five different functions Main Processor Generic Feature Memory Database Memory Mirrored Memory and Switching M...

Page 226: ...he Coral database when needed The 4 8XMM is also a required shared memory card for the CLA ATS card The card slot designation appears below each common control card slot on the front of the card cage An SAU device is attached to the SAU port on the front panel of each 32GC card Common Control Shelf The Common Control Shelf is positioned at the bottom of the main control cabinet It is built to prov...

Page 227: ...se directions The MPG ATS card can only be replaced on a system which is shut down 1 Unfasten the 14 mounting screws 4 on each side of the MPG ATS 3 on the top and 3 on the bottom 2 Unfasten the two Hex socket screws on the middle of the MPG ATS card 3 Grasp both knobs and unfasten them simultaneously by turning them counter clockwise 4 Pull on the knobs The MPG ATS card pulls off 5 Grasp the knob...

Page 228: ...on 8 Figure 8 1 Control Shelf Rear Backplane UP P9 P8 P10 P7 P11 P6 P12 P5 P13 P4 P14 P3 P15 P2 P16 P1 P20 J5 PS3 PS2 PS1 J7 J2 J6 J8 J1 P19 P18 P17 GND 8 GND 7 GND 6 GND 5 GND 4 GND 3 GND 2 GND 1 GND 9 GND 10 GND 11 GND 12 GND 13 GND 14 GND 15 GND 16 J12 MPG ATS 48VDC 48VDC 48VDC 48VDC FANS 48VDC 48VDC ...

Page 229: ...ol Shelf General Description 8 Figure 8 2 MPG ATS Interface Card Layout P7 Unit 6 P5 Unit 4 P3 Unit 2 P1 Unit 0 P8 Unit 7 P6 Unit 7 P4 Unit 3 P2 Unit 1 P10 Unit 1 P12 Unit 3 P14 Unit 5 P16 Unit 7 Third Fourth Sec Prm P9 Unit 0 P11 Unit 2 P13 Unit 4 P15 Unit 6 UP P20 P19 P18 P17 ...

Page 230: ... 2 Unused Slot CLA ATS Optional NOT USED MCP ATS NOT USED In addition to these cards the Coral system includes 4 8XMM optional expandible memory daughter card installed on the 32GC card SAU unit which attaches to the 32GC card front panel one for each 32GC Three slots are provided for Power Supply PS ATS units indicated in the figure as PS1 PS2 and PS3 Power Supply alarm fuses are located in the u...

Page 231: ...ard in the system Slot Coded Keys Each Control Shelf slot is equipped with physical coded keys a mechanical feature designed to compel correct card placement and to prevent the possibility of placing any circuit card in the wrong position Three coded keys are placed at the front of each slot Corresponding matching coded keys are placed the top and bottom of each control card The physical coded key...

Page 232: ...on Control card in a slot other than the one designated for that card Irreparable damage may occur if a Common Control card is placed in an incorrect slot with power applied 32 GC 32 GC CLA optional ATS CLA ATS optional PS 3 PS 2 MCP ATS MCP ATS 1 2 3 PS Fuses SAU SAU FAN 1 FAN 2 FAN 3 Fuse Fuse Fuse LEFT control Bottom row of coded keys Top row of coded keys RIGHT control optional PS 1 ...

Page 233: ...d slot and orient the card as follows If this card is to be inserted on the right side of the control cage insert the card right side up the component side of the card is facing right See Figures 8 17 through 8 14 and 8 20 for upright cards If the card is to be inserted on the left side of the control cage insert the card upside down the component side of the card is facing left 5 Align the card t...

Page 234: ...necting pins A slight resistance is felt as the multi pin connectors on the card mate with connectors on the backplane 8 Verify that the card is flush with the card cage 9 Verify that the card front panel LEDs indicate that the card is functional See the front panel description of the relevant card Table 8 5 MCP ATS Front Panel LED Indicators page 8 30 Table 8 14 32GC Front Panel Components page 8...

Page 235: ...ommon Control Cards 8 11 Common Control Shelf General Description 8 Figure 8 5 Inserting the Control Card 2 Push ejectors in direction of arrows 3 1 Press latches Insert card 4 At end of slot push ejectors in direction of arrows Ejector Latch ...

Page 236: ... See Figure 8 6 If the card ejectors do not include safety latches simultaneously push the ejectors in the direction of the arrows See Figure 8 6 5 Remove the card from the cage or shelf Circuit cards contain static sensitive circuitry and might be damaged or destroyed by electro static discharge ESD Always wear the static dissipating wrist strap connected to the system cabinet or card cage while ...

Page 237: ...m 6000 Installation Manual Common Control Cards 8 13 Common Control Shelf General Description 8 Figure 8 6 Removing the MCP ATS Card 1 Press latches 2 Push ejectors in direction of arrows 3 Remove card Ejector Latch ...

Page 238: ...age tested under load can be used to determine its state of charge Voltage measured across an unused battery connected to the memory circuitry must be between 3 30 and 3 35 volts If the voltage is less than 2 50 volts replace the battery For first time use remove the protective battery insulator See the layout drawing of the relevant control card Replacing the Lithium Battery 1 Carefully lift the ...

Page 239: ...le The technician must determine the faulty component either one of the fuses has blown and must be replaced or one of the fans is not functioning The fan tray should be replaced only when the main power to the system is turned off The alarm signals from the fan to the 32GC card are isolated from the 48V power source by an opto coupler device Determining the Fan Fault and Replacing the Fan Fuses W...

Page 240: ...ing an operative Coral system 1 Firmly pull out the fan tray 2 Insert the new fan tray and gently push it back completely into its slots so as to assure the backplane connections are secure 3 Fasten the screws attaching the fan tray to the chassis 4 Return Power to the system and check that all the fans are functioning properly Figure 8 7 Control Shelf Fan Tray FAN 1 0 5A F 250V 0 5A F 250V 0 5A F...

Page 241: ...em database The MCP ATS is a hot insertion card which allows the technician to remove the card from its powered up slot while the MCP ATS from the other side takes control Program Interface Connection The Program Interface PI provides a menu driven program facility for viewing and updating the Coral system database and for performing and monitoring diagnostic routines from a simple data terminal o...

Page 242: ...ns 2 MCP ATS Card Types Manufacturer Card Type Figure Number Layout Front Panel Tadiran Telecom Tadiran Telecom FFigure 8 8 and Figure 8 9 Figure 8 14 SBS SBS CT7 Figure 8 10 Figure 8 15 SBS CT9 Figure 8 11 Figure 8 16 Motorola CPV5350 500 Figure 8 12 Figure 8 17 CPV5370 Figure 8 13 Figure 8 18 3 Coral Versions Compatibility with MCP ATS Card Type Coral Software Card Compatible Tadiran Telecom SBS...

Page 243: ...existing database before removing the card See Upgrading the Coral Generic Version on page 4 2 for further details Removing the CFD Flash Memory Card 1 When required save the Coral database to the flash card and wait while the data is being written to the flash card See Saving the System Database page 4 4 2 Remove the MCP ATS card from the cage See Removing a Control Card page 8 12 3 remove the CF...

Page 244: ...either face down or face up depending on the MCP ATS CFD connector drive 1 Remove the old CFD memory card as described in Removing the CFD Flash Memory Card page 8 19 2 Insert the CFD to its slot on the MCP ATS card 3 Insert the MCP ATS card to the cage See Inserting a Control Card page 8 9 CFD Label Description The CFD label describes the CFD contents its Catalog number the loaded Software versio...

Page 245: ...cessor Card 8 Figure 8 8 MCP ATS Tadiran Telecom Layout Jumper P10 must be set to the MASTER 2 3 position Insert CFD Reset CFD release button MCP CLA Selection 1 2 CF Slave CLA 2 3 CF Master MCP BATTERY INSULATOR PULL UP TO REMOVE P10 CPU Front 1 2 3 Backup Battery REMOVE BEFORE USE ...

Page 246: ...e 8 9 MCP ATS Tadiran Telecom Layout with an Hard Disk Jumper P10 must be set to the MASTER 2 3 position Reset CFD release button CPU Insert CFD Front MCP CLA Selection 1 2 CF Slave CLA 2 3 CF Master MCP P10 1 2 3 BATTERY INSULATOR Under hard disk PULL UP TO REMOVE REMOVE BEFORE USE Hard disk optional ...

Page 247: ...Coral FlexiCom 6000 Installation Manual Common Control Cards 8 23 MCP ATS Main Processor Card 8 Figure 8 10 MCP ATS SBS CT7 Layout J1 J2 J3 J5 MCP ATS SBS CT7 CPU Compact Flash Disk CFD memory Insert ...

Page 248: ...8 24 Common Control Cards Coral FlexiCom 6000 Installation Manual MCP ATS Main Processor Card 8 Figure 8 11 MCP ATS SBS CT9 Layout Compact Flash Disk CFD memory Insert MCP ATS SBS CT9 ...

Page 249: ...Coral FlexiCom 6000 Installation Manual Common Control Cards 8 25 MCP ATS Main Processor Card 8 Figure 8 12 MCP ATS Motorola CPV 5350 Layout DRAM Compact Flash Disk CFD memory CPU BATTERY Insert ...

Page 250: ...8 26 Common Control Cards Coral FlexiCom 6000 Installation Manual MCP ATS Main Processor Card 8 Figure 8 13 MCP ATS Motorola CPV 5370 Layout Compact Flash Disk CFD memory CPU BATTERY Insert ...

Page 251: ... used in all Coral FlexiCom 6000 systems The following tables describe various card front panel components Table 8 4 MCP ATS Front Panel Connectors KB0 RS 232 Interface Pin Functions page 8 28 Table 8 5 MCP ATS Front Panel LED Indicators page 8 30 Table 8 6 VGA Interface Pin Functions page 8 32 Table 8 7 KB0 RS 232 COM1 Interface Pin Functions page 8 33 Table 8 8 Keyboard Mouse PS 2 Interface Pin ...

Page 252: ... on page 8 32 COM 1 l l l l l Asynchronous RS 232 serial port 9 pin D sub connector used for the PI device KB0 port connection See Table 8 7 KB0 RS 232 COM1 Interface Pin Functions on page 8 33 and Program Interface Connection page 8 17 COM 2 l Not used KB MS l l l l l Keyboard and PS 2 Mouse circular 6 pin mini DIN connector used to connect a keyboard or mouse when reviewing the BIOS settings Als...

Page 253: ...C without causing system interruption for Hot Standby systems or causing the system to default to initial sizes NOTE If the system is not a Hot Standby system all calls in progress during Reset are disconnected BIOS Basic Input Output System program which is permanently located in a computer s MCP ATS memory and is activated at startup Component SBS CT7 SBS CT9 CPV 5350 CPV 5370 Function Tadiran ...

Page 254: ...d Hard Drive activity reading and writing to hard disk Caution Do not remove the CFD nor the MCP ATS card from its slot when this LED is flashing See Removing a Control Card page 8 12 AL l l l Alarm indicator red Lights continuously to indicate one or more of the following CPU is overheated Battery voltage output is not within spec See Lithium Backup Batteries page 8 14 EXT PWR STAT l Blue Hot Swa...

Page 255: ...s on Blink red 1Hz BIOS early init Blink amber 1Hz BIOS start POST Blink green 1Hz up to 4Hz BIOS POSTA init Green on OS boot Red on System halted or reset HS l Hot Swap blue working according the hot swap specification PWR Alarm l l Power green Alarm red HDD l l Hard Disk Drive green indicates hard drive activity on the primary IDE channel Caution Do not remove the card from its slot when this LE...

Page 256: ...reen signal 3 BLUE Blue signal 4 NC no connection 5 DACVSS Video return 6 DACVSS Video return 7 DACVSS Video return 8 DACVSS Video return 9 NC no connection 10 DACVSS Video return 11 NC no connection 12 DDCDAT Display Data Channel data signal for DDC2 support 13 HSYNC Horizontal synchronization 14 VSYNC Vertical synchronization 15 DDCCLK Display Data Channel clock signal for DDC2 support ...

Page 257: ...es serial data input fro communications link 3 Tx Transmit Sends serial output to communications link 4 DTR Data set is ready to establish a communications link 5 GND Ground 6 DSR Data set is ready 7 RTS Indicates to data set that UART is ready to exchange data 8 CTS Data set is ready to exchange data 9 N A Pin Signal Mnemonic Function 1 KBDDAT Data line for keyboard 2 MDAT Data line for mouse 3 G...

Page 258: ...ATS Tadiran Telecom Front Panel Upright Position Handle Release latch Ethernet COM1 KB0 Keyboard USB 2 Reset button Handle Compact flash disk CFD slot USB2 USB1 MCP ATS VGA COM1 KB MS RST HD AL PWR HS ETH1 CFD Release latch USB 1 VGA video ALARM indicator Hard disk indicator Hot insertion indicator PWR indicator ...

Page 259: ...cessor Card 8 Figure 8 15 MCP ATS SBS CT7 Front Panel Upright Position Push button to release lever Handle VGA video CT7 COM1 KB0 Keyboard CT7 USB port not used Reset button Handle EXT indicator COM1 PMC VGA ETH1 ETH2 PWR indicator STAT indicator Push button to release lever SBS CT7 ...

Page 260: ...Processor Card 8 Figure 8 16 MCP ATS SBS CT9 Front Panel Upright Position USB KBD MS COM1 VGA ETH1 PMC1 ETH2 RST HS ST CT9 Handle Push button to release lever Ethernet 1 not used VGA video COM1 KB0 Keyboard USB Reset button Handle HS indicator ST indicator Ethernet 2 not used CT9 ...

Page 261: ...rd 8 Figure 8 17 MCP ATS Motorola CPV 5350 Front Panel Upright Position Ethernet 1 not used Handle COM1 KB0 VGA video COM2 not used Ethernet 2 not used Keyboard USB port not used Reset button Handle CPV5350 ALARM indicator SPKR indicator HDD indicator PWR indicator CPV5350 V I D E O MOTOROLA ...

Page 262: ... Manual MCP ATS Main Processor Card 8 Figure 8 18 MCP ATS Motorola CPV 5370 Front Panel Upright Position Ethernet 1 not used Handle CPV5370 COM1 KB0 Keyboard V I D E O VGA video Reset button Handle HDD indicator MOTOROLA Ethernet 2 not used PWR ALARM indicator ...

Page 263: ... not described below refer to the manufacturer s website as follows 1 From your workstation open the Web browser and access the manufacturer s web site at http www tadirantele com 2 Go to Partners login type your username and password 3 Click Enter The Main Partners page is displayed 4 Go to Support 5 Refer to the list of card models supplied for the MCP ATS and execute its corresponding BIOS Setu...

Page 264: ...the card 5 Press the keyboard Delete key repeatedly several times while the card is loading until the Pheonix Award BIOS CMOS Setup Utility main screen is displayed 6 Using the arrow keys navigate to the Load Optimized Defaults Y N screen type Y and then press Enter the optimized defaults are loaded and the main Pheonix Award BIOS CMOS Setup Utility screen is displayed 7 Press F10 the SAVE to CMOS...

Page 265: ...see Inserting a Control Card page 8 9 Connect video terminal 4 Connect a video terminal and keyboard to the card s front panel 5 Turn on the main Power to the Coral system Enter BIOS 6 Press the Keyboard F2 or Delete key while the card is loading 7 Ensure that the BIOS settings match the values displayed in the Tables listed in BIOS Values for SBS CT7 below 8 After verifying the correct values cho...

Page 266: ...gement Setup PCI Plug and Play Setup Auto Detect Hard Disks Change User Password Change Supervisor Password Auto Configuration with Optimal Settings Auto Configuration with Fail Safe Settings Save Settings and Exit Exit without Saving BIOS Option Value Date mm dd yyyy Time hh mm ss Floppy Drive A Not Installed Floppy Drive B Not Installed Type Pri Master Auto Pri Slave Not Installed Sec Master Aut...

Page 267: ...es Yes Initialize I20 Devices Yes Floppy Access Control Read Write Hard Disk Access Control Read Write SMART for Hard Disks Enabled BootUp Num Lock On PS 2 Mouse Support Enabled System Keyboard Present Primary Display Absent Password Check Setup Boot to OS 2 No Wait for F1 If Error Enabled Internal Cache WriteBack System BIOS Cacheable Enabled Onboard VGA Enabled Display Mode CRT DFP Digital Flat ...

Page 268: ...Type Normal ISA PCI Downstream Window 1 Type Disabled DMA 2 Type Normal ISA DMA 3 Type Normal ISA DMA 5 Type Normal ISA DMA 6 Type Normal ISA DMA 7 Type Normal ISA PCI Downstream Window 1 Type Disabled PCI Downstream Window 1 Size N A PCI Downstream Window 2 Type Disabled PCI Downstream Window 2 Size N A PCI Downstream Window 3 Type Disabled PCI Downstream Window 3 Size N A PCI Upstream Window 0 T...

Page 269: ...ock Ratio 50 62 5 Display Activity Ignore Device 6 Serial Port 1 Ignore Device 7 Serial Port 2 Ignore Device 8 Parallel port Ignore Device 5 Floppy disk Ignore Device 6 Primary Master IDE Monitor Device 1 Primary Slave IDE Ignore Device 2 Secondary Master IDE Ignore Device 3 Secondary Slave IDE Ignore Processor Thermal Protection Enabled Thermal Duty Cycle 87 5 BIOS Option Value Plug and Play Awar...

Page 270: ...IRQ153 PCI PnP BIOS Option Value OnBoard FDC Auto Drive and Port Drives A FDC B FDC Swap Floppy Drives No Parallel Port ECP DMA Channel Auto OnBoard IDE Both Compact PCI sideband INTP IRQ Disabled OnBoard IMPI controller N A OnBoard High Res Timer IRQ Disabled Swap Floppy Drives No OnBoard Ethernet 1 connector Front OnBoard Ethernet 2 connector Front BIOS Option Value ...

Page 271: ... the Coral system 6 Press the keyboard Delete key while the card is loading to enter the CMOS BIOS settings 7 Set Auto Configuration with Optimal Settings to Yes 8 Enter the Advanced CMOS Setup screen 9 Select the 1ST BOOT DEVICE option and set to 1ST IDE HDD 10 Enter the Peripheral Setup screen 11 Set the Onboard Serial Port1 option to 3F8H 12 Set the Onboard Serial Port2 option to 2F8H 13 Return...

Page 272: ...ert the MCP ATS into its slot b Extract the 32GC Extract the 32GC for this system side from its slot in order to disable the MCP ATS watchdog reset mechanism c Connect Video and Keyboard Connect a video terminal VGA connector and keyboard to the card front panel To enter card BIOS 2 Reset the MCP ATS and press DELETE repeatedly while the card is loading 3 The BIOS Setup Utility screen is displayed...

Page 273: ... and Exit and press OK to save Tab Name Option Sub Option Set Option Value to Advanced IDE Configuration Secondary IDE Master Hard Disk Floppy Configuration Floppy A Disabled Remote Access Configuration Remote Access Disabled USB Configuration USB Function Disabled Boot Boot Settings Configuration Wait for F1 if Error Disabled 1st Boot Device CFD name Chipset Onboard Compact PCI Bridge Configurati...

Page 274: ...oral system 6 Press F2 while the card is loading to enter the BIOS Ensure that the BIOS settings match the values displayed in the tables below Table 8 11 for Motorola CPV5350 Model 01 W3573F04B Version 1 1 Table 8 12 for the Motorola CPV 5350 V2 2 RM02 Table 8 13 for the Motorola CPV 5350 V3 0 RM02 7 After verifying the correct values choose the EXIT AND SAVE option and type Y to save the BIOS up...

Page 275: ...set Configuration Data NO L2 Cache ECC ENABLE ECC Memory Config DISABLE PCI Configuration Default Primary Video Adapter APG On Board Ethernet On Board Ethernet 1 ENABLE Ethernet 1 Connection FRONT Ethernet 1 Option Rom DISABLE On Card Ethernet 2 ENABLE Ethernet 2 Connection FRONT Ethernet 2 Option Rom DISABLE USB FRONT HA Config ENABLE Domain A ENABLE Domain B ENABLE PCI PNP IRQ IRQ 9 Reserved IRQ...

Page 276: ... controller ENABLE Base I O Address Primary Local Bus IDE Adapter BOTH Large Disk Access Mode DOS Legacy USB Support DISABLE Remote control COM Port DISABLE Embedded FLASH BIOS Image Source DISKETTE Drive Load BIOS Image Enter Clear CMOS Yes Program Flash Enter Other parameters are Not Applicable Parameter Value User Password is CLEAR Supervisor Password is CLEAR Set User Password ENTER Set Superv...

Page 277: ...alue Floppy Check DISABLE Quick Boot Mode ENABLE Summary Screen CLEAR SET UP Prompt ENABLE Numlock Auto Boot Device Priority 1 Hard Drive Bootable Add in Cards Compact Flash Disk Manufacturer Name 2 Removable Device 3 ATAPI CD ROM DRIVE 4 Legacy Network Boot Hard Drive 1 Compact Flash Disk Manufacturer Name 2 Bootable Add in Cards ...

Page 278: ...mory 64MB Board Serial No 4823181 BIOS Version CPV5350 BIOS V2 2 RM02 System Time hh mm ss System Date mm dd yy Diskette A Disabled Diskette B Disabled Primary Master None Primary Slave IDE Removable Secondary Master IDE Removable Secondary Slave None BIOS Option Value Type Auto Cylinders 734 Heads 4 Sectors 32 Maximum Capacity 48Mb Multi Sector Transfers Disabled LBA Mode Control Disabled 32 Bit ...

Page 279: ...s IDE adapter Both Large Disk Access Mode DOS ECC Memory Config Disabled PCI Configuration I O Device Configuration Local Bus IDE adapter Both Large Disk Access Mode DOS SMART Device Monitoring Disabled Legacy USB Support Disabled Remote Console Embedded Flash BIOS Option Value Serial Port A Enabled Base I O Address 3F8 Interrupt IRQ 4 Serial Port B Enabled Base I O Address 2F8 Interrupt IRQ3 Para...

Page 280: ...IOS Option Value COM Port Disabled Baud Rate 19 2K Console Type VT100 Flow Control CTS RTS Scan Lines 24 Active After POST Off BIOS Option Value Floppy Check Disabled QuickBoot Mode Enabled Summary Screen Disabled SETUP Prompt Enabled NumLock Auto Hard Drive Compact Flash Disk Manufacturer Name Removable Devices ATAPI CD ROM Drive ...

Page 281: ...80 CPU Type Pentium II CPU Speed 333MHz Host Bus Frequency 66MHz Cache RAM 256Kb Total Memory 64MB System Time hh mm ss System Date mm dd yy BIOS Option Value Cache RAM 256Kb Total Memory 64Kb Memory Bank 0 64MB SDRAM L2 Cache Enabled L2 Cache ECC Support Enabled ECC Memory Config Disabled BIOS Option Value Plug and Play O S No Reset Configuration Data No Legacy USB Support Enabled Floppy Configur...

Page 282: ...ed Floppy Check Disabled BIOS Option Value Local Bus IDE Adapter Both Large Disk Access Mode DOS Smart Device Monitoring Disabled Primary Master None Primary Slave IDE Removable Secondary Master None Secondary Slave None BIOS Option Value P S Mouse Auto Detect Serial Port A Enabled Base I O Address 3F8 Interrupt IRQ4 Serial Port B Enabled Base I O Address 2F8 Interrupt IRQ3 Parallel Port Enabled M...

Page 283: ...COM Port Disabled Baud Rate 19 2K Console Type VT100 Flow Control CTS RTS Screen Lines 24 Active After POST Off BIOS Option Value Quick Boot Enabled Summary Screen Disabled SETUP Prompt Disabled NumLock Auto Boot Retry Enabled Boot Device Priority Hard Drive Compact Flash Disk Manufacturer Name Bootable Add in Cards Removable Devices ATAPI CD ROM Drive ...

Page 284: ...ay the BIOS screen 7 Press the right arrow key to display the ADVANCED screen 8 Select the REMOTE CONSOLE position 9 Set the COM PORT parameter to DISABLED 10 Press the right arrow key until reaching the BOOT screen 11 Select the HARD DRIVE option 12 Set the Compact Flash Disk at the top as shown below with the key HARD DRIVE Compact Flash Disk Manufacturer Name Bootable Add In Cards Removable dev...

Page 285: ...ystem and digital tone generators dial busy ringing ringback DTMF MFC and test Additionally the 32GC card contains circuitry to synchronize the Coral peripheral clock to an external clock derived from a digital trunk interface The 32GC card supports eight HDLC highways and thirty two PCM streams and up to sixteen peripheral shelves It is capable of establishing a maximum of 2000 calls between port...

Page 286: ...described below Table 8 14 32GC Front Panel Components Component Function Main red Indicator Lights during card initialization is not lit when card is functioning properly If this indicator is lit the 32GC is faulty Steadily Off no problem 32GC card operating normally Steadily On 32GC card has not initialized It indi cates a possible problem with the 32GC card Flashing diagnostic test failed by ci...

Page 287: ... LEDs and push button are physically located on the XMM card The 32GC only provides an opening on its front panel for displaying them The upper XMM is not used in this Coral Version Therefore the items on the right side appear as empty holes on the 32GC front panel When no XMM is installed all these items appear as empty holes on the front panel RUN green Indicator CLA Lights when the CLA ATS card...

Page 288: ...el Upright Position 1 2 3 4 32GC A S M F GC COM INT CPCI RUN SAU CLA RST CLA 32GC All dip switches set to the right CLA ATS Run Indicator Upper XMM Indicators Not Used SAU Device Interface CLA ATS supported by Lower XMM Indicator Reset CLA ATS button Main Red Active Flashing Green Standby Green Maintenance Red Faulty Red ...

Page 289: ...on Control Cards 8 65 32GC Group Controller Card 8 Figure 8 21 32GC Card Layout A B C BATTERY INSULATOR PULL DOWN TO REMOVE REMOVE BEFORE USE 32GC U37 U34 U35 P10 100 pin female XMM connector Card Software HI Card Software LO Tones DTME MFC PROM ...

Page 290: ...peripheral shelf pairs receives 512 Time Slots divided into four three groups of 128 Time Slots see Figure 8 23 Each PB ATS supports 128 or 512 PCM time slots depending on the Peripheral Shelf Unit backplane type See PBD ATS beginning on page 8 107 for more information The 32GC card automatically identifies whether the Peripheral Shelves units require only 128 of the entire 512 time slots or the e...

Page 291: ... X2 PB ATS X2 PB ATS X2 Peripheral Shelf 0 Peripheral Shelf 1 Peripheral Shelf 2 Peripheral Shelf 3 Peripheral Shelf 4 Peripheral Shelf 5 Peripheral Shelf 6 Peripheral Shelf 7 Peripheral Shelf 8 Peripheral Shelf 9 Peripheral Shelf 10 Peripheral Shelf 11 Peripheral Shelf 12 Peripheral Shelf 13 Peripheral Shelf 14 Peripheral Shelf 15 Mirrored Memory Snooping ACTIVE Side STANDBY Side 512 T S 512 T S ...

Page 292: ...SLOT 8 SLOT 9 SLOT 10 SLOT 11 SLOT 12 SLOT 13 SLOT 14 SLOT 15 SLOT 16 SLOT 17 SLOT 18 512 time slots PB ATS 512 time slots PB ATS 512 time slots PB ATS 384 time slots PB ATS 512 time slots PB ATS 512 time slots PB ATS 512 time slots PB ATS 512 time slots Coral FlexiCom 6000 512 time slots per Peripheral Shelf Unit 4K time slots per 32GC 64 128 time slots for each Peripheral Shelf Unit time slots e...

Page 293: ...e tones are appropriate for the system as configured and overwrites the flash tone device on the 32GC card as appropriate PCM Streaming Each PCM stream operates at a data rate of 8 192 Mbps Each PCM stream consists of transmit and receive signals each of which are divided into 128 time slots Each time slot is eight bits wide sampled every 125 µs or 8 000 times per second This rate matches both A µ...

Page 294: ...ar system operation the SAU is checked to ensure it remains attached to the 32GC card However if necessary the SAU can be removed for short periods a maximum of two weeks without interrupting system operation If the SAU is removed for more than two weeks the system ceases to process calls Replacing a 32GC card requires removing the SAU from the old card and installing it on the replaced 32GC card ...

Page 295: ... the serial number is a verification digit Any leading zeros as well as the verification digit do not appear in the SAU number reported in the PI root menu SAUs for Redundant Systems HSB For Redundant Hot Standby systems the software detects the information embedded on both SAU devices one on each 32GC and verifies that the same Coral version is loaded on both SAUs and set for the Hot Standby dual...

Page 296: ...the same system side For a single sided system FlexiCom 6000 If the system receives any of these Alarm messages then the Coral system will only function for a maximum of 14 days For a redundant HSB system FlexiCom 6000 R If only one system side has an Alarm SAU Fault that system side will work for 14 days and then shut down while the other side will remain in Active mode resulting in a single side...

Page 297: ...ee Figure 8 20 2 The SAU device and its corresponding CFD memory card are shipped in their own coral software box Two separate coral software boxes are provided for redundant Coral FlexiCom 6000 R HSB systems one for the right side and on e for the left side of the control shelf 3 Verify that the serial number of the SAU matches the serial number on the CFD card inserted in the MCP ATS on this sid...

Page 298: ... in any combination up to a maximum of 16 Remote and Local Peripheral shelves total Each FlexLITE Coral FlexiCom 400 cabinet counts as two shelves towards the allowed maximum number of shelves For FlexLITE operation the 32GC card software Flash units U34 U35 must be Version 1 07 and later In redundant systems both 32GC cards must be upgraded Refer to Coral FlexLITE Remote Shelf Installation Manual...

Page 299: ...e 4 8XMM includes 3V lithium battery backup for power protection The 4 8XMM card is installed as a piggyback card onto a memory interface connector on the 32GC and does not occupy its own card slot within the Coral FlexiCom 6000 control shelf When is an XMM card required A 4 8XMM card is required In large Coral Configurations with 5000 or more ports To use the Coral Directory Traffic and Call Log ...

Page 300: ...page 3 16 A memory interface connector on the top side of the 4 8XMM and three holes of screws allows the optional installation of a second 4 8XMM card placed atop the first 4 8XMM card for future configurations The 4 8XMM dip switches are not used Attaching the 4 8XMM Card Each 4 8XMM card is equipped with two 100 pin connectors a female connector on the top side of the card marked J2 which is no...

Page 301: ...ule for 32GC 8 Figure 8 25 4 8XMM Card Layout 1 2 3 4 ON REMOVE BEFORE USE A J2 100 pin female connector 100 pin male connector Dip switch not used CLA Run Indicator CLA Exist Indicator Rear Side Bottom View B C BATTERY INSULATOR PULL DOWN TO REMOVE CLA Reset Component Side Top View 8 X M M J1 ...

Page 302: ...ector on the bottom side of the 4 8XMM card with the 100 pin memory interface connector P10 on the 32GC by aligning hole A on the XMM card with hole A on the 32GC card 4 Gently but firmly press the 4 8XMM connector into the 32GC connector until the 4 8XMM card rests on the metal spacers A slight resistance is felt as the connectors engage 5 Fasten one M3 screw through each of the mounting holes B ...

Page 303: ...nual Common Control Cards 8 79 4 8XMM Expanded Memory Module for 32GC 8 Figure 8 26 XMM installed on 32GC M2 5 Interface screw U37 U47 U34 32GC Component side Top View 1 2 3 4 ON A J2 B C M3 Interface screws with Hex Spacers below 8 XMM ...

Page 304: ...rage Capacity 4 or 8MB Memory Device 4 or 8 MB SRAM Battery LF1 2W 2430 2430B Voltage 3 0VDC Nom Capacity 250mAH Width 0 118 in 3 mm Diameter 0 965 in 24 5 mm NEDA Equivalent 5011L Coral Components Discontinuation Announcement 8XMM cards replace the discontinued 4XMM cards which are no longer produced 2 Specifications ...

Page 305: ...hernet 10 100Base T LAN computer network protocol The CLA ATS card incorporates the application processor and Ethernet interface circuitry for the CoraLINK computer telephony integration CTI link and holds a PCMCIA drive to house the Compact Flash Disk CFD The 64MB or more CFD contains the CLA ATS factory loaded software The CLA ATS shares the XMM memory expansion attached on the 32GC card The Eth...

Page 306: ...lly reestablishes a network connection IDE Indicator Power indicator Green indicates that the CLA card is active and properly working when lit COM1 Connection NOT USED Network Interface Ethernet LAN RJ 45 connection Keyboard Mouse connector for connecting a keyboard to set card BIOS Ready to Swap Indicator Card Layout An ATA type PCMCIA port to house the CFD is located on the card side see Figure ...

Page 307: ...W4 is connected with a shorting plug A list of the jumper settings is provided below however the jumper configurations may differ from card to card Jumper Coral Configuration W1 CPU Core Voltage 1 6V when On 1 2 On 3 4 Off 5 6 On 7 8 Off 9 10 On W2 Remote Reset Disabled Off W4 Onboard Battery Connected On W6 VT100 Download Mode Normal Mode Off W7 Onboard Video Enabled Off W9 W10 COM2 Terminations ...

Page 308: ... 27 CLA ATS Front Panel Upright Position cPCI MXP CLA ATS teknor Reset button Video IDE Indicator Power OK Indicator Keyboard mouse COM 1 RS 232 Port Not Used Ready To Swap indicator Injector ejector microswitch red Bottom handle Top handle Network Interface Ethernet RJ 45 connector CLA ATS teknor cPCI MXP ...

Page 309: ...sistors Compact Flash Disk CFD W10 W1 Factory set Battery W9 J7 J22 Injector ejector microswitch CPU BIOS Do not change Faulty jumper settings can damage both the board and the processsor 1 2 through serial port 1 2 3 t Remote reset hrough serial port 2 off disabled W2 W6 VT100 Download mode Off Normal mode 1 2 VT100 mode 3 4 Download mode Compact flash Off Slave On Master Onboard Battery On Conne...

Page 310: ...raLINK Adapter Card 8 Figure 8 29 CLA ATS card with CFD Drive removed Lithium Backup Battery For a full description of control card lithium batteries refer to Lithium Backup Batteries page 8 14 1 3 2 1 3 2 4 Rear View CFD Drive J7 J22 CLA ATS teknor cPCI MXP CFD Drive Connector ...

Page 311: ...oral system via the XMM card located on the 32GC card The XMM card stores a 2MB shared RAM for the MCP ATS and the CLA ATS from which CTI data information may be retrieved A CLA ATS functional block diagram is shown in Figure 8 30 Figure 8 30 CLA ATS Functional Block Diagram MCP ATS Main Control Processor Card CPCI CPCI 4 8XMM Ethernet Cable 32GC Group Controller CLA ATS To LAN Common Control ...

Page 312: ...A ATS card side see Figure 8 28 For information on how to insert and remove a CLA card from the cage see Inserting and Removing a Control Card page 8 9 During system initialization while the PI registers the display messages for a properly uploading system see Messages for a Properly Loading Active Side page 3 12 and Messages for a Properly Loading Standby Side the following message should be disp...

Page 313: ...D must be installed the following steps describe its installation procedure To Install the CFD Card 1 Unscrew the two screws located on the drive to remove the drive see Figure 8 28 2 Insert the new CFD The CFD is inserted with its label face up The CFD cannot be inserted upside down 3 Reattach the drive to its connector on the CLA ATS card see Figure 8 29 4 Fasten the screws to secure the CFD in ...

Page 314: ...e Control Shelf 4 Press the CLA ATS front panel reset button to re initialize the card 5 Press the keyboard Delete or F2 key while the CLA ATS card is initializing 6 Follow the on screen directions to select items 7 Choose the Standard CMOS SETUP option Should it be necessary to update the date and time this may be changed on this screen Primary Master Primary Slave Secondary Master and Secondary ...

Page 315: ...All Boot Up NumLock Status On Typematic Rate Setting Enabled Typematic Rate Chars s 30 Typematic Delay Msec 250 VT100 Setting Comport Speed Parity Data Stop 1 AUTO None 8 1 CPU Internal Cache Enabled External Cache Enabled CPU L2 Cache ECC Checking Enabled SDRAM RAS to CAS Delay 3 SDRAM RAS Precharge Time 3 SDRAM CAS latency Time 3 SDRAM Precharge Control Disabled DRAM Data Integrity Mode ECC Memo...

Page 316: ...MB 64 Video BIOS Shadow Enabled C8000 CBFFF Shadow Enabled CC000 CFFFF Shadow Enabled D0000 D3FFF Shadow Enabled D4000 D7FFF Shadow Enabled D8000 DBFFF Shadow Enabled DC000 DFFFF Shadow Enabled On Chip Primary PCI IDE Enabled IDE Primary Master PIO Auto IDE Primary Slave PIO Auto IDE Primary Master UDMA Auto IDE Primary Slave UDMA Auto On Chip Secondary PCI IDE Disabled IDE HDD Block Made Enabled ...

Page 317: ...y Master Option N Skip N OPTIONS SIZE CYCS HEADPRECOMP LAND2SECTOR MODE 1 Y 0 0 0 0 0 0 Normal The next screen should display the following HARD DISKS TYPE SIZE CYLS HEAD PRECOMP LAND2 SECTOR MODE Primary Master Primary Slave Select Primary Slave Option N Skip N OPTIONS SIZE CYCS HEADPRECOMP LAND2SECTOR MODE 2 Y 32 31 32 0 489 63 LBA 1 32 490 4 65535 489 32 Normal 13 Return to the main screen and ...

Page 318: ...nshielded twisted pair in accordance with the 10 100Base T protocol The computers are connected to the application via a hub terminal to the RJ 45 CLA ATS adapter Interface Connections The following table displays the CLA ATS RJ45 interface connector pin descriptions Table 8 15 CLA Interface Connections DTE The installation of a CLA ATS card to a Coral system has considerable impact on the system ...

Page 319: ...INK then translates that data into logical information for the Coral system which processes the calls CoraLINK can support up to eight different multiple CTI applications on the network any or all of which may be simultaneously directing service requests to and receiving status events at any time CoraLINK uses TCP IP protocol and complies with the ECMA 179 and 180 standards CoraLINK also supports ...

Page 320: ...rd 8 Figure 8 31 CoraLINK Application Telephony Server CoraLINK Interface Coral 6000 Interface CoraLINK RJ 45 Any Telephony Server e g FlexCT server CallPath CT Connect TSAPI up to 8 connections IVR Server CTI Clients LAN Server Computers with CTI applications Ethernet 10 100Base T RJ 45 TCP IP ...

Page 321: ... CPU Low Power 500 MHz with 32MB SDRAM Application Interface Complies with ECMA 179 180 and CSTA III Software Driver Access Protocol ITU X 217 X 227 ACSE X 219 X 229 ROSE Network Type IEEE 802 3 Ethernet Network Topology 10 100Base Tx Ethernet Network Interface Connector RJ 45 Network Transport Protocol TCP IP D slot ATA Type Coral Common Control Coral FlexiCom 6000 6000R 9 Specifications ...

Page 322: ...8 98 Common Control Cards Coral FlexiCom 6000 Installation Manual CLA ATS CoraLINK Adapter Card 8 NOTES ...

Page 323: ...he PB ATS card also includes circuitry to allow inhibit the PCM lines to the peripheral cards as well as a circuit for signal rate conversion from 8 192 Mbps to 4 096 Mbps for use in the peripheral shelves and vice versa The PCM lines are allowed in the Active PB ATS card and inhibited in the Standby PB ATS card The PB ATS card transmits and receives HDLC messages using HDLC highway A or B in acco...

Page 324: ...ovides the HDLC and PCM signals for the odd shelf via the PBD24S card A fault in the PB ATS card is detected by the Active 32GC Recognizing Time Slot Configurations Each PB ATS supports 128 or 512 PCM time slots depending on the Peripheral Shelf Unit backplane type The 32GC card automatically identifies whether the Peripheral Sec External Sync Active Standby 32GC Prm External Sync 32GC MPG ATS Dig...

Page 325: ...ce of a PB ATS card and its status are reported to the 32GC card via the FC19 redundant cabling to the MPG ATS The number of time slots used per Peripheral Shelf Unit may also be viewed either from the Sysgen 5 PI branch UNITS parameter or by viewing the Unit s PB ATS front panel where a time slot 128 or 512 indicator is lit Time Slot Transmission The PB ATS card transmits 512 time slots PCM at th...

Page 326: ...e located in slots 1 and or 2 of an even peripheral shelf fitted with a PBD ATS at the rear of these slots To prevent inserting a PB ATS card in the wrong slot the PB ATS card is contoured differently than the other peripheral shelf cards It has rounded corners on the bottom similar to the control cards of other Coral systems The PB ATS card slides into matching groves on the tracks in slots 1 and...

Page 327: ... to from the 4 096 Mbps rates of the peripheral cards and the 8 192 Mbps rates of the 32GC cards Clock and Synchronization Signals Clock and Synchronization signals are provided by both channels A and B however the PB ATS selects only one of the channels for a Clock and Sync source to the peripheral bus via the PB ATS regardless of from which 32GC they arrive A PB Select line controlled by the 32G...

Page 328: ...treams 4 PCM Streams 32GC Selector PCM Rate Adaptation CLK PCM Rx 1 4 PCM Tx 1 4 PCM Rx 1 4 PCM Tx 1 4 Right 32GC Left 32GC Active Standby Selector PCM Rx HW A1 4 PCM Tx HW A1 4 PCM Tx HW B1 4 PCM Rx HW B1 4 4 096 MHz CLK A B HDLC Selector Right 32GC Left 32GC HDLC Rx Tx HDLC Rx Tx CNR A B CNT A B Peripheral Backplane 8 192 MHz 8 192 MHz 8 192 MHz ...

Page 329: ... are missing 128 T S Green lights when the PB ATS is installed on a Coral FlexiCom 5000 backplane supporting only 128 time slots and indicates that this Peripheral Shelf Unit is using only 128 of the 512 time slots available for this Peripheral Shelf Unit 512 T S Green lights when the PB ATS is installed on a Coral FlexiCom 6000 backplane supporting 512 time slots and indicates that this Periphera...

Page 330: ...al FlexiCom 6000 Installation Manual PB ATS Peripheral Buffer Unit 8 Figure 8 34 PB ATS Front Panel PB ATS 128 512 ALARM Alarm Indicator Red PB ATS Active Indicator Green 128 Time Slot Indicator 512 Time Slot Indicator Green ACTIVE ...

Page 331: ... 512 or 128 time slots to the connected Peripheral Shelf Unit Peripheral shelves are factory set configured to work with 512 time slots per shelf In field upgrades the PBD ATS works with 128 time slot shelves This configuration is automatically identified by the system Communication between Common Control Cards Card Relationship The Coral system main processor MCP ATS maintains a constant dialog w...

Page 332: ...S Backplane Card 8 Figure 8 35 32GC PB ATS Card Communications via PBD ATS 1st PB ATS PBD ATS P2 Right 32GC J11 J12 PBD24S 2nd PB ATS Even Shelf Backplane Odd Shelf Backplane FC19 Cable Left 32GC P3 FC19 Cable P1 MPG ATS B A C K P L A N E FC16 Cable P6 P7 29 27 H 41 Cable P1 ...

Page 333: ...or P1 used to connect the PBD ATS cards to the PBD24S of the adjacent odd shelf if there is one via an FC16 100cm or FC18 50cm discontinued flat cable See PBD24S to PBD ATS cabling page 6 33 Two 4 pin connectors P6 and P7 for the Peripheral Shelf power supply alarms See RPS PPS Alarm Cabling page 6 36 P6 is connected to Pin 29 of P3 on the even shelf P7 is connected to Pin 27 of P3 on the even odd...

Page 334: ...cts with the shows on the backplane The levers should stand parallel to the backplane 7 Refasten the screws 8 Reconnect the cables 9 Return power to the Coral System Figure 8 36 PBD ATS Card Layout For upgrading older low density peripheral shelves with the PBD ATS see the instructions provided in the upgrade kit 1 1 P1 P2 P3 P6 P7 4 4 J11 J21 J12 J22 Back View Front View ...

Page 335: ... of slot 1 and slot 2 The data and signaling communication between the MPG ATS and the PBD ATS is established via various cables that connect these cards as described above in the PB ATS and PBD ATS sections above Each PB ATS card can support one Peripheral Unit composed of one or two peripheral shelves When a PB ATS card supports two peripheral shelves the card s are installed in slot 1 and or 2 ...

Page 336: ... shelf See Peripheral Shelf Numbering beginning on page 6 26 for more information on shelf ID The PBD24S front and back card layouts are illustrated in Figure 8 37 The card contains the following items Back view One 96 pin connector used to connect the card to the MBP backplane for slot 1 Front view One 50 pin connector P1 used to connect the PBD24S to its associated PBD ATS card via an FC16 100cm...

Page 337: ...Coral FlexiCom 6000 Installation Manual Common Control Cards 8 113 PBD24S Backplane Card 8 Figure 8 37 PBD24S Front and Back Card Layout Back View J2 J3 P1 Not Connected Not Connected Front View ...

Page 338: ...8 114 Common Control Cards Coral FlexiCom 6000 Installation Manual PBD24S Backplane Card 8 NOTES ...

Page 339: ......

Page 340: ...ne 2010 International Headquarters Tadiran Telecom Ltd 18 Hasivim Street P O Box 7607 Petach Tikva 49170 Israel Tel 972 3 9262000 Fax 972 3 9262310 http www tadirantele com USA Headquarters Tadiran Telecom Inc 4 Tri Harbor Court Port Washington NY 11050 Tel 1 516 632 7200 Fax 1 516 632 7210 ...

Reviews: