


3
On the Ghost.exe menu, click GhostCasting, then select one of the following:
Connect to the session using Multicasting
Multicast
Connect to the session using direct broadcasting
Direct Broadcast
Connect to the session using Unicasting
Unicasting
4
In the GhostCast Session Name to Join dialog box, type the session name.
5
Click OK.
6
Select the disk from which to take an image.
7
Click OK.
8
Select the partition from which to take an image, if required.
9
Click OK.
10
Select the level of compression that you require.
11
Click Yes to begin.
See
“Running Ghost.exe on a client computer”
on page 115.
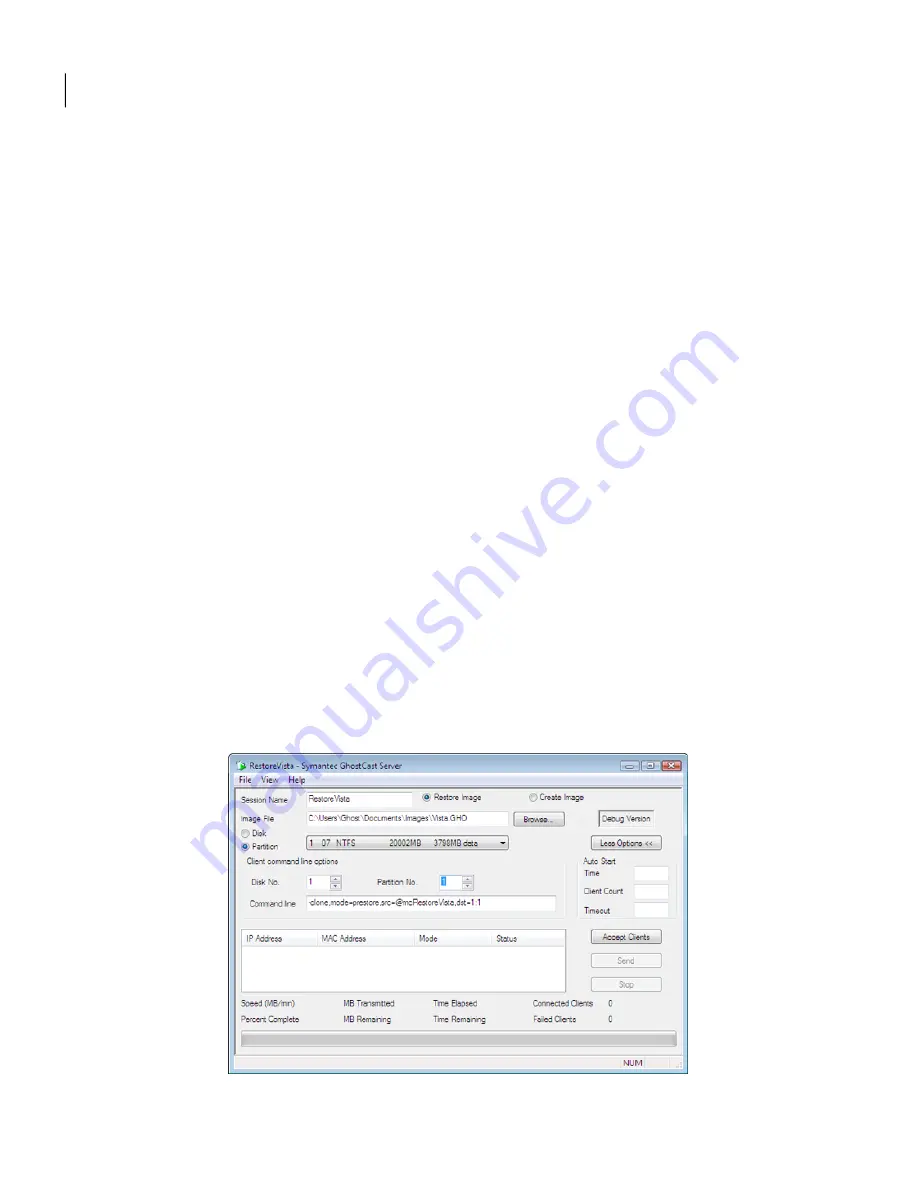
Restoring an image file onto client computers
To restore an image file, you must first start a GhostCast session on the GhostCast
Server. Once you create a session, connect the client computers to the GhostCast
session.
Using GhostCasting to create and restore images
Restoring an image file onto client computers
106
Summary of Contents for GHOST IMAGING FOUNDATION 7.1
Page 1: ...Symantec Ghost Imaging Foundation 7 1...
Page 3: ...Symantec Corporation 20330 Stevens Creek Blvd Cupertino CA 95014 http www symantec com...
Page 78: ...Managing partitions using GDisk Support for large hard disks 78...
Page 100: ...Editing registry keys and values using GhRegEdit Using GhRegEdit 100...
Page 116: ...Using GhostCasting to create and restore images Running Ghost exe on a client computer 116...
Page 122: ...GhostCasting from the command line GhostCast Server command line options 122...
Page 130: ...GDisk disk wipe specifications Determining disk size 130...
Page 166: ...Ghost for Linux Symantec Ghost utility support 166...
Page 170: ...Configuring firewalls Symantec Ghost port configuration 170...
Page 180: ...Troubleshooting Problems running Symantec Ghost 180...