THIS PRODUCT IS MANUFACTURED AND CONTROLLED UNDER A QUALITY MANAGEMENT SYSTEM CERTIFIED TO ISO 13485 MEDICAL DEVICE STANDARDS.
FOR RESEARCH USE ONLY. NOT INTENDED FOR HUMAN OR ANIMAL DIAGNOSTIC OR THERAPEUTIC USES.
TOLL FREE PHONE
1 800 667 0322
y
PHONE
+1 604 877 0713
VERSION 2.4.0
y
y
FOR GLOBAL CONTACT DETAILS VISIT WWW.STEMCELL.COM
DOCUMENT #28940
7
2
RUNNING ROBOSEP™: DETAILED INSTRUCTIONS
2.1
INTRODUCTION
When the RoboSep™ cell separator is powered up (see power-up
instructions in section 1.2.4), the RoboSep™
graphical user interface
loads automatically; upon completion of start-up, the “Sample
Processing” start screen appears.
Note: Please wait for the end of the start-up sequence before touching
the touchscreen, the lid, or other moving parts of the instrument, so as
to not interfere with the start-up process.
The user interface consists of two main sections, defined by tabs at the
top of the screen: the “Sample Processing” section, which is shown at
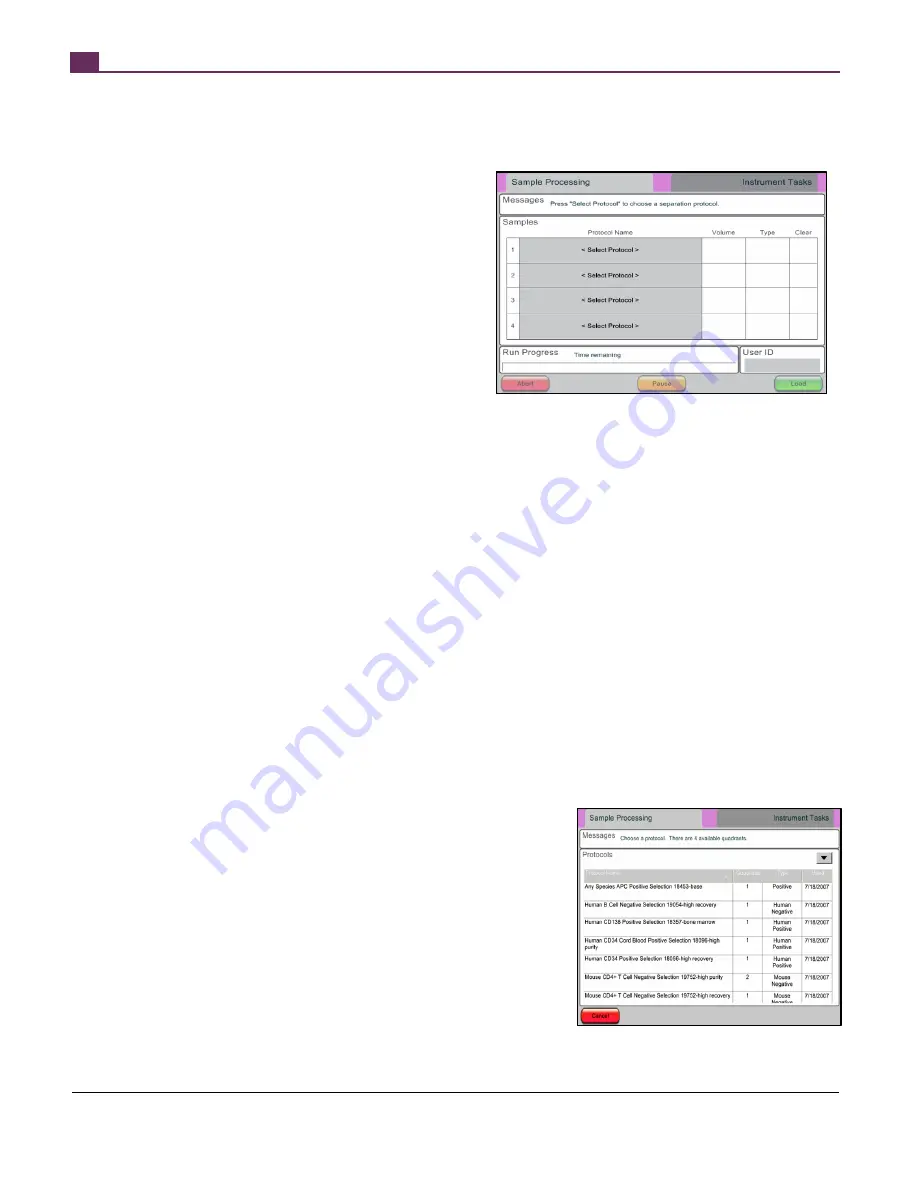
start-up, and the “Instrument Tasks” section (Figure 10). The light grey
tab indicates which section is currently active. You can switch from one
section to the other at any time by touching the appropriate tab.
2.2
SETTING UP A RUN
Navigate to the “Sample Processing” section of the user interface (Figure 10) by touching the appropriate tab at the top of the
RoboSep™ user interface. The sample processing screen is initially divided into five areas: Messages, Samples, Run Progress, User
ID, and a row of action buttons along the bottom. The areas’ functions are:
x
The Messages area indicates what step is next in the set-up process to start running RoboSep™.
x
The Samples area is divided into four rows corresponding to the four quadrants on the carousel. Each row has columns to display
the protocol name, the sample volume (in mL), and the type of cell selection protocol. Once protocols have been selected, this area
indicates on which quadrant of the carousel each protocol will be run.
x
The Run Progress area has a progress bar and countdown clock that shows the time to completion of the current run.
x
The User ID area allows the user to enter his/her unique code for reporting purposes.
x
The “Abort,” “Pause,” and “Load” action buttons allow the user to issue the appropriate commands to terminate, pause, or start a run.
2.2.1
Entering a User ID
A User ID can be entered at any point before a run begins; it is stored internally and is included in the report file that is generated after
each run (see Section 2.4). User IDs are useful for keeping track of usage in a multi-user environment. To enter a User ID:
1. Press the grey box under the “User ID” heading. A numeric pad will pop up (note: a keyboard can also be used).
2. Key in the user ID, and press the “Enter” key.
2.2.2
Selecting Protocols
RoboSep™
is delivered with a set of standard protocols optimized for use with “typical”
samples (e.g. peripheral blood mononuclear cells from normal donors). Standard
protocol names match the corresponding EasySep™ product name and catalog
number. Certain protocols also include a descriptor (e.g. “high recovery”) when more
than one protocol is provided for the same product. If working with atypical samples
(e.g. clinical/patient samples), protocols can be modified as appropriate and given a
different descriptor (see Section 3 – Customizing RoboSep).
The RoboSep™ protocol selection procedure is described below.
1. Choose a protocol to run:
a. Touch “Select Protocol” in any row of the Samples area
(Figure 10). A list of the available protocols appears on the
screen (Figure 11).
b. Select a protocol by touching the protocol name. A numeric
pad pops up (Figure 12).
Figure 10 – Start screen of the RoboSep™ user interface
Figure 11 – List of protocols to select from
Summary of Contents for RoboSep 20000
Page 1: ...RoboSep The Fully Automated Cell Separator T E C H N I C A L M A N U A L V E R S I O N 2 4 0 ...
Page 33: ......
Page 34: ......
Page 35: ......


