1.
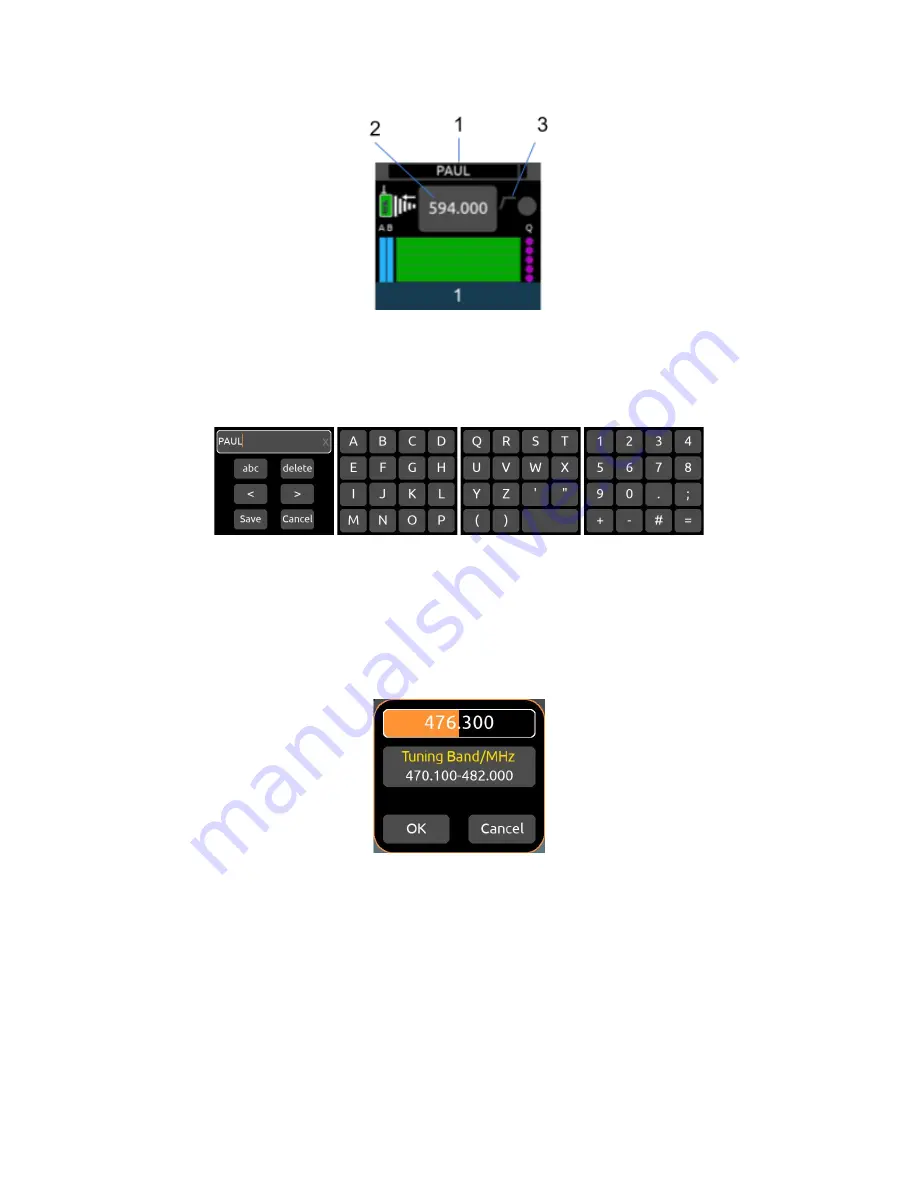
Receiver Channel Name and Audio Meter:
Displays channel name inside an audio level meter. Tap the meter to edit the
name (12-character maximum) using the virtual keyboard.
a.
The receiver channel name can be edited if the channel is NexLinked to an A20-Mini.
b.
The receiver channel name cannot be edited if the channel is being fed from an A10-TX.
c.
The name is grayed out if the A20-Mini transmitter is off or the transmitter is an A10-TX.
d.
If NexLinked to an A20-Mini transmitter, the name is pushed to the transmitter.
e.
The name is rippled to the 8-Series channel that the receiver channel is routed to if docked to an 8-Series and
the 8-Series menu [Channel Setup > Use Wireless Names] is enabled.
2.
RF Frequency:
Displays the receiver channel’s frequency.
a.
The frequency value flashes red when there is a NexLink issue. Go to the 1RX View > Gear Menu > NexLink
Status screen to determine the cause of the issue.
b.
The frequency value is gray when the NexLinked transmitter is powered off.
c.
Tap the frequency button to select a frequency within the current Tuning Band.
i.
To enter a frequency, tap each frequency field then rotate the HP knob to select a value. Tap OK to
store or Cancel to exit without saving. Alternatively, jump through the frequency fields by pressing the
HP knob.
ii.
To save power, turn off a receiver channel by setting its frequency to ‘Off’: in the whole number
frequency field (first field), rotate the HP knob fully anticlockwise to display ‘Off’.
iii.
Tap the ‘Tuning Band/MHz’ button to jump directly to the RF Menu from where a new Tuning Band
can be selected.
If NexLinked to an A20-Mini transmitter, the frequency is pushed to or pulled from the transmitter. See
System > More >
NexLink Tuning Mode.
3.
HPF:
Indicates if the HPF is active either on the transmitter (if an A10-TX) or receiver channel (if an A20-Mini transmitter).
A20-Nexus
User Guide
24


