Change Settings
137
User Guide
Step 5.
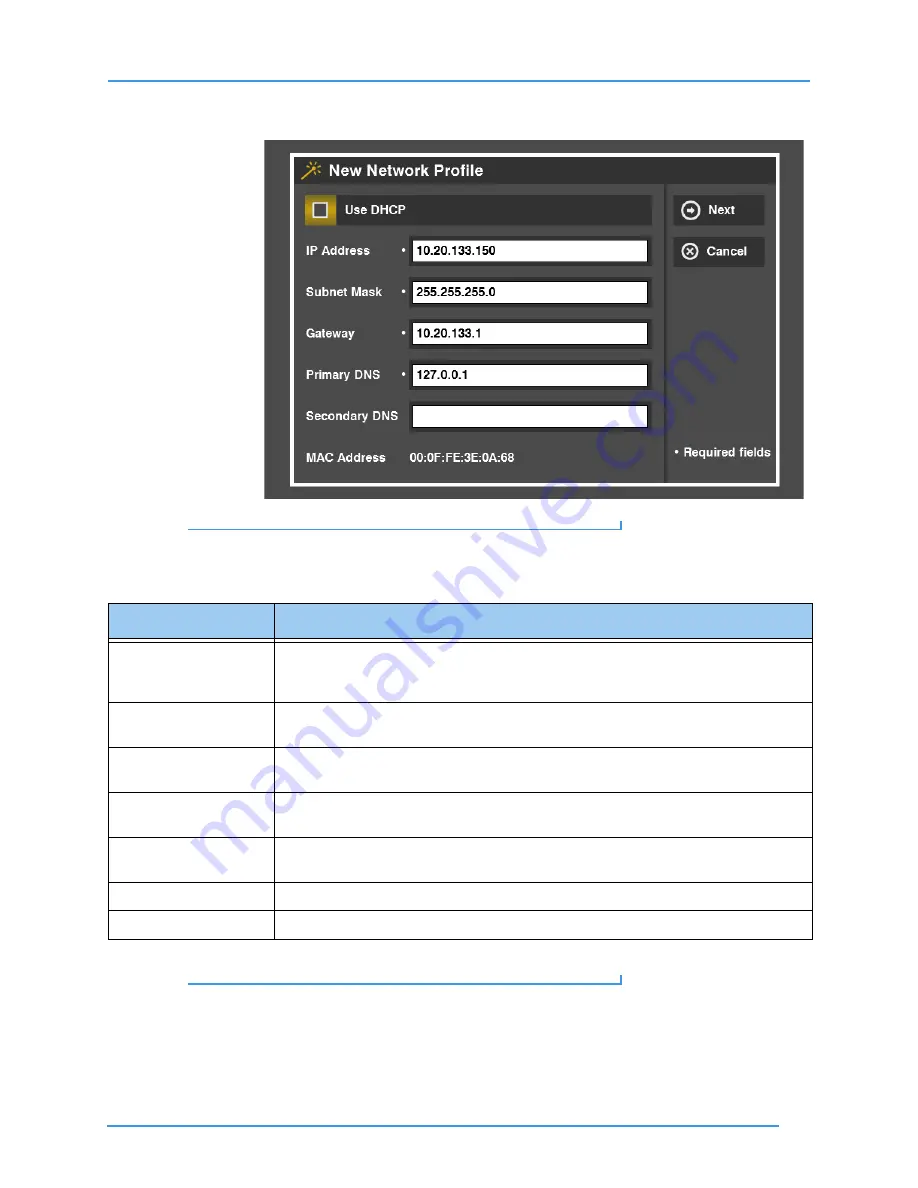
The New Network Profile screen appears.
Figure 222:
New Network Profile screen
Step 6.
Study the table below to learn about the settings. Then select the settings you want
to use. Please contact Sorenson Technical Support for help with network settings.
Table 14:
New Network Profile screen details
Step 7.
Select
Next
to save the changes and go on. Select
Cancel
to exit without saving.
Feature
Description
Use DHCP checkbox
Select this checkbox if ntouch VP is connected to a router with a DHCP (Dynamic Host
Configuration Protocol) server. When this checkbox is selected, all other fields on the
screen will be inactive (DHCP provides this information).
IP Address field
This field contains the static IP address to be used by the videophone. If you are not
using DHCP, you
must
make a valid entry in this field.
Subnet Mask field
This field contains the Subnet Mask to be used by the videophone. If you are not using
DHCP, you
must
make a valid entry in this field.
Gateway field
This field contains the IP address of the gateway (router) to which ntouch VP is
connected. If you are not using DHCP, you
must
make a valid entry in this field.
Primary DNS field
This field contains the IP address of a Primary DNS server. If you are not using DHCP,
you
must
make a valid entry in this field.
Secondary DNS field
This field contains the IP address of a Secondary DNS server.
MAC Address field
This field shows the MAC ID number of the videophone.


