1-51
DFS-700/700P
Chapter 4 Advanced Operations
4-10
Chapter 4 Advanced Operations
User Program Effects
Creating New User Program Effects
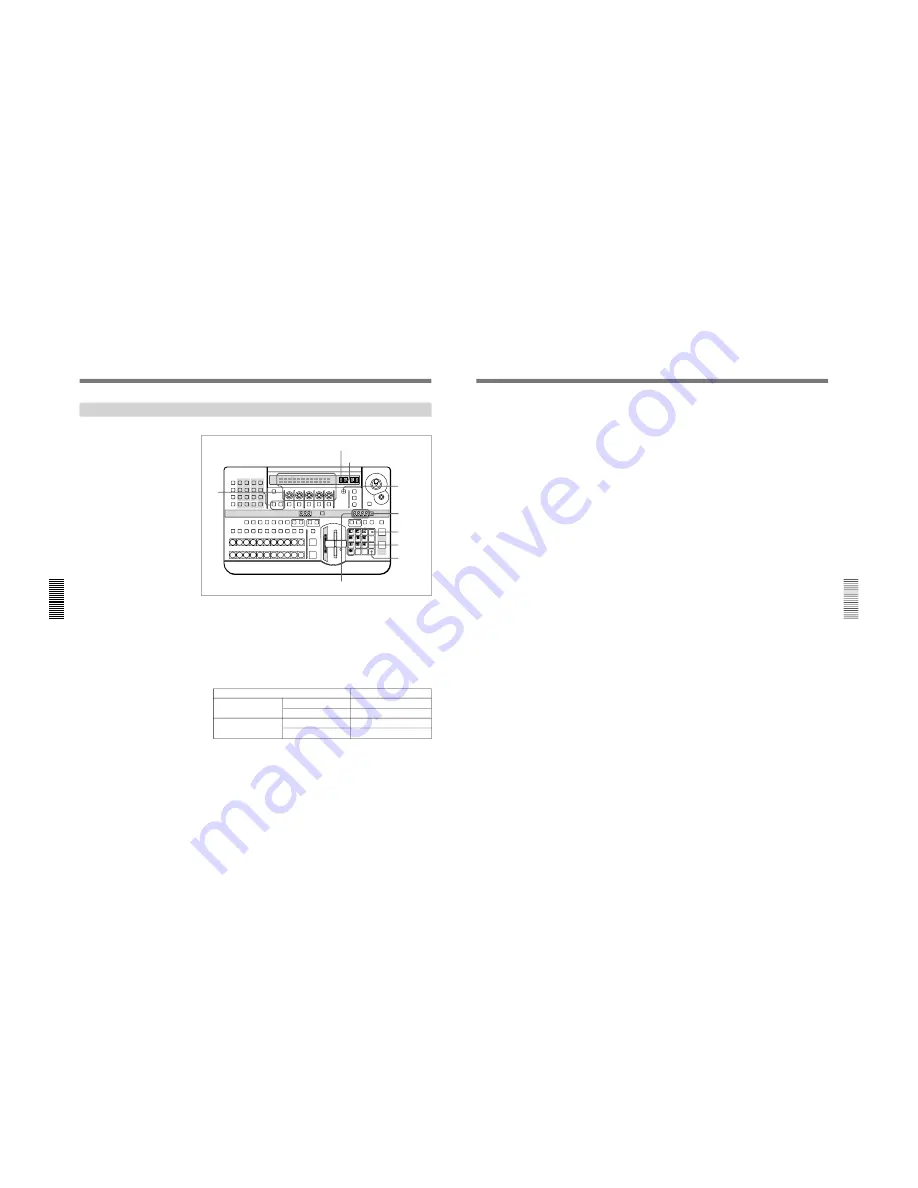
To create a new user program effect, use the following procedure.
1
Press the SET button.
2
Using the numeric buttons, enter the pattern number of the user
program effect to be created.
If you enter a number outside the user program effect range, an audible
warning sounds in step
4
. (The warning sounds only if the item
BEEPER on page 5 of the setup menu is set to ON.)
The number you entered appears in the PATTERN NUMBER display
window.
3
Press the ENTER button.
The STATUS display window should show “1”. If it shows any value
other than “1” this means that there are already a number of key frames
assigned to this number.
LAST X
INS
RST
TITLE
1
2
EDITOR
LUM
LUM
LUM
DSK
EDGE
TRAIL
SHADOW
GPI
CRK
CRK
BORDER BEVELD
EDGE
SET UP
MASK
MASK
MASK
SOFT
SHIFT
CCR
LIGHTING
BORDER
MATTES
LOCATION
LEARN
EDIT
RECALL
HOLD
INPUT
INITIAL
PATTERN
ADJ
PAGE
F1
F2
F3
F4
F5
USER PGM
STATUS EDIT
SNAP SHOT
SET
PATTERN NUMBER
EFFECT
DSK
FTB
SET
TRANS RATE
7
8
9
4
5
6
1
2
3
0
DOWN
UP
ENTER
FADE
TO
BLACK
P IN P
DSK
DEL
N/R
REV
DSK PVW
DIRECT
RECALL
DIRECT
PATTERN
CCR
TITLE 1
SOURCE
TITLE 2
SOURCE
DSK
FILL
SUPER BG FRGD 2 MEMORY
FRAME
FREEZ
MIX
EFFECT
BACKGROUND
BLACK
MEMORY
INT
VIDEO
TITLE
1
2
3
4
5
6
7
8
CUT
AUTO
TRANS
AUXILIARY
BLACK
MEMORY
INT
VIDEO
1
2
3
4
5
6
7
8
FOREGROUND
BLACK
MEMORY
INT
VIDEO
1
2
3
4
5
6
7
8
PATTERN/KEY PAD
6
5
2
3
1
4,7
STATUS display window
EDIT display window
PATTERN NUMBER display window
Effect type
Pattern number
Linear
Transition
9000 to 9009
Animation
9100 to 9109
Nonlinear
Transition
9200 to 9209
Animation
9300 to 9309
Chapter 4 Advanced Operations
Chapter 4 Advanced Operations
4-11
4
Press the EDIT button.
The button lights, the system enters user program edit mode, and the
monitor shows the image (key frame 1) selected on the
FOREGROUND bus buttons. This is because for a new effect, key
frame 1 is saved as an unmodified, full-screen foreground.
5
In the menu, set the parameters, and create key frame 2.
When creating a transition effect, see the section “Notes on creating a
transition user program effect” below.
6
When you have the image you want to save, press the LAST X/INS
button.
This creates key frame 2 with the parameters set in step
5
, and saves
the key frame after key frame 1. A “2” appears in the EDIT display
window and STATUS display window.
If this is an animation effect, instead of the LAST X/INS button, you
can press the ENTER button to save the key frame created with the
parameters set in step
5
as key frame 1 (thus modifying key frame 1).
This is because an animation effect is allowed to have key frame 1
different from an unmodified foreground image.
By repeating steps
5
and
6
(making parameter settings and adding key
frame with the LAST X/INS button), you can create the required
sequence of key frame (maximum eight).
The STATUS display window shows the number of saved key frames.
7
When you have saved all the required key frames, press the EDIT
button once more.
The button goes off, and the created user program effect is now ready
to be used.
Notes on creating a transition user program effect
• Make key frame 1 an unmodified full-screen image. (In a new pattern,
key frame 1 is automatically saved as a full-screen image.)
• In the last key frame, make the background image completely disappear.
(Either make it of zero size, or move it outside the screen area.) This will
make the created effect smoother.
• For the linear PERS parameter and the nonlinear FORM parameter, the
key frames must all have the same value. The value saved in the last key
frame is used for all key frames.


