NETYS RT 5 - 7 - 9 - 11 kVA - 551570A - SOCOMEC
51
EN
9. LCD DISPLAY & SETTINGS
Please refer to
Chapter 3: Operation Panel
to learn how to use the
operation panel and understand every icon/ diagram.
Each of the display diagrams shown in this chapter is for reference only.
Actual display depends on the operation of the UPS.
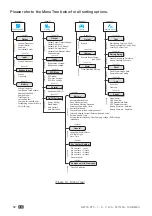
The following flow chart helps you to understand how to navigate each display screen.
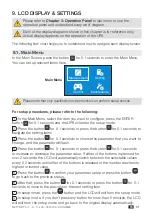
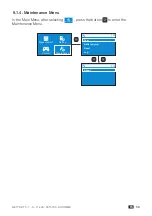
9.1. Main Menu
In the Main Screen, press the button
for 0.1 seconds to enter the Main Menu.
You can set up relevant items here.
Measurement
Control
Setting
Maintenance
Main Menu
Please note that only qualified service personnel can perform setup actions.
For setup procedures, please refer to the following:
1
In the Main Menu, select the item you want to configure, press the ENTER
button
for 0.1 seconds and the UPS will enter the setup mode.
2 Press the button
for 0.1 seconds or press the button
for 0.1 seconds to
navigate the setting items.
3 Press the button
for 0.1 seconds to choose the parameter that you want to
change, and the parameter will flash.
4 Press the button
for 0.1 seconds or press the button
for 0.1 seconds
to increase or decrease the parameter value. If either of the buttons is pressed for
over 2 seconds, the LCD will automatically switch between the selectable values
every 0.2 seconds until either of the buttons is released or the number reaches its
highest or lowest value.
5 Press the button
to confirm your parameter setup or press the button
ESC
to go back to the previous status.
6 After that, press the button
for 0.1 seconds or press the button
for 0.1
seconds to move to the previous or the next setting item.
7 In setup mode, press the
ESC
button and the LCD will exit from the setup mode.
8 In setup mode, if you don’t press any button for more than 5 minutes, the LCD
will exit from the setup mode and go back to the original display automatically.


