61
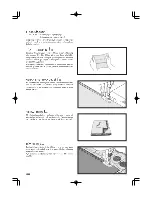
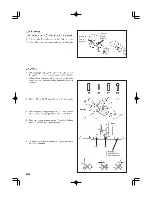
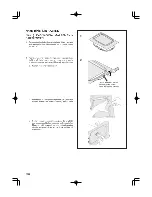
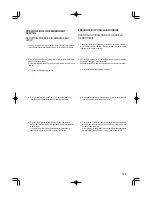
5. Marquez soigneusement la position de la boutonnière sur le
vêtement.
6. Placez le tissu sous le pied. Tirez le fil de la bobine sous le
tissu sur une longueur d’environ 10 centimètres vers l’arrière.
7. Alignez la marque de la boutonnière du tissu sur la marque
du pied presseur, puis abaissez le pied boutonnière.
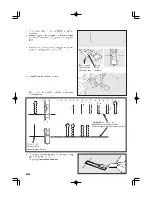
8. Tout en tenant le fil supérieur, démarrez la machine.
* La couture sera complétée automatiquement dans l’ordre
indiqué sur l’illustration.
9. Une fois la couture terminée, utilisez un outil d’ouverture de
boutonnière pour ouvrir le tissu au centre de la boutonnière.
Veillez à ne pas couper le fil de la couture.
5. Carefully mark the position of buttonhole on your garment.
6. Place the fabric under the foot. Pull out the bobbin thread
underneath the fabric to a length of about 4 inches to the rear.
7. Align the buttonhole mark on the fabric with the mark on the
buttonhole foot, and then lower the buttonhole foot.
8. While holding the top thread, start the machine.
* Sewing will be completed automatically in the following order.
9. When sewing is finished, use a buttonhole opener to open
up the fabric in the center of the buttonhole.
Be careful not to cut any of the seam thread.
Summary of Contents for FUTURA CE-200
Page 3: ...3 ...
Page 8: ...8 4 5 6 8 2 3 1 9 7 10 14 15 16 13 11 12 ...
Page 16: ...16 ...
Page 18: ...18 1 ...
Page 20: ...20 1 2 3 4 ...
Page 22: ...22 2 3 4 A B 5 6 1 ...
Page 24: ...24 1 3 5 6 4 2 Thread take up Releveur de fil Tria hilos Tab Languette Lengüeta ...
Page 26: ...26 1 2 3 ...
Page 28: ...28 1 2 3 4 ...
Page 38: ...38 F E A B C D I 2 3 4 1 G H 6 5 ...
Page 46: ...46 ...
Page 48: ...48 ...
Page 50: ...50 ...
Page 52: ...52 39 30 35 ...
Page 54: ...54 19 20 21 70 71 72 80 81 82 83 84 ...
Page 56: ...56 17 74 75 76 77 78 79 16 17 18 60 61 62 63 64 65 66 67 68 69 70 18 62 16 62 16 16 67 ...
Page 58: ...58 A B C C C C Buttonhole foot Pied boutonnière Tab A Butée A BTab B Butée B ...
Page 66: ...66 ...
Page 70: ...70 2 1 Hoop adjusting screw Vis de réglage de cerceau ...
Page 78: ...78 A 2 1 B B D C D Hoop mounting plate Plaque de montage de cerceau Carriage Chariot ...
Page 84: ...84 ...
Page 86: ...86 92 93 72 75 70 71 78 79 ...
Page 90: ...90 EM 01 EM 02 EM 03 EM 04 EM 05 EM 06 EM 07 EM 08 EM 09 SAFTY DEVICE ACTIVATED ...
Page 92: ...92 2 1 A B 2 3 4 3 5 4 1 ...
Page 96: ...96 ...
Page 98: ... Part No 77191 1 05 ENGLISH FRANÇAIS ...
Page 99: ...CE 200 INSTRUCTION MANUAL MANUEL D INSTRUCTION ...
Page 100: ......


