33
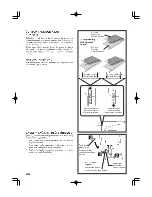
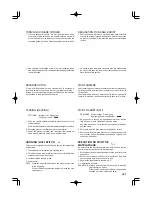
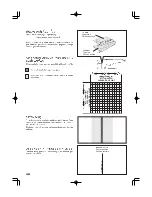
RÉGLAGE DE LA TENSION DU FIL
SUPÉRIEUR
POINT DROIT
L’aspect de votre point droit dépend surtout du bon équilibre
entre la tension supérieure et la tension inférieure. Elle est
parfaite lorsque les deux fils se nouent entre les deux épaisseurs
de tissu.
Vous pouvez régler la tension supérieure avec le cadran de
réglage de tension. Si la tension supérieure est trop lâche, tourner
le cadran vers le haut pour l’augmenter. Si elle est trop forte,
tournez-la vers l’autre côté pour la diminuer.
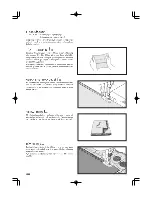
TENSION DE LA CANETTE
La tension de la canette a été correctement réglée à l'usine, il est
inutile de la corriger.
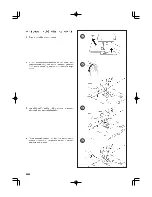
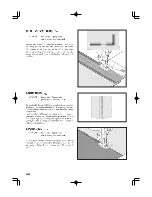
REMPLACEMENT DU PIED PRESSEUR
Relevez l’aiguille au maximum, ainsi que le levier du pied
presseur.
1. Poussez le levier de verrouillage et enlever le pied.
2. Placez le pied choisie sur la plaque-aiguille comme illustré.
3. Rabaissez le levier du pied presseur de façon à ce que le
pied s’enclenche de lui-même sur son support.
ADJUSTING TOP THREAD TENSION
STRAIGHT STITCHING
The good looking appearance of your stitching is largely
determined by the balanced tension of both top and bobbin
threads. The tension is well balanced when these two threads
‘lock’ in the middle of layers of fabric you are sewing.
If, when you start to sew, you find that the stitching is irregular,
you will need to adjust the tension control.
Make any adjustments with presser foot ‘down’.
BOBBIN TENSION
The bobbin tension has been correctly set at the factory, so you
do not need to adjust it.
CHANGING PRESSER FOOT
Be sure needle is in the up position. Raise presser foot lifter.
1. Push presser foot release button to remove the foot.
2. Place the desired foot on the needle plate aligning the presser
foot pin with the foot holder.
3. Lower the presser foot lifter so that the foot holder snaps on
the foot.
Summary of Contents for FUTURA CE-200
Page 3: ...3 ...
Page 8: ...8 4 5 6 8 2 3 1 9 7 10 14 15 16 13 11 12 ...
Page 16: ...16 ...
Page 18: ...18 1 ...
Page 20: ...20 1 2 3 4 ...
Page 22: ...22 2 3 4 A B 5 6 1 ...
Page 24: ...24 1 3 5 6 4 2 Thread take up Releveur de fil Tria hilos Tab Languette Lengüeta ...
Page 26: ...26 1 2 3 ...
Page 28: ...28 1 2 3 4 ...
Page 38: ...38 F E A B C D I 2 3 4 1 G H 6 5 ...
Page 46: ...46 ...
Page 48: ...48 ...
Page 50: ...50 ...
Page 52: ...52 39 30 35 ...
Page 54: ...54 19 20 21 70 71 72 80 81 82 83 84 ...
Page 56: ...56 17 74 75 76 77 78 79 16 17 18 60 61 62 63 64 65 66 67 68 69 70 18 62 16 62 16 16 67 ...
Page 58: ...58 A B C C C C Buttonhole foot Pied boutonnière Tab A Butée A BTab B Butée B ...
Page 66: ...66 ...
Page 70: ...70 2 1 Hoop adjusting screw Vis de réglage de cerceau ...
Page 78: ...78 A 2 1 B B D C D Hoop mounting plate Plaque de montage de cerceau Carriage Chariot ...
Page 84: ...84 ...
Page 86: ...86 92 93 72 75 70 71 78 79 ...
Page 90: ...90 EM 01 EM 02 EM 03 EM 04 EM 05 EM 06 EM 07 EM 08 EM 09 SAFTY DEVICE ACTIVATED ...
Page 92: ...92 2 1 A B 2 3 4 3 5 4 1 ...
Page 96: ...96 ...
Page 98: ... Part No 77191 1 05 ENGLISH FRANÇAIS ...
Page 99: ...CE 200 INSTRUCTION MANUAL MANUEL D INSTRUCTION ...
Page 100: ......


