63
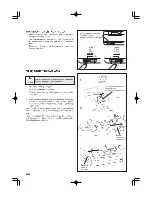
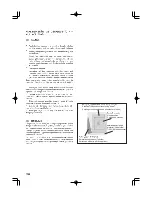
BOUTONNIÈRES AVEC GANSE
(RENFORCEES)
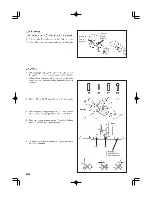
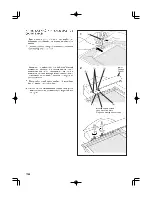
Accrocher le cordonnet (fil de passe ou fil de soie) sur la tige du
du pied pour boutonnière et tirer les deux extrémitès sous le
pied vers l’avant.
Coudre la boutonnière de manière à ce que la zig-zag recouvre
le cordonnet.
La boutonnière terminée, détacher le cordonnet du pied, tirer
les bouts vers l’avant et tailler la longueur supplémentaire.
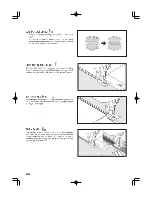
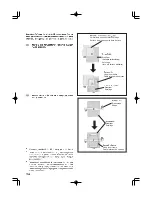
POINT D’ARRÊT
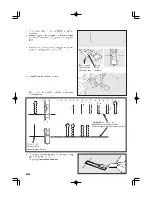
1. Réglez la position de la butée du pied boutonnière en
l’alignant sur la longueur du point d’arrêt, comme indiqué sur
l’illustration.
2. Fixez le pied boutonnière.
3. Réglez le levier de boutonnière
(C)
de façon qu’il tombe
verticalement entre les butées
(A)
et
(B)
.
4. Alignez la position de début du tissu sur le repère marqué
sur le pied boutonnière, puis abaissez le pied boutonnière.
5. Tout en tenant le fil supérieur, démarrez la machine.
89
CORDED BUTTONHOLES
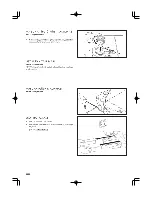
Hook filler cord (crochet thread or buttonhole twist) over the spur
and pull both ends of the cord forward under the foot.
Sew buttonhole so that zigzag stitches cover the cord.
When completed, release the cord from foot and snip off extra
length.
BAR-TACKING
1. Adjust the position of tab of buttonhole foot aligning with
length of bar-tack as illustrated.
2. Attach the buttonhole foot.
3. Set the buttonhole lever
(C)
so that it drops down vertically
between the stoppers
(A)
and
(B)
.
4. Align the start position on the fabric with the mark on the
buttonhole foot and then lower the buttonhole foot.
5. While holding the top thread, start the machine.
89
Summary of Contents for FUTURA CE-200
Page 3: ...3 ...
Page 8: ...8 4 5 6 8 2 3 1 9 7 10 14 15 16 13 11 12 ...
Page 16: ...16 ...
Page 18: ...18 1 ...
Page 20: ...20 1 2 3 4 ...
Page 22: ...22 2 3 4 A B 5 6 1 ...
Page 24: ...24 1 3 5 6 4 2 Thread take up Releveur de fil Tria hilos Tab Languette Lengüeta ...
Page 26: ...26 1 2 3 ...
Page 28: ...28 1 2 3 4 ...
Page 38: ...38 F E A B C D I 2 3 4 1 G H 6 5 ...
Page 46: ...46 ...
Page 48: ...48 ...
Page 50: ...50 ...
Page 52: ...52 39 30 35 ...
Page 54: ...54 19 20 21 70 71 72 80 81 82 83 84 ...
Page 56: ...56 17 74 75 76 77 78 79 16 17 18 60 61 62 63 64 65 66 67 68 69 70 18 62 16 62 16 16 67 ...
Page 58: ...58 A B C C C C Buttonhole foot Pied boutonnière Tab A Butée A BTab B Butée B ...
Page 66: ...66 ...
Page 70: ...70 2 1 Hoop adjusting screw Vis de réglage de cerceau ...
Page 78: ...78 A 2 1 B B D C D Hoop mounting plate Plaque de montage de cerceau Carriage Chariot ...
Page 84: ...84 ...
Page 86: ...86 92 93 72 75 70 71 78 79 ...
Page 90: ...90 EM 01 EM 02 EM 03 EM 04 EM 05 EM 06 EM 07 EM 08 EM 09 SAFTY DEVICE ACTIVATED ...
Page 92: ...92 2 1 A B 2 3 4 3 5 4 1 ...
Page 96: ...96 ...
Page 98: ... Part No 77191 1 05 ENGLISH FRANÇAIS ...
Page 99: ...CE 200 INSTRUCTION MANUAL MANUEL D INSTRUCTION ...
Page 100: ......

