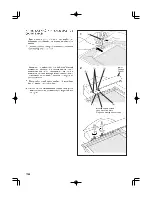
77
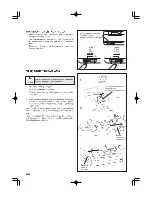
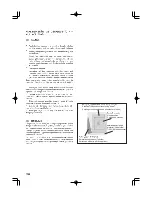
PRÉPARATION DE LA MACHINE AVANT
D’INSTALLER LE CERCEAU
1. Tournez le volant jusqu’à ce que l’aiguille soit à sa position la
plus haute.
2. Branchez votre ordinateur à la machine à coudre FUTURA à
l’aide du câble USB.
3. Mise à marche de la machine. (Reportez-vous aux pages 10
- 12.)
REMARQUE: Si le câble USB est déconnecté, le
message d’erreur “PC” s’affiche sur le
panneau de commande.
Le chariot de l’unité de broderie se déplacera
automatiquement jusqu’à la position d’attente de broderie.
(Si l’aiguille de la machine à coudre n’est pas près de sa
position la plus haute, l’interrupteur de marche/arrêt
clignotera et le chariot ne se déplacera pas.)
4. Insérez le CD du logiciel dans le lecteur du CD-ROM de votre
ordinateur.
Le broderie FUTURA est un “système” de machine
et logiciel qui offre des options et des fonctions
puissantes. Pour installer le logiciel, reportez-vous
aux instructions sur l’insertion du CD.
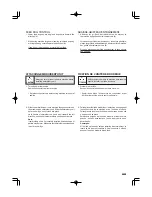
PREPARING THE MACHINE BEFORE
INSTALLING THE HOOP
1. Turn hand wheel toward you until needle comes to its highest
position.
2. Connect your PC to the FUTURA sewing machine with USB
cable.
3. Turn on power to machine. (Refer to page 10 - 12.)
NOTE: If the USB cable is unconnected, an error message
“PC” will be displayed on the control panel.
The carriage of the embroidery unit will move automatically
to the embroidering standby position.
(If the sewing machine needle is not close to its highest
position, the Start/Stop switch will flash and the carriage will
not move.)
4. Insert the software CD into the CD-ROM disc receiver in your
PC.
FUTURA embroidery is a "system" of the machine
and the software providing powerful options and
capabilities. In order to install the software, please
look into the CD insert for further information.
Summary of Contents for FUTURA CE-200
Page 3: ...3 ...
Page 8: ...8 4 5 6 8 2 3 1 9 7 10 14 15 16 13 11 12 ...
Page 16: ...16 ...
Page 18: ...18 1 ...
Page 20: ...20 1 2 3 4 ...
Page 22: ...22 2 3 4 A B 5 6 1 ...
Page 24: ...24 1 3 5 6 4 2 Thread take up Releveur de fil Tria hilos Tab Languette Lengüeta ...
Page 26: ...26 1 2 3 ...
Page 28: ...28 1 2 3 4 ...
Page 38: ...38 F E A B C D I 2 3 4 1 G H 6 5 ...
Page 46: ...46 ...
Page 48: ...48 ...
Page 50: ...50 ...
Page 52: ...52 39 30 35 ...
Page 54: ...54 19 20 21 70 71 72 80 81 82 83 84 ...
Page 56: ...56 17 74 75 76 77 78 79 16 17 18 60 61 62 63 64 65 66 67 68 69 70 18 62 16 62 16 16 67 ...
Page 58: ...58 A B C C C C Buttonhole foot Pied boutonnière Tab A Butée A BTab B Butée B ...
Page 66: ...66 ...
Page 70: ...70 2 1 Hoop adjusting screw Vis de réglage de cerceau ...
Page 78: ...78 A 2 1 B B D C D Hoop mounting plate Plaque de montage de cerceau Carriage Chariot ...
Page 84: ...84 ...
Page 86: ...86 92 93 72 75 70 71 78 79 ...
Page 90: ...90 EM 01 EM 02 EM 03 EM 04 EM 05 EM 06 EM 07 EM 08 EM 09 SAFTY DEVICE ACTIVATED ...
Page 92: ...92 2 1 A B 2 3 4 3 5 4 1 ...
Page 96: ...96 ...
Page 98: ... Part No 77191 1 05 ENGLISH FRANÇAIS ...
Page 99: ...CE 200 INSTRUCTION MANUAL MANUEL D INSTRUCTION ...
Page 100: ......

