33
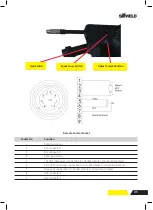
4.1 Spool Gun Display
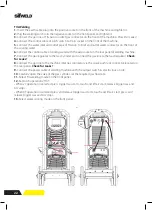
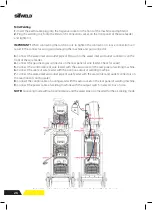
Set up installation for Spool Gun
1.
Insert the earth cable plug into the negative (-) socket on the front of the machine and twist to tighten.
2.
Connect the Spool Gun to the MIG torch connection socket on the front panel of the wire feeder, and
tighten it.
IMPORTANT!
When connecting the torch be sure to tighten the connection. A loose connection can
result in the connector arcing and damaging the machine and gun connector.
3.
Connect the Spool Gun control cable to the multipin receptacle on the front panel of the wire feeder.
4.
Connect the gas line to gas connector on the rear panel of wire feeder.
5.
Connect the control cable of wire feeder with the aero socket on the rear panel of welding machine.
6.
Connect the cable of wire feeder with the positive output of welding machine.
7.
Connect the gas regulator to the Gas Cylinder and connect the gas line to the Gas Regulator.
8.
Connect the power cable of welding machine with the output switch in electric box on site.
DIAGRAM FOR GUN
30
Set up installation for Spool Gun
(1) Insert the earth cable plug into the Negative socket on the front of the machine and
tighten it.
(2) Connect the Spool Gun to the MIG torch connection socket on the front panel of the
wire feeder, and tighten it.
IMPORTANT:
When connecting the torch be sure to tighten the connection. A loose
connection can result in the connector arcing and damaging the machine and gun
connector.
(3) Connect the Spool Gun control cable to the multipin receptacle on the front panel of
the wire feeder.
Neck Liner
4. Operation
Before starting any welding activity ensure that you have suitable eye protection and protective
clothing. Also take the necessary steps to protect any persons within the area.
Summary of Contents for Evolution MTS400 SYN
Page 39: ...39 Notes ...

