


Revision Date: 3/13/2019
39
BOLDScreen LCD
Specifications
1.
Resolution: 1920 x 1200 (60Hz)
2.
24” screen
3.
52cm wide
4.
115cm from the participant’s eyes to the screen
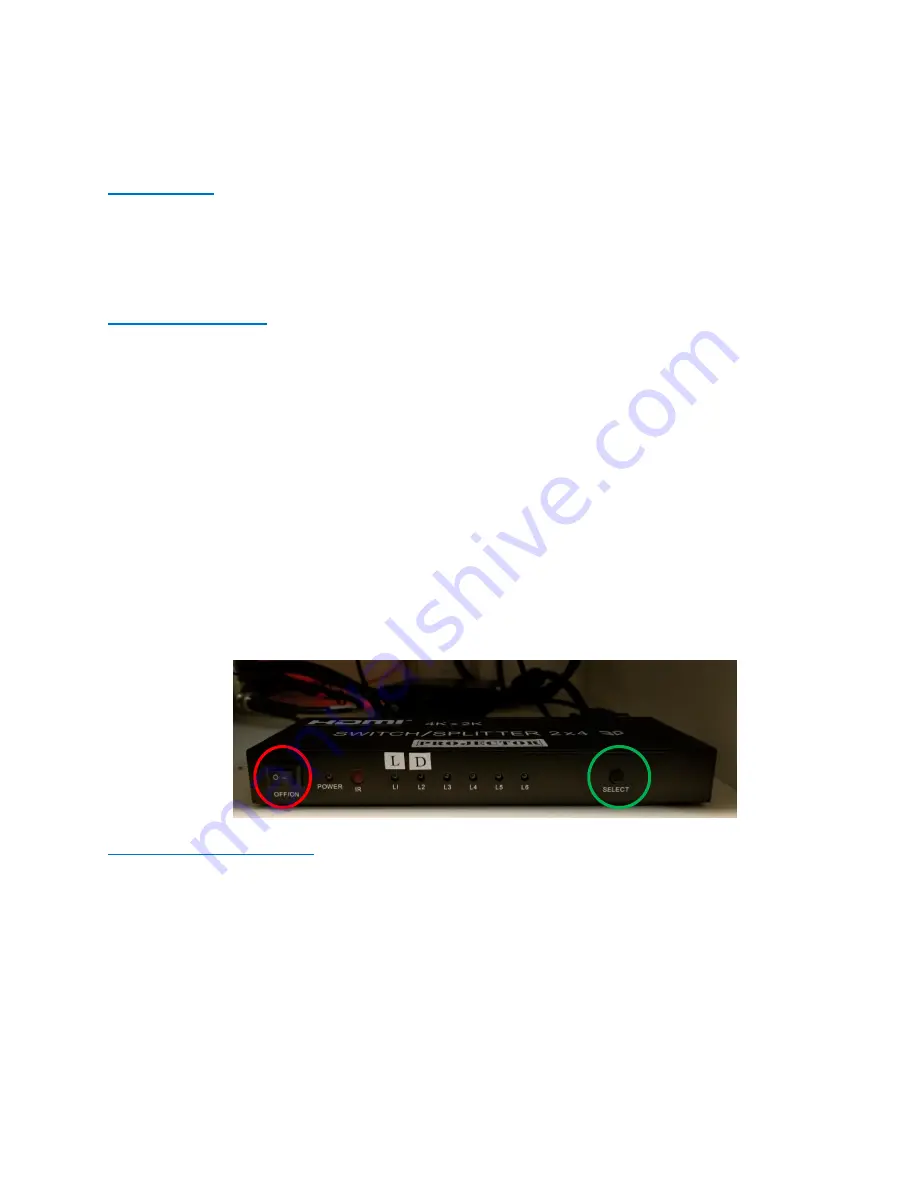
Turning on the LCD
1.
For laptops: plug the LCD HDMI cable into the laptop using an adapter if needed (the
desktop is always plugged in and active)
2.
Flip the power switch (red circle on picture) on the front of the black “LCD” switch box
to turn the system on
3.
Use the select button (green circle on picture) to choose “L” for a laptop computer
4.
Use the select button (green circle on picture) to choose “D” for the Dell Desktop
computer
5.
The monitor labelled “LCD” is a duplication of what is being projected to the
participant’s screen
6.
Note - the LCD takes a couple seconds to display after the switch box is turned on – it
will also start dark and lighten up automatically within seconds
7.
You
MUST
turn off the switch box after your scan to allow the screen to go to sleep so
the static computer image does not “burn” into the display
8.
Note – after turning off the LCD switch box the LCD screen will stay on for about 5 min
before going into sleep mode – this is normal
Positioning the Participant
1.
Select the mirror frame and mirror for the coil you are using
2.
Place the mirror frame onto the anterior portion of the coil
3.
Snap the mirror onto the frame – the curved side of the mirror should point in the
direction of the participant’s feet
4.
Position the mirror so that the participant can see the whole LCD screen without straining
their neck or eyes
5.
Laser landmark the participant per usual (if you have trouble marking the laser with the
mirror on you may laser the participant before attaching the mirror – be sure you have the
participant close their eyes)