


Revision Date: 3/13/2019
31
Goggle Setup
Tech Remote (Talk Box)
1.
To change any settings on the Tech Remote intercom you will need to scroll the far right
wheel “Menu” to the appropriate setting - press down on the wheel - scroll to change the
setting - press down again to lock in that setting
2.
Connect the goggle VGA cable to the laptop or select “GOGGLES” on the “desktop
switch box” if you are using the desktop computer
3.
Connect the appropriate audio cable (res tech or opto) to the computer you will be using
Laptop: the audio cable connects directly to the laptop
Desktop: the res tech audio cable connects to the audio jack in the white drawer
labelled “AUDIO TO DESKTOP”
4.
Make sure the computer is on (BMC Mac laptop, your laptop or the Dell Desktop)
5.
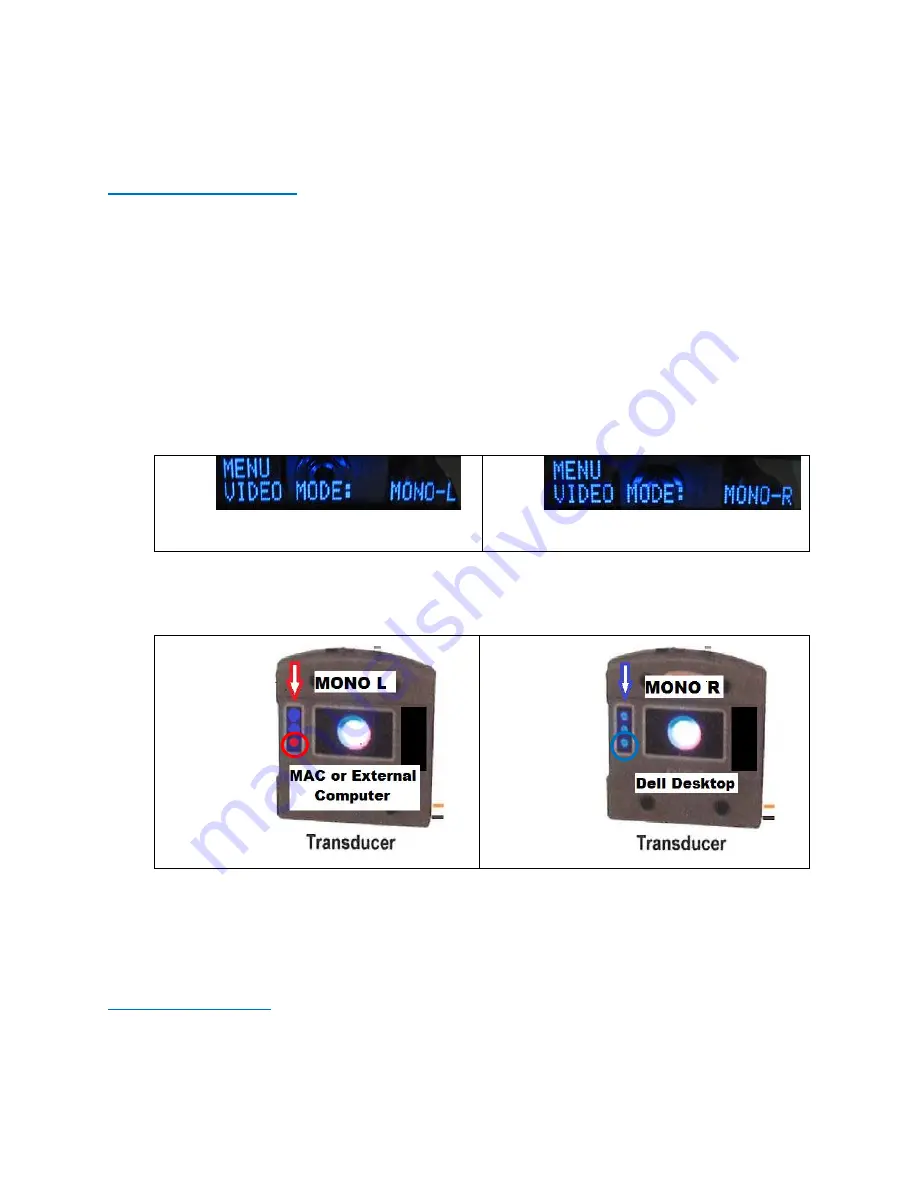
Go to Menu on the “Tech Remote,” and set the “Video Mode” (what the participant sees)
If you want the participant to see
the laptop
If you want the participant to see
the Dell Desktop
6.
Go to Menu on the Tech Remote and turn on the “System PWR” (turn this off when you
are done with your scan)
7.
“Visor PWR” should always be on (do not turn off after scan)
Red Light
Blue Light
8.
DO NOT assume that the display on the “Goggles” monitor will be correctly mirrored to
the goggles – always verify the correct display is being projected by physically looking
through the goggles during protocol development scans or by asking the participant to
describe what they see on the screen
Visuastim Controller
1.
On the “Visuastim Controller,” make sure the “Monitor Input” (what the researcher sees
on the “Goggles” monitor) is set to: