Sharp FO-IS115N Operation Manual Download Page 71

Sending a Fax by Automatic Dialling

67

3. Sending 

Fa

x

e

s

1

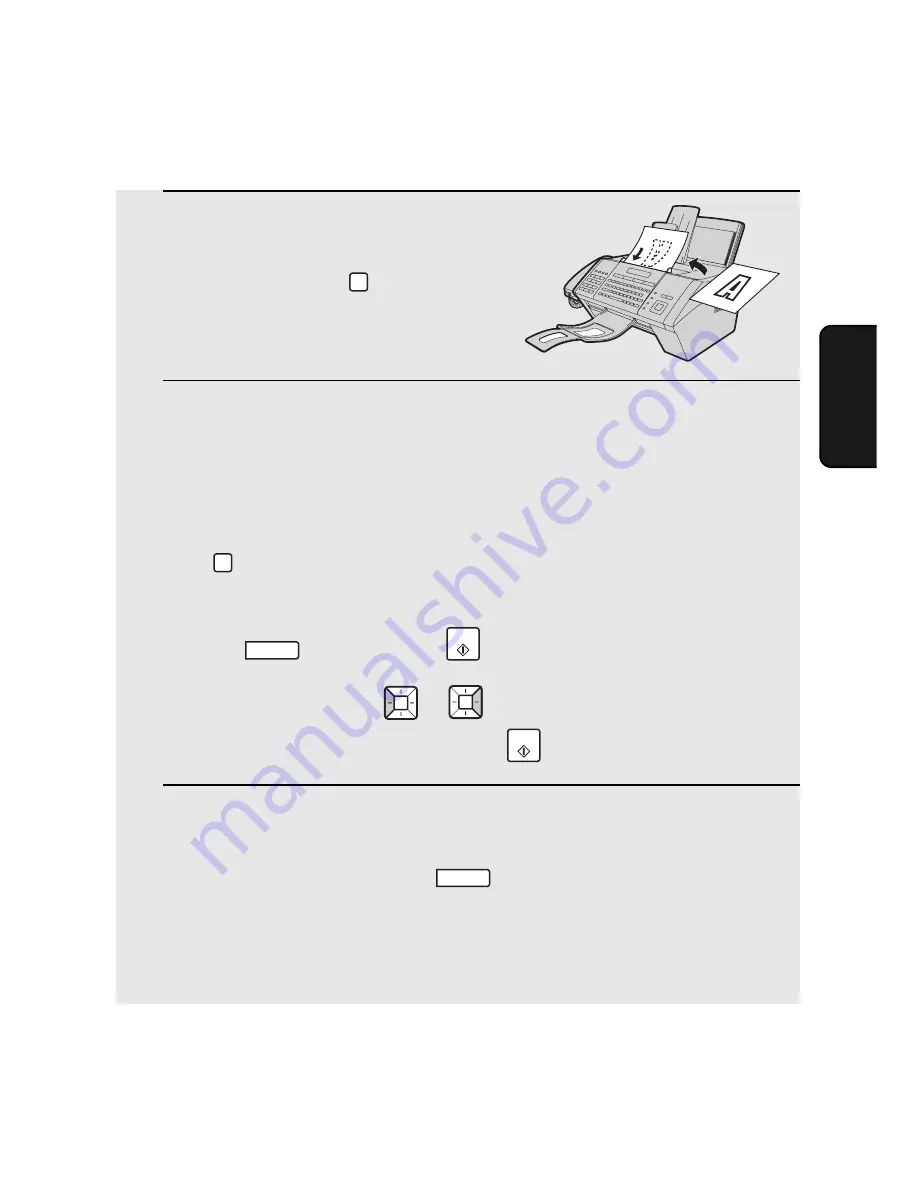
Load the document(s).

If desired, press 

 to set the 

resolution and/or contrast.

2

Select the fax number using one of the methods below:

Rapid Key Dialling:

 If the number is stored in a Rapid Key, press the 

Rapid Key.

Speed Dialling:

 If the number is stored in a Speed Dial number, press 

 and enter the Speed Dial number with the number keys (the 

number must be 3 digits: enter “001” for Speed Dial 1, “010” for Speed Dial 
10, etc.). Make sure the correct destination appears in the display (if not, 

press 

), and then press 

.

Search Dialling:

 Press 

 or 

 until the name or number of the other 

party appears in the display, and press 

.

3

Scanning, dialling, and transmission will take place automatically.

To cancel transmission, press 

.

If the transmission is completed successfully, the machine will beep once.

If an error occurs, the machine will beep three times and print a Transaction 
Report to inform you of the problem (see page 145).

RESOLUTION

SPEED DIAL

STOP

START

START

STOP

Using an auto-dial number to send a fax

Summary of Contents for FO-IS115N

Page 1: ...FACSIMILE OPERATION MANUAL FO IS115N ...

Page 2: ...Datalight is a registered trademark of Datalight Inc FlashFXTM is a trademark of Datalight Inc Copyright 1993 2004 Datalight Inc All Rights Reserved U S Patent Office 5 860 082 6 260 156 ...

Page 3: ... Please retain your sales documentation as this should be produced to validate a warranty claim This warranty is in addition to and in no way limits varies or excludes any express and implied rights and remedies under any relevant legislation in the country of sale However to the extent permitted by such legislation Sharp excludes any liability for any indirect or consequential damage arising from...

Page 4: ...TRALIA REGARDING YOUR LOCAL SHARP APPROVED SERVICE CENTRE VISIT OUR WEBSITE AT www sharp net au OR CALL SHARP CUSTOMER CARE 1300 135 022 LOCAL CALL COST APPLY WITHIN AUSTRALIA SHARP CORPORATION OF AUSTRALIA PTY LTD SPform019 JUNE 2004 ...

Page 5: ... 27 Setting the Reception Mode 29 Volume Adjustment 29 2 Network Scanning 31 Setting up Network Scanning 31 Storing E mail Addresses 39 Scan to E mail Transmission 44 Network Settings 48 Scan to Folder FTP 50 3 Sending Faxes 55 Transmittable Documents 55 Loading the Document 56 Adjusting the Resolution and Contrast 58 Sending a Fax by Normal Manual Dialling 60 Sending a Fax by Automatic Dialling 6...

Page 6: ...int Settings 108 7 Making Copies 112 8 Special Functions 114 Broadcasting 114 Blocking Unwanted Faxes 119 Duplex Scanning 121 Receiving Faxes to E mail Folder 122 Searching for an Address in a Global Address Book 125 Polling Requesting a Fax 130 Timer Transmission 135 Distinctive Ring Requires Service 138 9 Option Settings 139 10 Checking Stored Information 143 Transaction Report 145 11 Maintenanc...

Page 7: ...Table of Contents 3 Replacing the Drum Cartridge 152 12 Troubleshooting 156 Problems and Solutions 156 Messages and Signals 161 Clearing Paper Jams 165 Index 170 ...

Page 8: ...d with machine 20 000 pages average Replacement cartridge FO 25DR 20 000 pages average Paper tray capacity Approx 220 sheets 80 g m2 A4 size copier paper at room temperature maximum stack height should not be higher than the line on the tray Recommended paper weight 80 g m2 Printer type Laser Print resolution 600 600 dpi dots per inch Effective printing width 202 mm max PC print speed 11 ppm pages...

Page 9: ...t feeder A4 30 sheets max 80 g m2 paper Input document size Automatic feeding Width 148 to 216 mm Length 140 to 297 mm Manual feeding Width 70 to 216 mm Length 140 to 356 mm Effective scanning width 208 mm max Storable transmission destinations Rapid Keys 36 Speed Dial numbers 114 Telephone function Yes cannot be used if power fails Copy function Single Multi Sort up to 99 copies per page Network ...

Page 10: ... services offered by your telephone company errors may occur during transmission and reception of faxes This machine is not compatible with digital telephone systems User authentication Yes File formats TIFF G4 PDF G4 Supported operating systems printer driver Windows 2000 XP Server 2003 Vista Display LCD display 20 digits x 2 lines Power requirements 230 240 V 50 Hz Power consumption Standby 8 5 ...

Page 11: ...llowing situations occur Liquid has been spilled into the machine or the machine has been exposed to rain or water The machine produces odours smoke or unusual noises The power cord is frayed or damaged The machine has been dropped or the housing damaged Do not allow anything to rest on the power cord and do not install the machine where people may walk on the power cord This machine must only be ...

Page 12: ...s uses and can radiate radio frequency energy and if not installed and used in accordance with the instructions may cause interference However there is no guarantee that interference will not occur in a particular installation If this equipment does cause interference to radio or television reception which can be determined by turning the equipment off and on the user is encouraged to try to corre...

Page 13: ...demark of the OpenLDAP Foundation Copyright 1999 2003 The Open LDAP Foundation Redwood City California U S A All rights reserved This product includes software developed by Computing Services at Carnegie Mellon University http www cmu edu computing Copyright c 1998 2003 Carnegie Mellon University All rights reserved All other company names and product names appearing in this manual are the tradema...

Page 14: ...tically redial the last number dialled p 69 This can also be used to enter a pause when storing a fax number for automatic dialling p 64 SCAN TO E MAIL key Press to send a document to an e mail recipient p 44 SCAN TO FOLDER key Press to send a document to a folder on a computer on the same network as the machine or to an FTP server p 52 A Look at the Operation Panel 1 2 3 4 5 SPEAKER HOLD SPEED DI...

Page 15: ...elect special functions and settings COPY HELP key When a document is in the feeder press to make a copy p 112 At any other time press to print the Help List STOP key Press to cancel an operation before it is completed Number keys Use these keys to dial fax numbers and enter numbers when storing transmission destinations Rapid Keys letter keys A fax number e mail address or network folder can be s...

Page 16: ...EASE key When a fax has been received to memory instead of being printed out because the Secure Fax function has been activated press this key to enter the Secure code and print out the fax p 87 START key Press after dialling to send a fax p 60 Arrow keys Use to scroll through and select settings and to search for stored destinations 21 22 23 20 ...

Page 17: ... To delete all entered characters hold down until all characters are cleared Caps Lock key Press to enter upper case letters Press again to return to lower case letter entry SHIFT key Hold down while pressing a letter key to temporarily change case Letter keys Use to enter letters key com key Press to conveniently enter and com when entering an e mail address SYMBOL key Hold down while pressing a ...

Page 18: ...ep in mind when setting up Do not place the machine in direct sunlight Do not place the machine near heaters or air conditioners Keep dust away from the machine Keep the area around the machine clear About condensation If the machine is moved from a cold to a warm place condensation may form on the scanning glass preventing proper document scanning To remove the condensation turn on the power and ...

Page 19: ...Setup 15 1 Installation Basic Setup Connecting the handset Attach the document feeder tray and the received document tray Insert the trays at an angle and rotate back Attaching the trays Attach the paper tray ...

Page 20: ...Basic Setup 16 After inserting the tray flip out the extension Attach the document exit tray Connecting the power cord Plug the power cord into a 230 240 V 50 Hz earthed AC outlet ...

Page 21: ...in If your area experiences a high incidence of lightning or power surges it is recommended that you install surge protectors for the power and telephone lines Surge protectors can be purchased from your dealer or at most telephone specialty stores Do not plug the power cord into any other kind of outlet This will damage the machine When disconnecting the machine always disconnect the phone line b...

Page 22: ...mile function of this machine is not designed for use on a line which has call waiting call forwarding or certain other special services offered by your telephone company If you attempt to use the facsimile function in conjunction with any of these services you may experience errors during transmission and reception of facsimile messages The facsimile function of this machine is not compatible wit...

Page 23: ...tup is shown below The machine is connected using an Ethernet cable not included Please purchase a 10Base T 100Base TX straight through regular cable Connect one end of the cable to the LAN port on the machine Connect the other end to a LAN port on your switch or hub To communicate on your network the machine must have an IP address To set the machine s IP address and configure other network setti...

Page 24: ...er and replacement can print approximately 20 000 A4 size pages When replacing the drum cartridge use a SHARP FO 25DR drum cartridge Follow the steps below to install the toner cartridge and the drum cartridge Note The quality of the toner cartridge is guaranteed for 18 months after the date of manufacture indicated on the package The quality of the drum cartridge is guaranteed for 24 months after...

Page 25: ...Installing the Toner Cartridge and Drum Cartridge 21 1 Installation 2 Press the release and open the front cover 3 Open the side cover 4 Remove the new drum cartridge from its packaging 2 1 ...

Page 26: ... wipe it gently with a clean cloth Exposure to light for more than several minutes will damage the drum Be sure to insert the drum cartridge promptly into the machine If you find it necessary to leave the cartridge out of the machine for more than several minutes wrap the cartridge in black paper 6 Remove the new toner cartridge from its packaging Shake the cartridge side to side four or five time...

Page 27: ...the dots to make sure the cover is completely closed Otherwise light may enter the print compartment and damage the drum The display will show TONER EXCHANGED 1 NEW 2 OLD 9 If you installed a new toner cartridge press to select NEW this will reset the toner counter to zero If you temporarily removed and then replaced an old toner cartridge for maintenance or other reason press to continue using th...

Page 28: ...O START 10 Press 11 If you installed a new drum cartridge reset the drum counter as explained below START Manually resetting the toner counter When a new toner cartridge is installed the toner counter is reset in Step 9 on the previous page The procedure below is normally not necessary however it can be used in the event that you need to reset the toner counter manually 1 Press and then until LIFE...

Page 29: ...not use the blank side of paper that has already been printed on 1 Fan the paper and then tap the edges against a flat surface to even the stack 2 Pull the paper plate forward Squeeze the paper guide and adjust it to the width of the paper Insert the stack of paper into the tray print side up 3 Push the paper plate back 2 1 3 The maximum stack height should not be higher than the line on the paper...

Page 30: ...the display 2 Press Display OWN NUMBER SET 3 Press ENTER FAX 4 Enter your fax number by pressing the number keys max 20 digits To insert a space between digits press To enter press To clear a mistake press 5 Press 6 Enter your name using the letter keys max 24 characters Example SHARP To clear a mistake press For information on using the letter keys see page 13 7 Press DATE TIME SET 8 Press to exi...

Page 31: ...n until DATE TIME SET appears 3 Press The currently set date appears example DATE 08 10 2008 4 Enter a two digit number for the day 01 to 31 Example the 5th DATE 05 10 2008 To correct a mistake press to move the cursor back to the mistake and enter the correct number 5 Enter a two digit number for the month 01 for January 02 for February 12 for December etc Example January DATE 05 01 2008 6 Enter ...

Page 32: ...the Date and Time 28 7 Enter a two digit number for the hour 00 to 23 and a two digit number for the minute 00 to 59 Example 9 25 05 JAN SAT 09 25 8 Press to start the clock ANTI JUNK 9 Press to exit START STOP ...

Page 33: ... want to receive both phone calls and faxes on the line connected to the fax machine All calls including faxes must be answered by picking up the fax machine s handset To set the reception mode press until the desired mode appears in the display AUTO or MANU For more information on receiving faxes see Chapter 4 RECEPTION Volume Adjustment You can adjust the volume of the speaker handset and ringer...

Page 34: ...elect HIGH MIDDLE LOW or OFF Make sure has not been pressed the handset is not lifted and a document is not loaded in the feeder The ringer will ring once at the selected level 2 If you selected OFF OK to turn off the ringer press SPEAKER START ...

Page 35: ...ogram The scanned document is automatically sent as an attachment to an e mail message To use network scanning the machine must be connected to an Ethernet network as explained on page 19 IP address The machine requires an IP address to in order to communicate on your network and the Internet If your network is set up to automatically assign IP addresses you do not need to do anything the machine ...

Page 36: ...e machine was unable to receive an IP address automatically or if the router locked up after the machine received an IP address IP ADDRESS DHCP FAIL 192 168 1 201 will appear 192 168 1 201 is an IP address that is assigned to the machine for diagnostic purposes when connection fails it cannot be used for regular communication If NOW CONNECTING CHECK LATER appears press to exit This message will ap...

Page 37: ... router see the manual for the router If IP ADDRESS DHCP FAIL appears remove and then reinsert the Ethernet cable plug and then check the IP address again If the same message appears check the device that acts as the DHCP server on your network try removing and restoring the power If your router is your DHCP server make sure that DHCP is enabled in the router settings If your network does not have...

Page 38: ...name or IP address follow the procedure in Checking your IP address and the connection page 32 or print the Network Settings List page 143 Type in the host name or IP address of the machine in the address bar of your computer s Web browser The machine s Web page will appear For the Web browser it is recommended that you use Internet Explorer 6 0 or higher Note If the Web page is used while the mac...

Page 39: ... the machine in your browser s address bar Click E mail Setup to open the e mail settings Configuring the e mail settings in the Web page Select E mail Setup in the menu frame of the Web page to open the E mail Setup screen Under SMTP Setup enter the host name or IP address of your SMTP server in SMTP Server ...

Page 40: ...e mail sent from the machine and the sender E mail Address Note The E mail Address must be entered This must be a valid e mail address Responses to e mail sent from the machine and any undelivered mail reports will be sent to this address It is normally convenient to use the e mail address of the administrator of the machine or other person in charge of machine communication Enter an E mail Subjec...

Page 41: ...steps below to display the e mail settings and then configure each setting as explained in the table 1 Press then until E MAIL SETTING appears 2 Press then repeatedly until the setting that you wish to configure appears 3 Press Note This step is not necessary for the FILE FORMAT setting 4 Enter the required information for the setting as explained in the table on the next page 5 After configuring ...

Page 42: ...items at the time of transmission Setting Description SENDER NAME Enter the sender name that will appear in the e mail message max of 50 characters When finished press SENDER ADDRESS Enter your sender e mail address max of 128 characters When finished press Note Be sure to enter a valid e mail address Return e mail and undelivered mail reports will be sent to this address In addition some SMTP ser...

Page 43: ...age 10 An e mail address stored in a Speed Dial number is selected by pressing and entering the 3 digit Speed Dial number A total of 114 Speed Dial numbers are available E mail addresses can be stored using the machine s Web page or the operation panel Using the Web page to store e mail addresses Open the machine s Web page as explained on page 34 To view a list of the Rapid Keys and Speed Dial nu...

Page 44: ...u wish to use from the list Type in the E mail Address of the destination and select the File Format of the scanned image The file format selected here is a default format that will be used if a file format is not specified at the time of transmission When finished click Submit Editing or deleting a destination in the Web page To edit or delete a previously stored destination select the destinatio...

Page 45: ...he number must be 3 digits enter 001 for Speed Dial 1 010 for Speed Dial 10 etc Display SELECT DEST TYPE If you prefer to have the machine suggest an available Rapid Key Speed Dial number at the end of the procedure press 3 Press to select E MAIL Display E MAIL MODE 4 Enter the e mail address with the letter and number keys max of 128 characters To clear a mistake press For information on using th...

Page 46: ...tep 10 If not press the desired Rapid Key or press and enter the desired 3 digit Speed Dial number and go to Step 10 10 Return to Step 2 to store another e mail address or press to exit START SPEED DIAL STOP Editing and clearing stored destinations To make changes to a previously stored destination or clear a destination follow these steps 1 Press then 2 Select the destination that you wish to edi...

Page 47: ...ter or number key The new character will replace the old character You can also press to backspace and clear characters If you do not wish to change the address go directly to Step 5 5 Press 6 Make the desired changes to the name If you do not wish to change the name go directly to Step 7 7 Press Display FILE FORMAT 8 Select the default file format that will be used for scanned images if the user ...

Page 48: ... more information on loading the document see page 56 If desired press to set the resolution and contrast see p 58 The default resolution for Scan to E mail is FINE RESOLUTION Scan to E mail Transmission Follow the steps below to send a scanned document or image to an e mail recipient The document will be sent as a file attachment to an e mail message You can specify the recipient by directly ente...

Page 49: ...G appears your SMTP server or sender address has not been entered in the e mail settings p 34 4 If you need to select or change any of the e mail options press and go to Step 5 below Note that settings selected here are temporary To make permanent changes see p 34 If you do not wish to change the e mail options go directly to Step 7 5 Press or until the desired option appears and press is not nece...

Page 50: ...UTO To assign a custom name press CUSTOM enter the desired name with the letter keys max 40 characters and press 6 When you have finished configuring the e mail options press or until the display shows PRESS START TO SCAN 7 Press to begin transmission Note The recipient may have security settings in their e mail program or virus protection software that prevent the file attachment from being recei...

Page 51: ...ur mail server or there is no response from the mail server Make sure the SMTP server setting is correct p 34 If you have configured POP before SMTP settings in the Web page make sure these settings are correct SERVER NOT FOUND SMTP This appears when an incorrect host name is entered for your SMTP server Check the SMTP server setting p 34 SERVER NOT FOUND DHCP This appears when the machine is unab...

Page 52: ...ngs only appear when DHCP is set to NO IP ADDRESS SUBNET MASK DEFAULT GATEWAY DNS PRIMARY DNS SECONDARY 1 Press then until NETWORK SETTING appears 2 Press DHCP will appear 3 Press for NO the machine will not obtain an IP address automatically IP ADDRESS will appear If you wish to configure a different setting press or 4 Press 5 Press the number keys to enter the required number Three digits must b...

Page 53: ... 6 to configure the next setting or press to exit START STOP Initialising the network settings If you need to return the network settings to their initial state follow the steps below Initialising the settings enables DHCP and clears the IP address and related settings 1 Press then until NETWORK SETTING appears 2 Press then until INITIALIZE SETTINGS appears 3 Press Display INITIALIZE SETTINGS IF O...

Page 54: ...ion Scan to Folder and FTP destinations can only be stored using the machine s Web page A maximum of 12 Scan to Folder destinations and 12 Scan to FTP destinations can be stored Storing a Scan to Folder destination To store a Scan to Folder destination open the machine s Web page as explained on page 34 Click Network Folder under Destination Management in the menu frame The screen below will appea...

Page 55: ...r properties Enter the User Name and Password required to access the computer If your network environment requires that you enter the domain name with the user name enter the User Name in the format DomainName UserName Select the File Format of the scanned image The file format selected here is a default format that will be used if a file format is not specified at the time of transmission When fi...

Page 56: ...e file format selected here is a default format that will be used if a file format is not specified at the time of transmission When finished click Submit Scan to Folder FTP Transmission Follow the steps below to send a scanned document to a network folder or FTP server The document will be sent as an image file The file format can be selected in Steps 4 and 5 below 1 Insert the document face down...

Page 57: ...hanges change the settings in the Web page as explained on pages 51 and 52 If you do not wish to change the file options go directly to Step 6 4 Press or until the desired option appears and then make a selection for the option as explained below FILE FORMAT Select the format of the scanned image file Press for TIFF or for PDF FILE NAME To use an automatically generated file name for the scanned f...

Page 58: ... when a Scan to Folder transmission is not successful Check the folder path stored in the destination information see page 50 SERVER ERROR CHECK CONFIGURATION For an unsuccessful Scan to Folder transmission check the user name password and folder path stored in the destination information see page 50 Make sure that 1 the folder is set to be shared on the network and 2 network users are allowed to ...

Page 59: ... feeder depend on how many sheets you load Loading up to 30 sheets at once Size A4 210 x 297 mm Weight 80 g m2 Loading 1 sheet at a time manual feeding Size 216 x 356 mm Weight 157 g m2 140 mm 70 mm Letters or graphics on the edges of a document will not be scanned The maximum scanning width is 208 mm and the top and bottom 4 mm of the document cannot be scanned Letters in the shaded area will not...

Page 60: ...acked easily smudged or have a slick coated surface should be photocopied and the copy loaded in the feeder Loading the Document Up to 30 A4 size sheets can be placed in the feeder at once The sheets will automatically feed into the machine starting from the bottom sheet If you need to send or copy more than the maximum number of sheets place the additional sheets gently and carefully in the feede...

Page 61: ... should enter the feeder first SEND READY will appear in the display 3 Adjust the resolution and or contrast settings as explained on page 58 then dial the receiving machine as explained on page 60 Note When inserting a large number of pages in the feeder slant the front end of the stack so that the bottom pages enter first ...

Page 62: ...y effective for sending a document They are not effective for receiving a document Resolution settings Contrast settings STANDARD Use STANDARD for ordinary documents This setting gives you the fastest and most economical transmission FINE Use FINE for documents containing small letters or fine drawings SUPER FINE Use SUPER FINE for documents containing very small letters or very fine drawings HALF...

Page 63: ... list of resolution settings the contrast setting AUTO will appear next to each resolution setting The second time you move through the list the contrast setting DARK will appear Note In order to transmit in SUPER FINE resolution the receiving fax machine must also have that resolution If it doesn t your machine will automatically step down to the next best available setting RESOLUTION If you pref...

Page 64: ...e other fax machine is responding SPEAKER SPEAKER 1 Load the document s If desired press to set the resolution and or contrast 2 Pick up the handset or press Listen for the dial tone 3 Dial the number of the receiving machine by pressing the number keys 4 Wait for the connection Depending on the setting of the receiving machine you will either hear a fax tone or the other person will answer If the...

Page 65: ...g is used a slash and the total number of pages is automatically added to each page number on transmitted fax pages for example P 1 5 P 2 5 etc This allows the recipient to check for missing pages If you wish to use this feature with Normal Dialling you must set the total number of pages manually Follow the steps below 1 Load the document s 2 Press then until PAGE COUNTER appears in the display 3 ...

Page 66: ...To cancel a batch number entry remove the document from the feeder or press If the number of pages actually transmitted is not the same as the batch number entered an alarm will sound and PAGE COUNT ERROR will appear in the display PAGE E will also appear in the NOTE column of the Transaction Report if printed STOP ...

Page 67: ...numbers Follow the steps below to store a fax or phone number using the machine s operation panel Fax phone numbers can also be stored using the machine s Web page Open the Web page as explained on page 34 and click Fax under Destination Management in the menu frame to open the Fax Destination Control screen SPEED DIAL START 1 Press then 2 To store a number in a Rapid Key press the desired Rapid K...

Page 68: ...e of the destination max 20 characters For information on using the letter keys see page 13 7 Press 8 If you selected a Rapid Key or Speed Dial number in Step 2 the display will briefly show STORED and then NEW NUMBER Go to Step 9 If you did not select a Rapid Key or Speed Dial number in Step 2 the display will show the next available Rapid Key or Speed Dial number If that number is acceptable pre...

Page 69: ...3 digit Speed Dial number with the number keys enter 001 for Speed Dial 1 010 for Speed Dial 10 etc Search Press or until the name or number of the destination appears in the display and press Display 1 EDIT 2 CLEAR 3 Press for EDIT or for CLEAR If you selected CLEAR go to Step 7 4 If you selected EDIT make the desired changes to the number Press or to move the cursor to the digit or digits you wi...

Page 70: ...er or letters you wish to change and then press the appropriate letter key The new letter will replace the old letter You can also press to backspace and clear letters If you do not wish to change the name go directly to Step 7 7 Press 8 Return to Step 2 to edit or clear another number or press to exit DEL START STOP ...

Page 71: ...nter 001 for Speed Dial 1 010 for Speed Dial 10 etc Make sure the correct destination appears in the display if not press and then press Search Dialling Press or until the name or number of the other party appears in the display and press 3 Scanning dialling and transmission will take place automatically To cancel transmission press If the transmission is completed successfully the machine will be...

Page 72: ...tered in a row 3 Check the display If the number shown is correct press If the number is not correct press to clear the incorrect digits and then re enter the correct digit s RESOLUTION REDIAL START STOP Making a voice call with an auto dial number Rapid Key Dialling Lift the handset and press the Rapid Key Speed Dialling Lift the handset press and enter the Speed Dial number with the number keys ...

Page 73: ...tic redialling press If there are multiple fax numbers being automatically redialled only the number that was attempted first will appear in the display To cancel automatic redialling of a different number see Checking and cancelling stored fax jobs on page 70 Under certain conditions automatic redialling may stop before two redialling attempts are made STOP Using the REDIAL key To redial the last...

Page 74: ...w the steps below Timer transmission jobs can also be checked and canceled using this procedure 1 Press 2 Make sure that TX JOBS appears in the display and press 3 Press or to scroll through the stored fax jobs The top line of the display shows the memory number assigned to the job and the time the job was stored The bottom line alternately shows the destination and the status of the job NO DATA w...

Page 75: ...eceive a fax as explained in Using MANUAL Mode below RECEPTION 4 Receiving Faxes To change the number of rings on which the machine answers calls change the NUMBER OF RINGS setting pp 139 and 140 The machine automatically reduces received faxes as needed to fit the paper If you prefer to have all faxes printed at full size change the RECEIVE RATIO setting pp 139 and 142 Important Do not let more t...

Page 76: ...r party first speaks with you and then wants to send a fax press after speaking Press before the sender presses their Start key When RECEIVING appears in the display hang up START START Using MANUAL Mode To select MANUAL mode press until MANU appears in the display In MANUAL mode you must answer all calls even faxes by picking up the machine s handset Answering on the machine s handset Important I...

Page 77: ...ption to Memory Incoming faxes will be received to memory when printing is not possible such as when the machine runs out of paper the print cartridge needs replacement or the paper jams When you have received a fax in memory FAX RX IN MEMORY will appear in the display alternating with a message that indicates the problem When you resolve the problem the stored faxes will automatically print out I...

Page 78: ...ove faxes and Scan to E mail transmissions before transmission takes place Each time a user performs a fax or Scan to E mail transmission the machine automatically sends an e mail notification with the scanned image as an attachment to a specified supervisor The supervisor checks the transmission and decides whether it should be approved or denied and then returns the e mail to the machine The tra...

Page 79: ...llow the steps below 1 Hold down until ADMIN CODE SETUP PRESS START KEY appears in the display 2 Press Display ENTER OLD CODE 3 Enter the current administrator code If you are setting the code for the first time enter 00000000 To clear a mistake press 4 Press 5 Enter the new code that you wish to use any number from 5 to 8 digits 6 Press The code will be printed out Take care not to lose the print...

Page 80: ...gs under Device Setup in menu frame of the Web page select Enable password protection of pages under Device Setup In this case users can access all settings other than the Device Setup settings without entering a password it is not necessary to set a password under User Password as explained above To access the Device Setup settings the administrator password must be entered If you wish to require...

Page 81: ...ion 3 Activate the user authentication function The above tasks can be performed in the machine s Web page or using the machine s operation panel The procedures for both methods are described on the following pages User authentication by LDAP server If your network has an LDAP server and you wish to use the LDAP server for user authentication use the Web page to configure settings 1 Open the Web p...

Page 82: ...he menu frame The screen below will appear Under Default Settings set User Authentication to Enable Select Authenticate a user by Login Name and Password or Authenticate a user by User Number only To add a new user click Add The following screen will appear the screen shown is the screen that appears when the authentication method is set to Login Name and Password ...

Page 83: ...ion function page 91 If the authentication method is Login Name and Password and you will be using an LDAP server for authentication select Network Authentication Otherwise select Login locally In Authority select the operations that you wish to permit the user to perform menu is used to permit the user to configure the settings that are accessed by pressing FUNCTION ...

Page 84: ... users have been stored for the previously selected method You must first delete these users using the procedure on page 82 4 Press to exit SECURE SECURE START STOP Using the operation panel to select the login method To use the machine s operation panel to specify whether users must log in by entering a user number or by entering a login name and password follow the steps below The login method c...

Page 85: ...ssign to the user any number from 5 to 8 digits not already in use If login name and password has been selected as the authentication method enter the login name that the user will use to log in maximum of 32 characters Press and enter the password that the user will use maximum of 30 characters SECURE SECURE START START START Using the operation panel to store users Follow the steps below to stor...

Page 86: ...s or until the user that you wish to edit or delete appears and press If you wish to delete all stored users press and go to Step 9 5 Press for EDIT or for CLEAR If you selected CLEAR go to Step 9 SECURE SECURE START DEL Using the operation panel to edit and delete users Follow the steps below to edit or delete a previously stored user 7 Press 8 Return to Step 4 to store another user or press to e...

Page 87: ...If the authentication method is user number make the desired changes to the user number If the authentication method is user name and password make the desired changes to the user s login name maximum of 32 characters Press and make the desired changes to the password Press or to move the cursor to the digit character you wish to change and then enter the new digit character The new digit characte...

Page 88: ... authentication function at the operation panel 1 Press then until USER CONTROL appears If the display shows ENTER PASSWORD after you press enter the administrator code and press 2 Press Display USER AUTHENTICATION 3 Press ON to activate user authentication or OFF to deactivate user authentication 4 Press to exit SECURE SECURE START STOP ...

Page 89: ...ou performed a fax transmission Scan to E mail transmission or other similar operation you will be automatically logged out when the operation is completed If you do not use the machine for more than 3 minutes you will be automatically logged out START Procedure for login by login name and password To log in and use the machine when the authentication method is login name and password follow the s...

Page 90: ... a fax transmission Scan to E mail transmission or other similar operation you will be automatically logged out when the operation is completed If you do not use the machine for more than 3 minutes you will be automatically logged out START START If login fails 3 times in a row If you enter the wrong user number or wrong password 3 times in a row and A warning when login fails is selected in User ...

Page 91: ...code The Secure code is used to print received faxes Follow the steps below to set the Secure code The Secure code can be any number from 5 to 8 digits in length 1 Press make sure that SECURE FAX appears and press If the display shows ENTER PASSWORD after you press enter the administrator code and press 2 Press until SECURE CODE 1 SET 2 CLEAR appears 3 Press to select SET 4 Enter a Secure code 5 t...

Page 92: ...FF If the display shows ENTER PASSWORD after you press enter the administrator code and press 2 Press to select ON 3 Press to exit SECURE SECURE START STOP Printing received faxes When the memory is holding one or more received faxes RECEIVED SECURE FAX will appear in the display Follow the steps below to print the faxes 1 Press Display SECURE DATA PRINT ENTER SECURE 2 Enter the Secure code 3 Pres...

Page 93: ...ED SECURE FAX appears in the display First print the received faxes and then deactivate Secure Fax 1 Press make sure that SECURE FAX appears and press Display SECURE FAX 1 ON 2 OFF If the display shows ENTER PASSWORD after you press enter the administrator code and press 2 Press to select OFF Display ENTER SECURE 3 Enter the Secure code 4 Press 5 Press to exit SECURE SECURE START START STOP ...

Page 94: ... shows ENTER PASSWORD after you press enter the administrator code and press 2 Press until SECURE CODE 1 SET 2 CLEAR appears 3 Press to select CLEAR 4 Enter the Secure code 5 Press The display will briefly show SECURE CLEAR CLEARED If the wrong code is entered WRONG SECURE will appear Go back to Step 4 If the wrong code is entered 3 times in a row you will return to the standby display 6 Press to ...

Page 95: ...sent by Normal Dialling page 60 To set up this function you must 1 Establish an exclusive e mail account for the machine and configure settings for the account in the Web page Note All e mail received by the machine is automatically cleared If an account that is shared by a person is used e mail sent to that person may be cleared before he or she can retrieve it 2 Store the name and e mail address...

Page 96: ...count and the password E mail account settings in the Web page Open the machine s Web page as explained on page 34 Click E mail Setup in the menu frame and enter the host name or IP address of your SMTP server A sender address must also be entered These settings are the same as for Scan to E mail transmission page 35 Next click POP under Network Settings in the menu frame The following screen will...

Page 97: ...im or her of the supervisor s decision and the status of the transmission In Automatic elimination of the image which hasn t been authorized yet you can select a time after which a transmission will be canceled if no response is received from the supervisor In Transmissions to listed domains bypass the authorized process you can enter up to three domains for which authorisation is not performed Wh...

Page 98: ...Press 7 Enter the name of the supervisor with the letter keys SECURE SECURE START START Using the operation panel to store supervisors To store the name and e mail address of the person who will check the transmission using the operation panel follow the steps below Up to three supervisors can be stored At the bottom of the screen enter the e mail addresses of supervisors that are Authorised to ch...

Page 99: ...ntil AUTH TRANSMISSION appears If the display shows ENTER PASSWORD after you press enter the administrator code and press 2 Press then until AUTHORIZED APPROVER appears 3 Press 4 Press or until the supervisor that you wish to edit or delete appears and press 5 Press for EDIT or for CLEAR If you selected CLEAR go to Step 9 SECURE SECURE START 8 Press 9 Return to Step 4 to store another supervisor o...

Page 100: ...ear letters If you do not wish to change the e mail address go directly to Step 7 7 Press 8 Make the desired changes to the name of the supervisor Press or to move the cursor to the character you wish to change and then enter the new character The new character will replace the old character You can also press to backspace and clear characters If you do not wish to change the name go directly to S...

Page 101: ...supervisor must be stored before Authorised Transmission can be activated 1 Press then until AUTH TRANSMISSION appears If the display shows ENTER PASSWORD after you press enter the administrator code and press 2 Press Display ACTIVATE AUTH TX 3 Press ON to activate the function or OFF to deactivate the function If SETUP APPROVER appears you must first store a supervisor as expained on page 92 4 Pr...

Page 102: ...mmand to send the e mail back to the machine The supervisor must not change any of the content of the e mail To deny the transmission the supervisor must enter REJECT in the subject line and send the e mail back to the machine using Reply or equivalent command The supervisor must not change any other content of the e mail 5 If the transmission is approved the machine will begin transmission If the...

Page 103: ...ote When Call Restriction is activated a voice number cannot be dialed unless it is stored in a Rapid Key or Speed Dial number and is permitted for use For this reason it is recommended that emergency numbers be stored in Rapid Keys or Speed Dial numbers To use this function the administrator must specify the Rapid Keys and Speed Dial numbers that are permitted to be used and then activate the fun...

Page 104: ...desired destination appears only destinations that have not yet been permitted will appear To check the fax number or e mail address of a name that appears press 5 Press 6 Press YES to permit the destination to be used To cancel press NO 7 Return to step 4 to permit another destination or press to exit START STOP ...

Page 105: ...n Call Restriction is activated When Call Restriction is activated after the user specifies the destination by pressing a Rapid Key entering a Speed Dial number or searching the machine will check whether or not the number is permitted to used If the destination is permitted to be used APPROVED will briefly appear and the machine will perform the transmission If the destination is not permitted to...

Page 106: ...s 2 Press then until SET PERMITTED 1 NEW 2 SEARCH appears 3 Press NEW 4 To store a new fax number follow steps 2 through 7 of the storing procedure that starts on page 63 To store a new e mail address follow steps 2 through 8 of the storing procedure that starts on page 41 To cancel the permission setting of a previously stored fax number or otherwise edit the number follow steps 2 through 7 of th...

Page 107: ... that it is correct After you check the number press to begin dialing and transmission Send Hold will not operate if the handset is lifted or is pressed before dialing Activating or deactivating the Send Hold function START SPEAKER 1 Press then until SEND HOLDING appears If the display shows ENTER PASSWORD after you press enter the administrator code and press 2 Press Display ACT SEND HOLDING 3 Pr...

Page 108: ...s a Rapid Key Press enter a 3 digit Speed Dial number and press Enter the full fax number with the number keys and press Press or until the name or number of the other party appears in the display and press 3 Check the name or number that appears in the display If it is correct press to begin dialing and transmission If the name or number is not correct press to clear it RESOLUTION SPEED DIAL STAR...

Page 109: ... Driver If the initial screen does not automatically appear run Launch exe on the CD ROM Open My Computer double click your CD ROM drive and double click Launch exe 3 Follow the instructions in the windows that appear to install the printer driver If multiple FO IS115N machines are connected to your network the printer driver can only be installed for one machine at a time When the list of detecte...

Page 110: ...ow right click the printer icon and select Delete If printer drivers are installed for multiple FO IS115N machines all printer drivers can be removed at once using the CD ROM that accompanied the machine Insert the CD ROM into your computer s CD ROM drive select Install Printer Driver and then select Remove in the FO IS115N Setup Maintenance screen that appears ...

Page 111: ...ick Properties Setup or Printer in the Print dialog box the name of the button varies depending on the application The Printing Preferences window appears Adjust the settings as desired see pages 109 to 111 and then click OK 4 Select the print range and adjust any other settings as desired in the Print dialog box 5 When you are ready to begin printing click Print or OK in the Print dialog box Note...

Page 112: ...e Printers folder in Windows 2000 as explained below Windows Vista Click the Start button click Hardware and Sound and click Printers Right click the SHARP FO IS115N icon and select Printing Preferences Windows XP Server 2003 Click the start button click Control Panel click Printers and Other Hardware and then click Printers and Faxes In the Printers and Faxes window click on the SHARP FO IS1150N ...

Page 113: ...Click the setting and select the desired quality a higher setting produces a clearer image Watermark This is used to print a watermark a faint background image on each sheet of output Click the setting and select the desired watermark To edit the selected watermark click Edit Watermark To save your settings and close the window click OK To save your settings without closing the window click Apply ...

Page 114: ...er tray Orientation Select Portrait or Landscape to match the orientation of your document Fit to Paper Select this and then select a paper size to enlarge or reduce the printed image to the selected paper size To save your settings and close the window click OK To save your settings without closing the window click Apply To cancel your settings and close the window click Cancel ...

Page 115: ...r Advanced Printing Features Normally this is set to Enabled to allow you to use the advanced printing features Halftoning This is normally set to Auto Select to let the printer select the best halftone setting To save your settings and close the window click OK To save your settings without closing the window click Apply To cancel your settings and close the window click Cancel ...

Page 116: ...you wish to have copies sorted as shown below change the SORT COPY setting to YES pp 139 and 142 1 Load the document s Maximum of 30 A4 sheets If desired press to set the resolution and or contrast 2 Select the following copy settings as needed Enlarge reduce Press or to select 100 125 135 200 70 88 or 94 Default setting 100 Number of copies per original Enter a number from 1 to 99 Default setting...

Page 117: ...s that were scanned will be copied and the remaining pages will automatically feed out Repeat the copy procedure for the remaining pages including the page that was being scanned when the memory became full Note It may not be possible to make a copy of an original if a high resolution setting is used and or the original contains so much detailed content that the memory becomes full before scanning...

Page 118: ...ssible to enter a full fax number or e mail address 1 Load the document s If desired press to set the resolution and or contrast 2 Press 3 Press to broadcast to FAX destinations or to broadcast to E MAIL destinations 4 Select a destination using one of the following methods Press a Rapid Key Press and enter a 3 digit Speed Dial number Press or until the desired destination appears in the display 5...

Page 119: ...y printed out after Broadcasting is completed If any destinations in the Note column of the report are marked Busy or have a communication error code you will need to send the document to those destinations again DEL START START If the memory becomes full If the memory becomes full during scanning MEMORY FULL will appear in the display Press to send the pages which have been stored up to that poin...

Page 120: ...group you can press to select e mail options see Steps 4 to 6 on page 45 When you are ready to begin transmission press RESOLUTION START Storing destinations in Group Keys Follow the steps below to store a group of destinations in a Group Key Any Rapid Key not already in use can be used as a Group Key A key cannot be simultaneously programmed as both a Group Key and a Rapid Key Up to 50 fax or e m...

Page 121: ...ORED or RAPID STORED appears the key has already been programmed Clear the key or try another Rapid Key 5 Select a destination using one of the following methods Press a Rapid Key Press and enter a 3 digit Speed Dial number Press or until the desired destination appears in the display 6 Press to enter the destination 7 Repeat Steps 5 and 6 for each of the other desired destinations maximum of 50 Y...

Page 122: ...Broadcasting 118 8 When you have finished entering the destinations press 9 Press to exit START STOP ...

Page 123: ...on mode must be set to AUTO press until AUTO appears in the display RECEPTION 1 Press then until ENTRY MODE appears 2 Press then until ANTI JUNK appears 3 Press 4 Press 5 Enter the fax number with the number keys max 20 digits Note Enter numbers only hyphens and spaces cannot be entered 6 Press 7 Return to Step 4 to store another number or press to exit When a fax is blocked a transaction report p...

Page 124: ...clear appears in the display 5 Press 6 Press for EDIT or for CLEAR If you selected CLEAR go to Step 8 7 If you selected EDIT make the desired changes to the number Press or to move the cursor to the digit or digits you wish to change and then enter the new digit The new digit will replace the old digit You can also press to backspace and clear digits 8 Press 9 Press to exit FUNCTION DEL START STOP...

Page 125: ...ont of 2nd page back of 2nd page etc Note that any blank sides must be included when scanning the pages if the number of pages is not equal each time the machine scans the stack an error will result 1 Load the documents Make sure the pages are placed front side down with the first page on the bottom If desired press to set the resolution and or contrast 2 Press and then 3 Perform all steps of the ...

Page 126: ...ax numbers and forwarding destinations e mail address network folder or FTP server One originating fax number and one forwarding destination can be stored in each group When a fax is received the machine will check each stored group and if the originating number of the received fax matches the originating fax number in one of the groups the machine will forward the fax to the forwarding destinatio...

Page 127: ...hout entering a fax number 6 Press 7 Specify the destination e mail address network folder or FTP server to which you wish to have the faxes forwarded using one of the methods below Rapid Key Dialling Press a Rapid Key Speed Dialling Press and enter a 3 digit Speed Dial number Search Dialling Press or until the destination appears in the display 8 Press The group is stored If NETWORK FOLDER FTP IS...

Page 128: ...eps below to activate the Fax to E mail Folder function Printing forwarded faxes The machine is initially set to print received faxes that are forwarded If you prefer that the machine only print forwarded faxes when a forwarding error occurs follow the steps below 1 Press then until FAX TO E MAIL FOLDER appears 2 Press then until PRINT RECEIVED FAX appears 3 To have all forwarded faxes printed pre...

Page 129: ...ormation that must be entered Open the machine s Web page as explained on page 34 and click LDAP under Network Settings in the menu frame The LDAP Setup screen will appear In LDAP select Enable Enter the host name or IP address of your LDAP server in LDAP Server if the authentication type is DIGEST MD5 only the host name can be entered To check the host name of your LDAP server click the Start but...

Page 130: ...perties of any user stored on the Active Directory For the Password enter the password of that user These entries are used for connection to the Active Directory When user authentication is activated on the machine When user authentication by user name and password is activated on the machine and the LDAP server authentication type is SIMPLE you must enter your Display name for the user name when ...

Page 131: ...roperties of any user stored on the Active Directory For the Password enter the password of that user These entries are used for connection to the Active Directory When user authentication is activated on the machine When user authentication by user name and password is activated on the machine and the LDAP server authentication type is DIGEST MD5 you must enter your User logon name for the user n...

Page 132: ...ontrast 2 Press 3 Enter a keyword with the letter keys The keyword is normally the name of the person or destination whose fax number or e mail address you are searching for 4 Press SEARCHING PLEASE WAIT appears while the LDAP server searches for the destination 5 When the LDAP server completes the search the name of the first matching person or destination will appear in the display Press repeate...

Page 133: ...ers If NO MATCHING ADDRESS RE ENTER KEYWORD appears the server does not have any entries that match your entered keyword Enter a different keyword 6 When the desired destination appears in the display press If you pressed without displaying the fax number or e mail address of the destination SELECT DEST TYPE will appear Press FAX to send to the fax number or E MAIL to send to the e mail address If...

Page 134: ...ling key To use Polling you must first set POLLING to YES and select a Rapid Key for use as the polling key in the Option Settings as explained on pages 139 and 141 Using polling to request fax transmission 1 Dial the fax machine that you wish to poll using one of the following methods Enter the full number using the numeric keys Press and enter a 3 digit Speed Dial number Pick up the handset or p...

Page 135: ...e the document will be automatically cleared from memory after polling If you allow polling an unlimited number of times the document will remain in memory until you clear it as explained on page 132 1 Load the document If desired press to set the resolution and or contrast 2 Press then until MEMORY POLLED appears 3 Press 4 Press to select SET Display 1 ONCE 2 REPEAT 5 Press to allow polling only ...

Page 136: ...unauthorized polling of your machine When this function is turned on polling will only be allowed when the fax number of the polling machine has been entered in your machine s list of permitted fax numbers called passcode numbers The number of the polling machine must also be correctly programmed in that machine for identification To use Polling Security follow the steps below to turn the function...

Page 137: ...sion You can store up to 10 fax numbers in your machine s list of permitted numbers 1 Press then until ENTRY MODE appears 2 Press then until POLLING PASSCODE appears 3 Press 4 Press 5 Enter the fax number with the number keys max 20 digits Note Enter numbers only hyphens and spaces cannot be entered 6 Press 7 Return to Step 4 to store another number or press to exit FUNCTION START STOP ...

Page 138: ...ress for EDIT or for CLEAR If you selected CLEAR go to Step 8 7 If you selected EDIT make the desired changes to the number Press or to move the cursor to the digit or digits you wish to change and then enter the new digit The new digit will replace the old digit You can also press to backspace and clear digits 8 Press 9 Press to exit FUNCTION DEL START STOP Editing and clearing polling permission...

Page 139: ...tered if all are stored in Rapid Keys or Speed Dial numbers A Group Key can also be used once a Group Key is used no further destinations can be entered A destination can be specified by entering a full fax number with the number keys however in this case only one destination can be entered 1 Load the document s If desired press to set the resolution and or contrast 2 Press then until TIMER SEND a...

Page 140: ...er is entered only one destination can be entered 8 Press If you wish to enter more destinations go to Step 9 If you have finished entering destinations or are only entering one destination go to Step 10 9 Repeat Steps 7 and 8 for each of the destinations that you wish to enter A maximum of 50 destinations can be entered You can press to scroll through and check your entered destinations To delete...

Page 141: ... destination and the specified time appear 5 To cancel a displayed job press Press once again to complete the cancelation press if you do not wish to cancel 6 When finished press to exit FUNCTION START START STOP STOP Checking and cancelling stored timer transmission jobs Follow the steps below to check the timer transmission jobs that are stored If needed you can also use this procedure to cancel...

Page 142: ...chine signal voice calls and faxes by different ring patterns The machine will automatically receive faxes To turn on the distinctive ring function set the DISTINCTIVE RING setting to YES as explained on pages 139 and 140 In addition the reception mode must be set to AUTO When your fax number is dialled the machine will signal the call with a special ringing sound then answer automatically and beg...

Page 143: ... Settings Make a selection for the displayed setting as explained below This is done in step 3 of the above procedure Setting Description FINE PRIORITY This is used to change the default resolution for faxing from STANDARD to FINE Press YES to select FINE or NO to select STANDARD Initial setting NO STANDARD 9 Option Settings The option settings allow you to customize the operation of the machine t...

Page 144: ... are on a tone dial line press TONE If you are on a pulse dial line press PULSE Initial setting TONE DISTINCTIVE RING If you subscribe to a distinctive ring service as explained on page 138 press YES to turn on the distinctive ring function In addition set the reception mode to AUTO If you do not subscribe to a distinctive ring function press NO Initial setting NO FAX SIGNAL RX If you hear a soft ...

Page 145: ...smission due to noise on the telephone line automatically corrected before print out at the receiving end This is only effective when the other machine has ECM as well Press NO to turn off ECM mode When there is considerable noise on the line you may find that ECM slows transmission Turning off ECM mode may increase transmission speed Initial setting YES DIAL TONE DETECTION Press YES to have the m...

Page 146: ...t operate if the received fax is too long contains many fine graphics or images or is sent at high resolution In this case the remainder of the fax will be printed on a second page Press 100 to have all faxes printed at full size if a fax is too long to fit on the paper the remainder will be printed on a second sheet note that the cut off point may occur in the middle of a line Initial setting AUT...

Page 147: ...39 and AUTO PRINT OUT on page 141 DESTINATION LIST This shows the destinations that have been stored in Rapid Key and Speed Dial numbers pages 39 and 63 GROUP LIST This shows the destinations that are stored in the Group Keys page 116 SETUP LIST This shows your currently entered sender s name sender s number and anti junk fax number your current selections for the option settings print setup and a...

Page 148: ...ppear in the display 1 Press then until ENTRY appears 2 Press 3 Press or to scroll through the items The number stored of each item appears followed by a slash and the total number available For example RAPID GROUP 15 36 RAPID 13 GROUP 2 indicates that 15 Rapid and Group Keys out of a total of 36 have been stored The second line shows how many of these are Rapid Keys and how many are Group Keys 4 ...

Page 149: ...e other machine START Starting time TX RX TIME Total time taken for transmission reception PAGES Number of pages NOTE One of the following notes will appear under NOTE to indicate whether the fax was successful and if not why it failed OK Transmission reception was successful P FAIL A power failure prevented the transaction JAM The printing paper or document jammed BUSY The fax was not sent becaus...

Page 150: ... lever and right end of the roller up Pull the white roller out to the right Cleaning the Scanning Glass and Rollers Any dirt fingerprints or other small debris on the scanning glass will degrade the quality of faxes scanned images and copies Clean the scanning glass and roller frequently as explained below 3 1 2 11 Maintenance ...

Page 151: ...ends of the white roller Make sure that all dirt and stains such as correcting fluid are removed Dirt and stains will cause vertical lines on transmitted images and copies If the scanning glass is difficult to clean try moistening the cloth with isopropyl alcohol or denatured alcohol Take care that no alcohol gets on the rollers Do not press down on the two front rollers ...

Page 152: ...ever back up and in pushing it slightly to the right so that it fits into position 5 Close the operation panel pressing down firmly on both sides to make sure it clicks into place 1 3 2 Cleaning the housing Wipe the external parts and surface of the machine with a dry cloth Caution Do not use benzene or thinner These solvents may damage or discolor the machine ...

Page 153: ...d and clean the paper feed roller with a clean cloth 3 Push the paper plate back down and replace the paper tray Cleaning the Paper Feed Roller Clean the paper feed roller regularly to remove dust and debris A dirty paper feed roller will cause misfeeds and other paper feeding problems Clean this roller ...

Page 154: ...been in operation 2 Press the release and open the front cover Replacing the Toner Cartridge When the toner cartridge nears empty about 200 pages can still be printed TONER NEAR EMPTY will appear in the display When the toner cartridge is empty TONER EMPTY will appear in the display When TONER EMPTY appears printing will not be possible Replace the toner cartridge with the following cartridge SHAR...

Page 155: ...e toner cartridge handle to the left and then pull the toner cartridge out of the compartment Dispose of the old toner cartridge according to local regulations If in doubt contact your local waste disposal agency 5 Continue from Step 6 on page 22 to install the new toner cartridge ...

Page 156: ... in the display 2 Press 3 Press The number of pages printed will appear in the display 4 Press repeatedly to exit INFO START STOP Replacing the drum cartridge When 20 000 pages have been printed DRUM LIFE OVER will appear in the display Replace the drum cartridge with the following cartridge SHARP FO 25DR drum cartridge 1 Open the top cover of the machine Caution The fusing unit inside the print c...

Page 157: ...e and open the front cover 3 Open the side cover 4 Push the toner cartridge handle to the left and then pull the toner cartridge out of the compartment Place the toner cartridge on a sheet of paper on a level surface Do not touch the roller in the toner cartridge 2 1 ...

Page 158: ... other objects to contact the drum the green cylinder This may damage the drum If fingerprints dust or other contaminants get on the drum wipe it gently with a clean cloth Exposure to light for more than several minutes will damage the drum Be sure to insert the drum cartridge promptly into the machine If you find it necessary to leave the cartridge out of the machine for more than several minutes...

Page 159: ...cartridge and close the side cover inner cover and top cover Steps 7 and 8 on page 23 When the display shows TONER EXCHANGED 1 NEW 2 OLD press for OLD and then Steps 9 and 10 on pages 23 and 24 When finished reset the drum cartridge counter as explained on page 24 START ...

Page 160: ... the phone line Press to clear the LINE ERROR message and then try the transaction again If the error persists check the following Check the connection The cord from the TEL LINE socket to the wall socket should be no longer than two meters Make sure there are no modem devices sharing the same telephone line Check with the other party to make sure their fax machine is functioning properly Have you...

Page 161: ...t the telephone line is properly connected to both the TEL LINE socket and the wall socket see page 18 Make sure that the machine is set to the correct dialling mode for your telephone line See the procedure on page 139 and DIAL MODE on page 140 The power is on but no transmission takes place Make sure that the receiving machine has paper If the receiving machine is in manual mode with no attendan...

Page 162: ...mitting machine Make a copy or print a report to confirm the printing ability of your machine The received document is faint Ask the other party to resend the document using a higher contrast setting If other printed output is also faint the toner cartridge may need replacement see page 150 Received images are distorted Noise on the telephone line may cause distortion Have the other party try send...

Page 163: ...and or dark vertical lines appear Any dirt or material on the scanning glass will cause spots to appear on copies and transmitted faxes Clean the scanning glass as explained on page 146 The paper comes out blank when you make a copy Make sure the original is placed face down in the feeder The size of the printed document image does not match the size of the paper Make sure an appropriate enlarge r...

Page 164: ...int The toner cartridge may need replacement see page 150 Dots appear at regular intervals on printed output The drum cartridge may be damaged Replace the drum cartridge see page 152 Characters or parts of the image are missing from printed output Remove the drum cartridge as explained on page 152 and wipe the surface of the drum the green cylinder with a dry cotton swab If print quality does not ...

Page 165: ...ion is not possible because the SMTP server or the sender address has not been specified in the e mail settings see page 34 COVER OPEN The top front or side cover is open Make sure each cover is completely closed press down on the corners to make sure each cover is completely latched DOCUMENT JAMMED The original document is jammed See page 165 to clear the jam Document jams will occur if you load ...

Page 166: ... the problem so that printing can continue see Reception to Memory on page 73 If faxes are being held in memory because the Secure Fax function has been activated print the faxes as explained on page 88 If you are attempting to broadcast or transmit from memory see If the memory becomes full on page 115 If you are copying see If MEMORY FULL appears on page 113 OUT OF PAPER PRINT CANCELED Printing ...

Page 167: ...Scan to E mail transmission was not successful because the machine was unable to automatically obtain an IP address Restart your router or other device that acts as your DHCP server SERVER NOT FOUND SMTP A Scan to E mail transmission was not successful because an incorrect host name is entered for your SMTP server Check the SMTP server setting p 34 THERMISTOR ERROR If this message appears unplug t...

Page 168: ...ls 164 Audible signals Continuous tone 3 seconds Indicates the end of transmission reception or copying Intermittent tone 3 beeps 5 seconds 1 second on 1 second off Indicates incomplete transmission reception or copying ...

Page 169: ...t feed properly during transmission or copying or DOCUMENT JAMMED appears in the display first try pressing If the document doesn t feed out remove it as explained below START 1 Open the operation panel 2 Rotate the lever toward you and down and then pull the lever and right end of the roller up Remove the document 1 3 1 2 ...

Page 170: ...orrectly in its holder and then push the lever and right end of the roller down Rotate the lever back up and in pushing it slightly to the right so that it fits into position 4 Close the operation panel pressing down firmly on both sides to make sure it clicks into place 1 3 2 ...

Page 171: ...hine Caution The fusing unit inside the print compartment becomes very hot during operation Do not touch the inside of the print compartment after the machine has been in operation 2 Press the release and open the front cover 3 Push the two heater roller release levers down to release the heater roller 2 1 ...

Page 172: ...n the print compartment If this clears the jam go to Step 6 If you are unable to clear the jam in this way go to Step 5 Take care not to touch or allow other objects to contact the drum the green cylinder This may damage the drum 5 If the jammed page cannot be pulled out directly open the side cover and rotate the white knob in the direction shown to feed out the jammed paper ...

Page 173: ...Jams 169 12 Trouble shooting 6 After the jammed paper has been removed push the two heater roller release levers back up close the side cover if you opened it close the front cover and then close the top cover 4 3 1 2 ...

Page 174: ...nt guides 44 56 Document restrictions 56 Document maximum scanning size 55 Drum cartridge Installing 20 Replacing 152 Duplex Scan 121 E ECM mode Error Correction Mode 141 E mail message 45 E mail options 45 E mail settings 34 38 E mail subject 45 F Fax Duet Distinctive Ring 138 Fax Signal Receive 140 Fax to E mail Folder 122 File format 46 Fine Priority setting 139 G Global address book searching ...

Page 175: ...r e mail 45 Receive Fax to E mail List 143 Receive Ratio setting 142 Reception mode AUTO 29 71 MANUAL 29 72 Redialling 69 Redialling automatic 69 Resolution 58 Ringer volume 30 S Scan to Folder 50 Scan to FTP 50 Scanning glass cleaning 146 Searching for stored e mail address 45 Secure Fax 87 Send Hold function 103 Sender s name and number entering 26 Setup List 143 Sort Copy 142 Speaker volume 29 ...

Page 176: ......

Page 177: ...e To ensure continued safety do not remove any cover or attempt to gain access to the inside of the product Refer all servicing to qualified personnel OUTPUT POWER 0 15 mW 0 01mW LASER WAVE LENGTH 770 795 nm PULSE TIMES 12 00 µs 7 mm This product complies with IEC60825 1 2001 ...

Page 178: ...SHARP CORPORATION OF AUSTRALIA PTY LTD A C N 003 039 405 1 Huntingwood Drive Huntingwood Blacktown N S W 2148 SHARP CORPORATION Version 1 0 ...

Reviews: