The Sapling Company, Inc.
1633 Republic Road
Huntingdon Valley, PA 19006
USA
+1 215.322.6063 P.
+1 215.322.8498 F.
www.sapling-inc.com
34
34
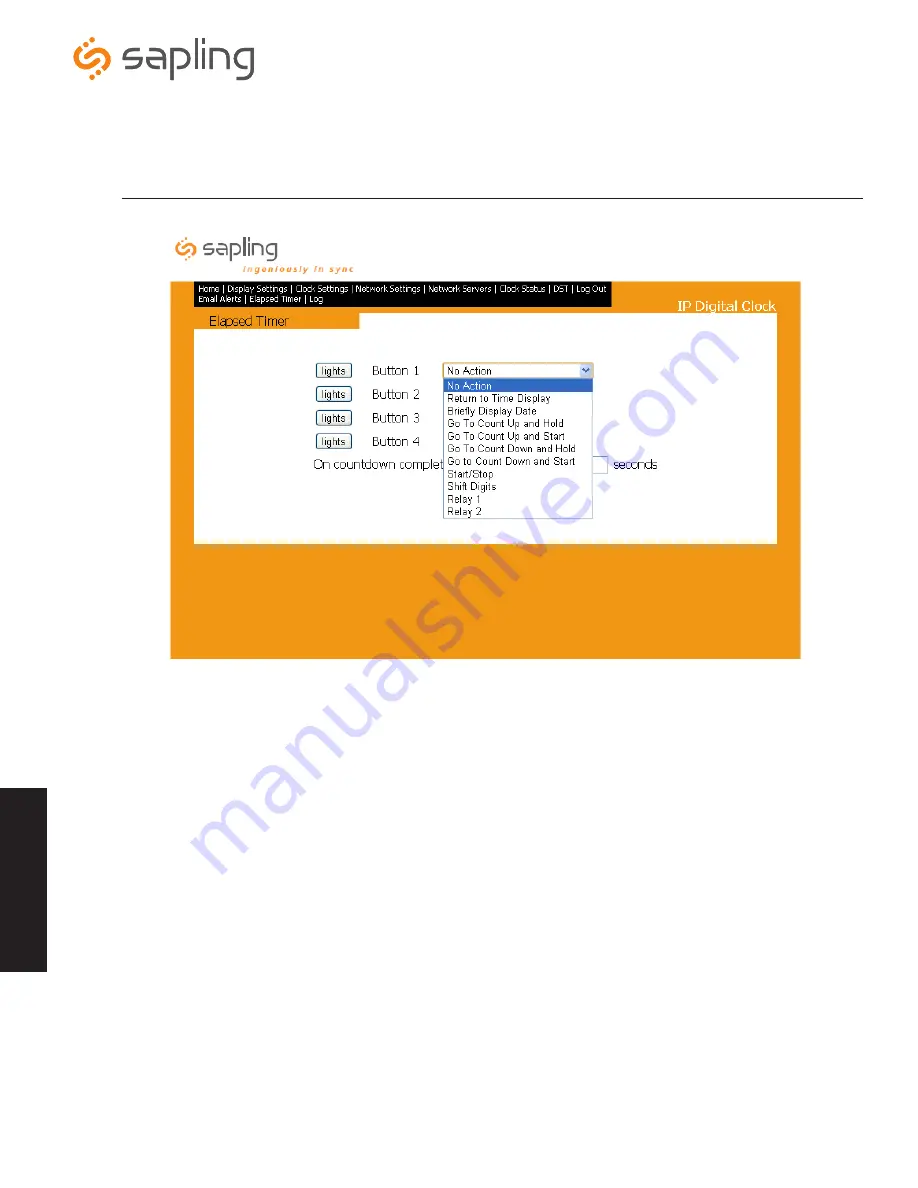
Web Interface - Configuring the Elapsed Timer Buttons (3200/3300 Versions Only)
*The Elapsed Timer tab will only appear on the task bar when the Elapsed Timer is plugged
into the back of the IP digital clock.
1.
No Action
- Pressing this button will perform no functions on the IP clock.
2.
Return to Time Display
- Pressing this button will cause the IP clock to return to its previously displayed time.
3.
Briefly Display Date
- Pressing this button will cause the IP clock to briefly show a date display.
4.
Go to Count Up and Hold
- Pressing this button will cause the IP clock to display and hold at zero.
5.
Go to Count Up and Start
- Pressing this button will cause the IP clock to switch from its current display and begin the
counting up process beginning from zero.
6.
Go to Count Down and Hold
- Pressing this button will cause the IP clock to display and hold at zero.
7.
Go to Count Down and Start
- Pressing this button will cause the IP clock to begin counting down from a time specified by the
user and will switch from its current display and begin displaying the count down process.
8.
Start/Stop
- Pressing this button will cause the timer to start or stop its counting functions.
9.
Shift Digits
- Pressing this button will cause the digits to shift displays from an Hour/Minutes display to a Minutes/Seconds display
(4 digit IP clocks only).
10.
Relay 1
- Pressing this button will cause the relay to open and receive the time protocol from the network (Sync-Wire only).
11.
Relay 2
- Pressing this button will cause the relay to open and receive the 2nd time protocol from the network (Sync-Wire only).
*For more information about the Elapsed Timer and its programming functions, please see the Elapsed Timer manual.
W
eb
In
ter
fac
e


