The Sapling Company, Inc.
1633 Republic Road
Huntingdon Valley, PA 19006
USA
+1 215.322.6063 P.
+1 215.322.8498 F.
www.sapling-inc.com
16
16
1.
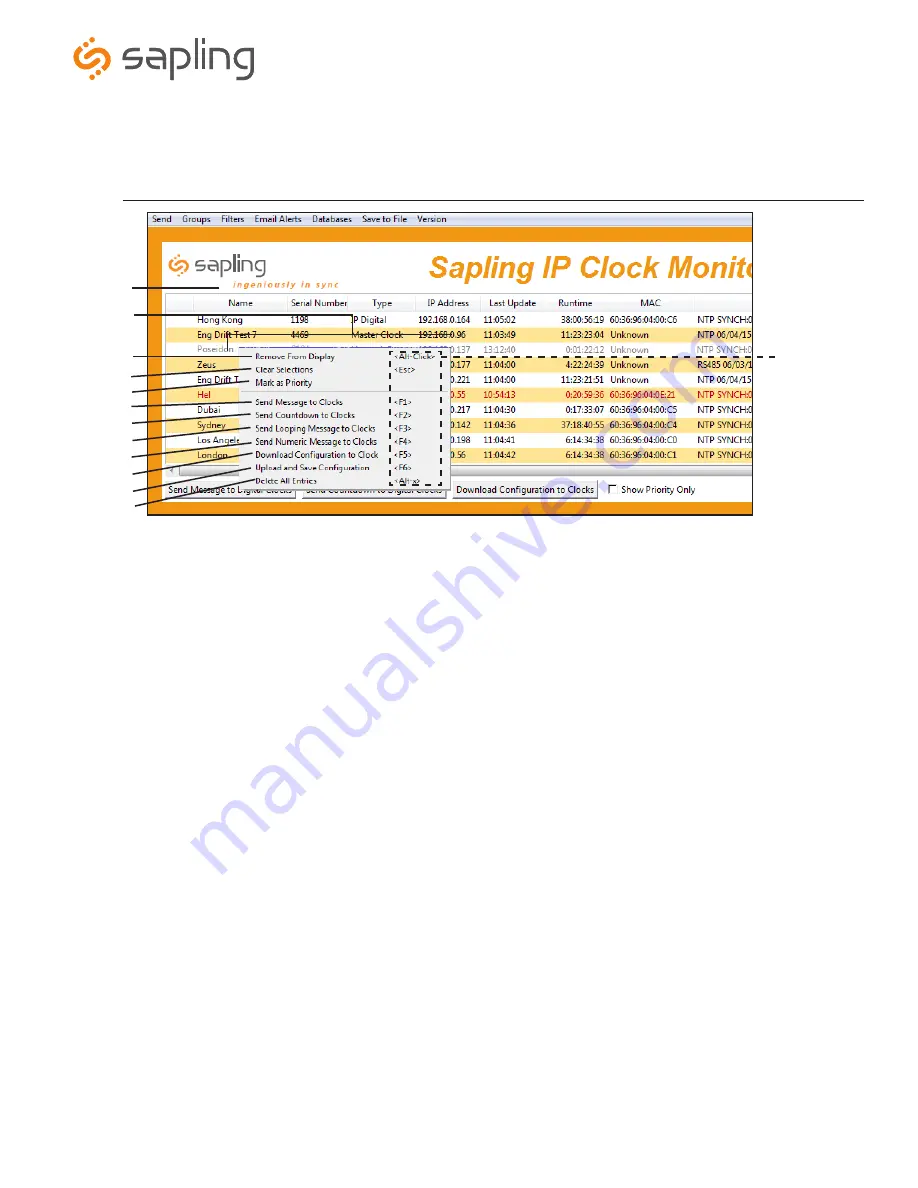
Monitor Screen
- Displays all the clocks that are active in the system. The monitor screen displays the name of the clock, serial
number, type of clock, IP address, last updated time, how long the clock has been running, and the status of the clock.
2.
Quick Access Menu
- To access this menu, click the right mouse button while your cursor is on the selected clock. A list of options
are shown and explained below.
3.
Remove from Display
- When clicked, this option will remove the selected clock from the Monitor screen.
4.
Clear Selections
- This option will deselect any highlighted items on the Monitor Screen.
5.
Mark as Priority -
Marking a clock(s) as priority is another filtering option for a user to segment the clocks. Once a clock is marked
as priority, there will be an asterisk (*) next to the chosen clock. See option 15 on page 17 for directions on how to filter the priority
clocks on the monitor screen.
6.
Send Message to Clocks
- This option is not available with IP analog clocks.
7.
Send Countdown to Clocks
- This option is not available with IP analog clocks.
8.
Send Looping Message to Clocks
- This option is not available with IP analog clocks.
9.
Send Numeric Message to Clocks
- This option is not available with IP analog clocks.
10.
Download Configuration to Clock
- By selecting this option, the user can load an IP clock’s setting from a PC to another IP clock.
11.
Upload and Save Configuration
- By selecting this option, the user can upload the settings from an IP clock and save them to a PC.
12.
Delete All Entries
- By selecting this option, the user can remove all clocks from the monitor screen.
*Before starting, copy the IPMONITOR Application from the CD provided to a computer that is connected to
the same network as the IP clocks, then load the program.
Sapling IP Clock Monitor Software
e
r
t
y
u
i
o
a
s
q
w
d
Please note: These
options can also be
accessed by using the
keyboard shortcuts
noted in the Quick
Access Menu


