The Sapling Company, Inc.
1633 Republic Road
Huntingdon Valley, PA 19006
USA
+1 215.322.6063 P.
+1 215.322.8498 F.
www.sapling-inc.com
24
24
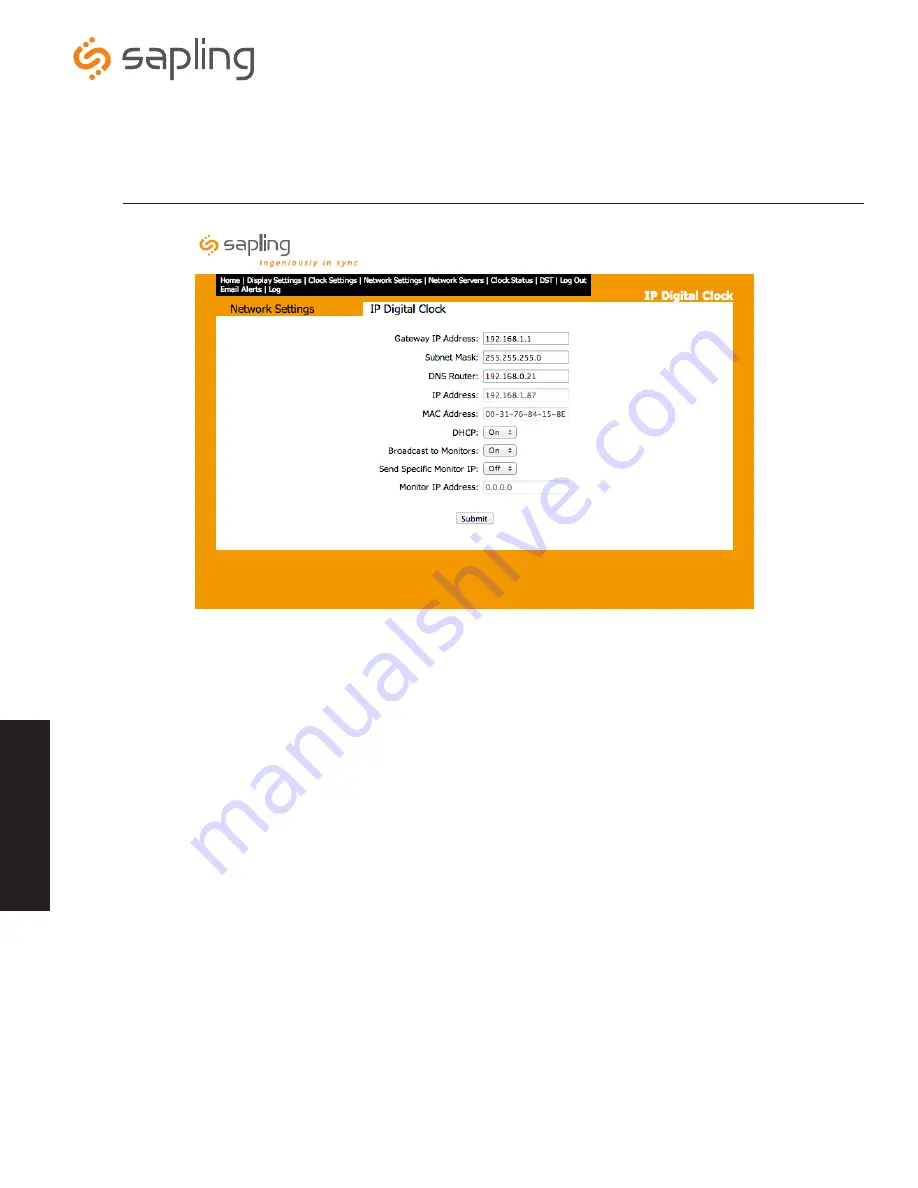
1.
Gateway IP Address
- This field allows for the gateway IP address to be set.
2.
Subnet Mask
- This field allows for the subnet mask to be set.
3.
DNS Router
- This field allows for the DNS router address to be set.
4.
IP Address
- This field will display the IP address that was given by the DHCP server. If DHCP is disabled, then the user will be able to set
a static IP address. *See note below.
5.
MAC Address
- This read only option is the clock’s physical address.
6.
DHCP
- This setting allows the user to choose whether the clock is on a DHCP server or not.
7.
Broadcast to Monitors
-This setting allows the clock to send out its data in broadcast mode.
8.
Send Specific Monitor IP
- This setting allows the user to send the IP clock’s status to a computer on a sub-net outside of the normal
network.
9.
Monitor IP Address -
This is where the user will type in the IP address of the specific sub-network in which the clock's status will be sent
to outside of the normal network if option 8 is enabled.
10.
Submit
- This button, when pressed, saves all of the settings that were changed.
*Static IP
- If using a static IP, the IP address will be defaulted to 192.168.0.123. Go to a web browser and type in 192.168.0.123 to load the
web interface. Turn off DHCP enter the new IP address and click submit. Then power down the IP Clock, remove the jumper, and reboot the
Network Repeater. To access the web interface, type in the new IP address in the web browser.
Web Interface - Network Settings
W
eb
In
ter
fac
e
q
w
e
r
t
u
i
o
a
y


