Cause and Solution
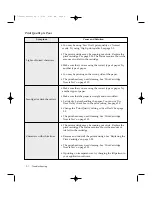
¥ The media is incorrectly loaded or is an unsupported size
or type. See page 2.7. For special media, it is recommended
to load at manual tray to feed one sheet at a time. See page
2.9.
¥ Make sure that you do not have hard-coded spaces at the
left margin in your application.
¥ The print head may need cleaning. See ÔPrint Cartridge
Nozzle TestÕ on page 3.15.
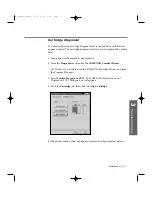
¥ The print cartridge may be misaligned. See ÔAligning Print
CartridgeÕ on page 3.19.
¥ The print head may need cleaning. See ÔPrint Cartridge
Nozzle TestÕ on page 3.15.
¥ The print cartridge may be misaligned. See ÔAligning Print
CartridgeÕ on page 3.19.
¥ Try changing the fill pattern in your application software.
¥ The colour print cartridge has run out of one or more inks.
Install a new colour cartridge. See page 3.20.
¥ The print head may need cleaning. See ÔPrint Cartridge
Nozzle TestÕ on page 3.15.
¥ The print settings may be incorrect. Check ÔDocument TypeÕ
setting in the SmartJet Document/Quality dialogue box. See
page 2.5.
¥ The black print cartridge may be installed. Replace with a
colour cartridge. See page 3.20.
¥ Make sure that you are using the correct type of paper. Try
another type of paper.
¥ Make sure that the ÔPaper TypeÕ setting is appropriate for
the paper you loaded. See page 2.5.
¥ Change the ÔPrint QualityÕ setting to ÔHighÕ or ÔNormal.Õ
See page 2.5.
¥ You may reduce the image size before printing it using your
application. Refer to your application manual.
Symptom
Improperly formed or
characters do not align
correctly at left margin.
Vertical straight lines are not
smooth in tables, borders,
and graphs.
Solid black areas on
transparencies contain white
streaks.
Printed colour does not
match screen colours.
Black and white is printing
instead of colour.
Colour print quality is poor.
You receive a message that
says the photograph will
overflow the print area.
3
.5
Troubleshooting
3
T
roubleshooting
07-Troubleshooting 2/5/99 9:42 AM Page 5
Summary of Contents for SF-4300
Page 7: ...1 1 Getting Started 1 02 Setup 2 5 99 10 31 AM Page 1 ...
Page 30: ...1 24 Installing Smart Soft Memo 03 Install 2 5 99 10 28 AM Page 12 ...
Page 31: ...2 1 Operation 2 04 Print 2 5 99 10 05 AM Page 1 ...
Page 77: ...3 1 Troubleshooting 3 07 Troubleshooting 2 5 99 9 42 AM Page 1 ...
Page 100: ...3 24 Maintenance Memo 08 Maintenance 2 5 99 9 37 AM Page 10 ...
Page 101: ...4 1 Appendix 09 Appendix 2 5 99 9 33 AM Page 1 ...


