This example shows a test pattern of all nozzles functioning correctly on
a
black print cartridge
.
5. The printer feeds a sheet of paper and prints the nozzle test pattern.
6. Examine the test pattern. This example shows a test pattern of all nozzles
functioning correctly on the
color print cartridge
.
Compare the diagonal line at the top and bottom of the test pattern. Look
for a break in the diagonal line. A broken line shows any clogged nozzles.
If the bottom line shows improvement, rerun this test. If improvement
continues, rerun the test. If all nozzles are not printing after running the
test three times, continue with step 7.
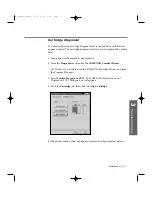
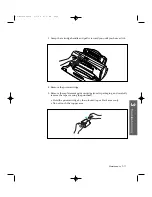
7. If print quality does not improve, remove and reinstall the print
cartridge. Repeat the nozzle test.
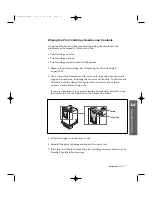
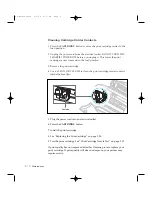
8. If the line is still broken, wipe the nozzles and contacts. See ÒWiping the
Print Cartridge Nozzles and ContactsÓ.
Before purge
After purge
Purge process
Before purge
After purge
Purge process
3
.16
Maintenance
08-Maintenance 2/5/99 9:37 AM Page 2
Summary of Contents for SF-4300
Page 7: ...1 1 Getting Started 1 02 Setup 2 5 99 10 31 AM Page 1 ...
Page 30: ...1 24 Installing Smart Soft Memo 03 Install 2 5 99 10 28 AM Page 12 ...
Page 31: ...2 1 Operation 2 04 Print 2 5 99 10 05 AM Page 1 ...
Page 77: ...3 1 Troubleshooting 3 07 Troubleshooting 2 5 99 9 42 AM Page 1 ...
Page 100: ...3 24 Maintenance Memo 08 Maintenance 2 5 99 9 37 AM Page 10 ...
Page 101: ...4 1 Appendix 09 Appendix 2 5 99 9 33 AM Page 1 ...

